Connect-Tek Over IP
29
▓
Chapter 4 File Transfer
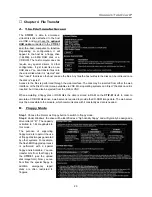
A. The File Transfer Screen
The
CTIP-01
is able to emulate a
virtual disk drive attached to the host
via USB, and must have the
optional
USB cable
connected to the
CTIP-01
and the host computer to function.
Depending on configuration, it will
appear to the host as a floppy drive
(1.44MB), an 8MB RAM disk or a
CD-ROM. The host computer does not
require any special drivers or other
configuration. It just looks like a new
USB drive. You can transfer files onto
the virtual disk while it is “ejected” and
then “insert” the disk so the host can see the files. Any files the host writes to the disk can be retrieved once
the disk is “ejected”.
Access to the files is performed through the web interface. The disk may be inserted from either the web
interface, or the Disk Control menu available via VNC. Most operating systems can “Eject” the disk once it is
inserted, but it can also be ejected from the Web or VNC.
When emulating a floppy disk or RAM disk, the data is stored in RAM on the
CTIP-01
itself. In order to
emulate a CD-ROM disk drive, a web server is required to provide the CD-ROM image data. The web server
must be accessible to the module, which communicates with it constantly as data is needed.
B. Floppy Mode
Step 1
. Choose the Format as Floppy button to switch to floppy mode.
Step 2
. Under Windows, the drive will be identified as a “high density floppy” and will typically be assigned a
drive letter of “B:”. The capacity
is limited to 1.44 megabytes in
this mode.
The purpose of supporting
floppy mode is to permit the use
of floppy-disk images generated
by other systems. For example,
the flash BIOS upgrade process
is performed with a special
floppy and is bootable. You can
transfer bits from that floppy to
the
CTIP-01
(use the upload
disk image form). Now, you can
boot from the special floppy. In
addition, emergency repair
disks are often restricted to
floppies.

