


8
Chapter 2 Installation
2.1 Hardware Installation
Follow the instructions below to complete the hardware installation.
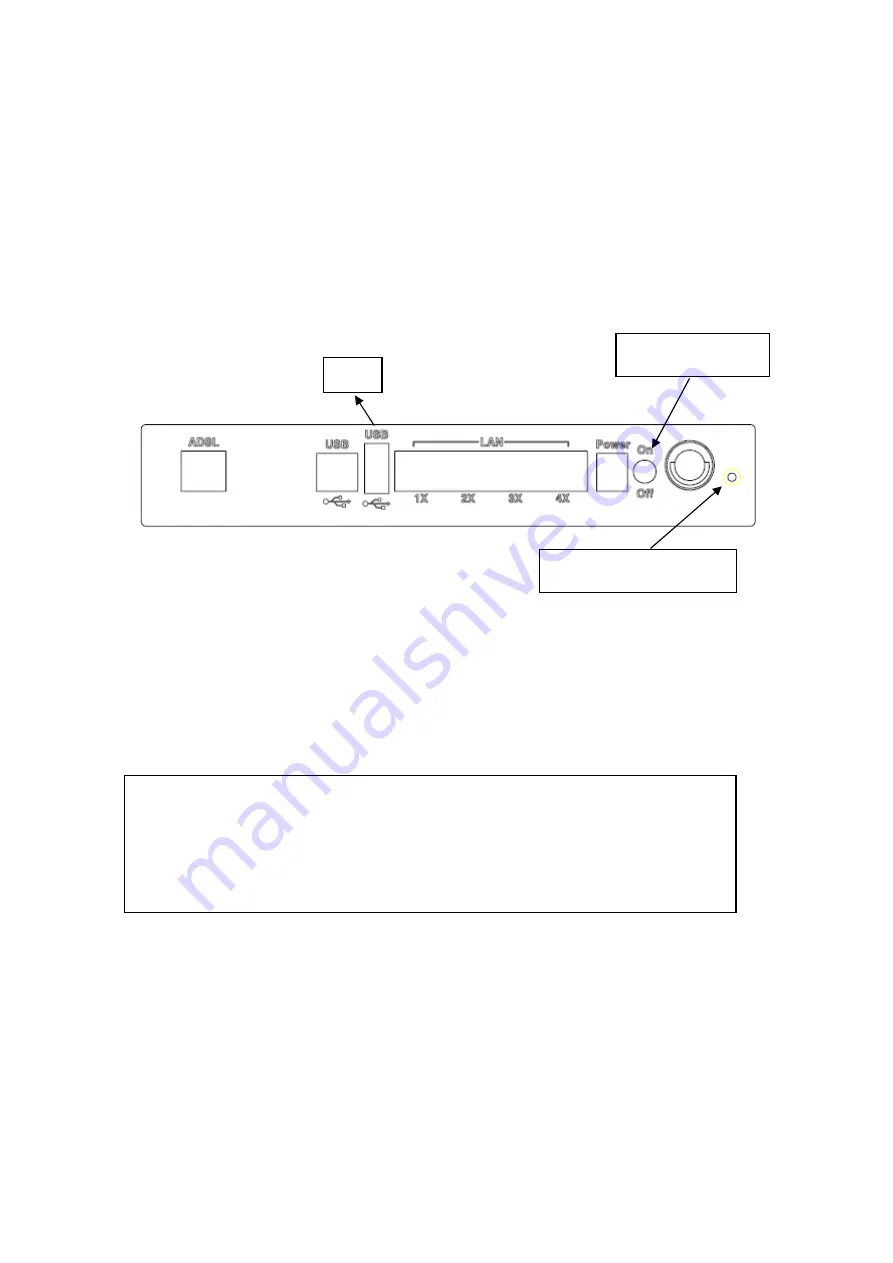
A diagram of the back panel of the router is shown below for reference.
Connection to Power
Connect the
power jack to the shipped power cord. Attach the power adapter to
the wall outlet or other AC source. After all connections have been made, press the
power button to turn on the device. After powering on, the router will perform a
self-test. Wait a few moments and the device will be ready to operate.
Caution 1:
If the device fails to power up, or if it malfunctions, first verify that
the power supply is connected correctly. Then power it on again.
If the problem persists, contact technical support.
Caution 2:
Before servicing or disassembling this equipment always disconnect
all power cords and telephone lines from the wall outlet.
Reset Button
In the rear panel, there is a reset button. To load the factory default settings, hold
the reset button down for 5 to 10 seconds.
Connection to USB port
Connect the USB port to a PC with a standard USB cable.
Reset button
Power button
Host
Содержание NexusLink 5631
Страница 1: ...NexusLink 5631 Wireless ADSL2 Bonded Router User Manual Version C1 3 February 19 2008 261076 005...
Страница 7: ...6 1 2 Application This diagram depicts the application of the NexusLink 5631 on a wireless network...
Страница 17: ...16 STEP 6 When the window displays as below click the NEXT button and wait...
Страница 18: ...17 STEP 7 Click the Finish button when the window displays as below STEP 8 Installation is complete...
Страница 52: ...51 5 3 Route 5 4 ARP...
Страница 53: ...52 5 5 DHCP...
Страница 101: ...100 If router mode is PPPoE the following screen will be displayed for your reference...
Страница 118: ...117 Step 6 Click Have Disk and insert the printer driver CD Step 7 Select driver file directory on CD ROM and click OK...
Страница 119: ...118 Step 8 Once the printer name appears click OK Step 9 Choose Yes or No for default printer setting and click Next...


