


18
Chapter 3 Web User Interface
This section describes how to manage the router via a web browser. The web page
is best viewed with Microsoft Internet Explorer 5.0 and later. A unique default user
account is assigned with user name
root
and password
12345
. The user can
change the default password later when logged in to the device.
3.1 TCP/IP Settings
The default IP address of the router (LAN port) is 192.168.1.1. To configure the
router for the first time, the configuration PC must have a static IP address within
the 192.168.1.x subnet. Follow the steps below to configure your PC IP address to
use subnet 192.168.1.x.
STEP 1:
Right click on the Local Area Connection under the Network and Dial-Up
connection window and select
Properties
.
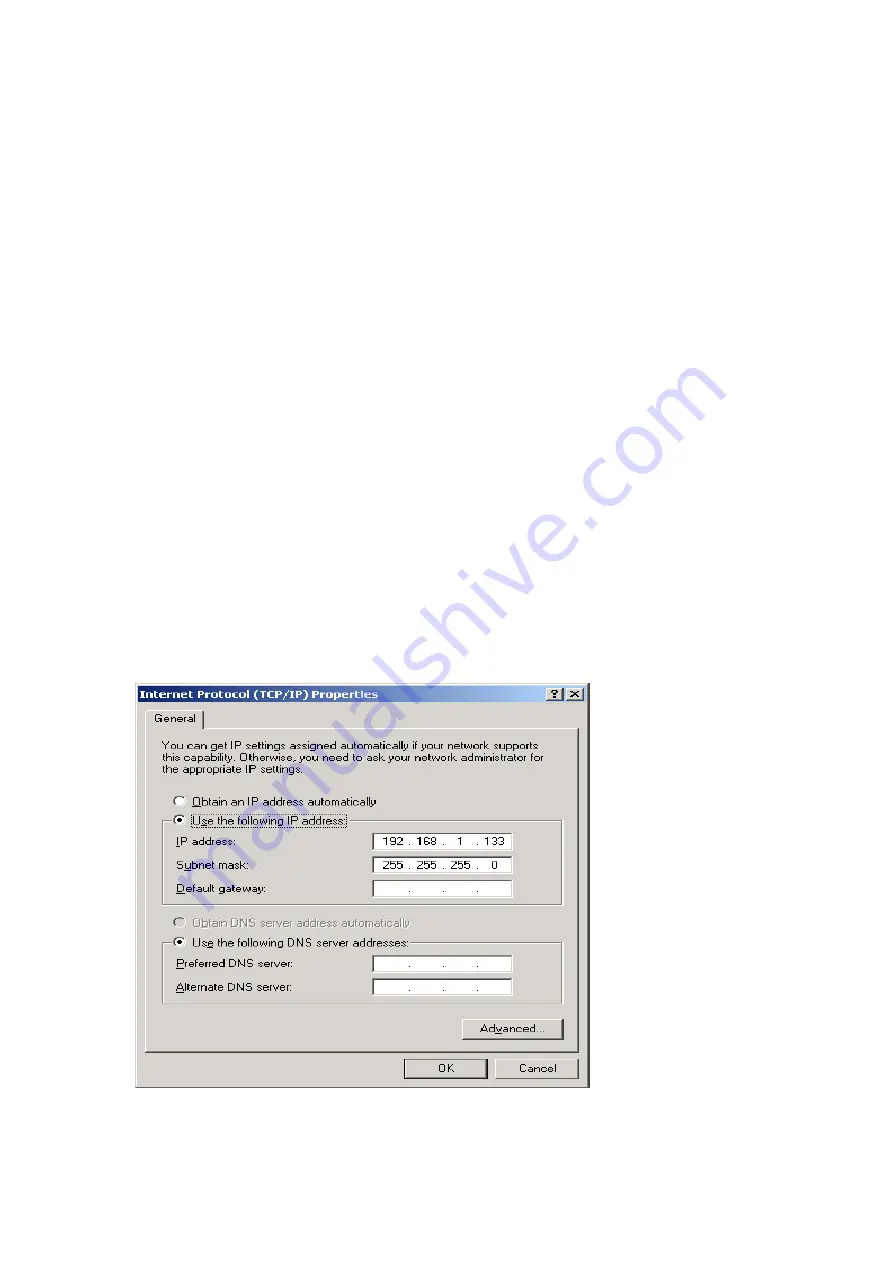
STEP 2:
Enter the TCP/IP window and change the IP address to
192.168.1.x/24
.
STEP 3:
Click OK to submit settings.
Содержание NexusLink 5631
Страница 1: ...NexusLink 5631 Wireless ADSL2 Bonded Router User Manual Version C1 3 February 19 2008 261076 005...
Страница 7: ...6 1 2 Application This diagram depicts the application of the NexusLink 5631 on a wireless network...
Страница 17: ...16 STEP 6 When the window displays as below click the NEXT button and wait...
Страница 18: ...17 STEP 7 Click the Finish button when the window displays as below STEP 8 Installation is complete...
Страница 52: ...51 5 3 Route 5 4 ARP...
Страница 53: ...52 5 5 DHCP...
Страница 101: ...100 If router mode is PPPoE the following screen will be displayed for your reference...
Страница 118: ...117 Step 6 Click Have Disk and insert the printer driver CD Step 7 Select driver file directory on CD ROM and click OK...
Страница 119: ...118 Step 8 Once the printer name appears click OK Step 9 Choose Yes or No for default printer setting and click Next...


