


105
Step 2:
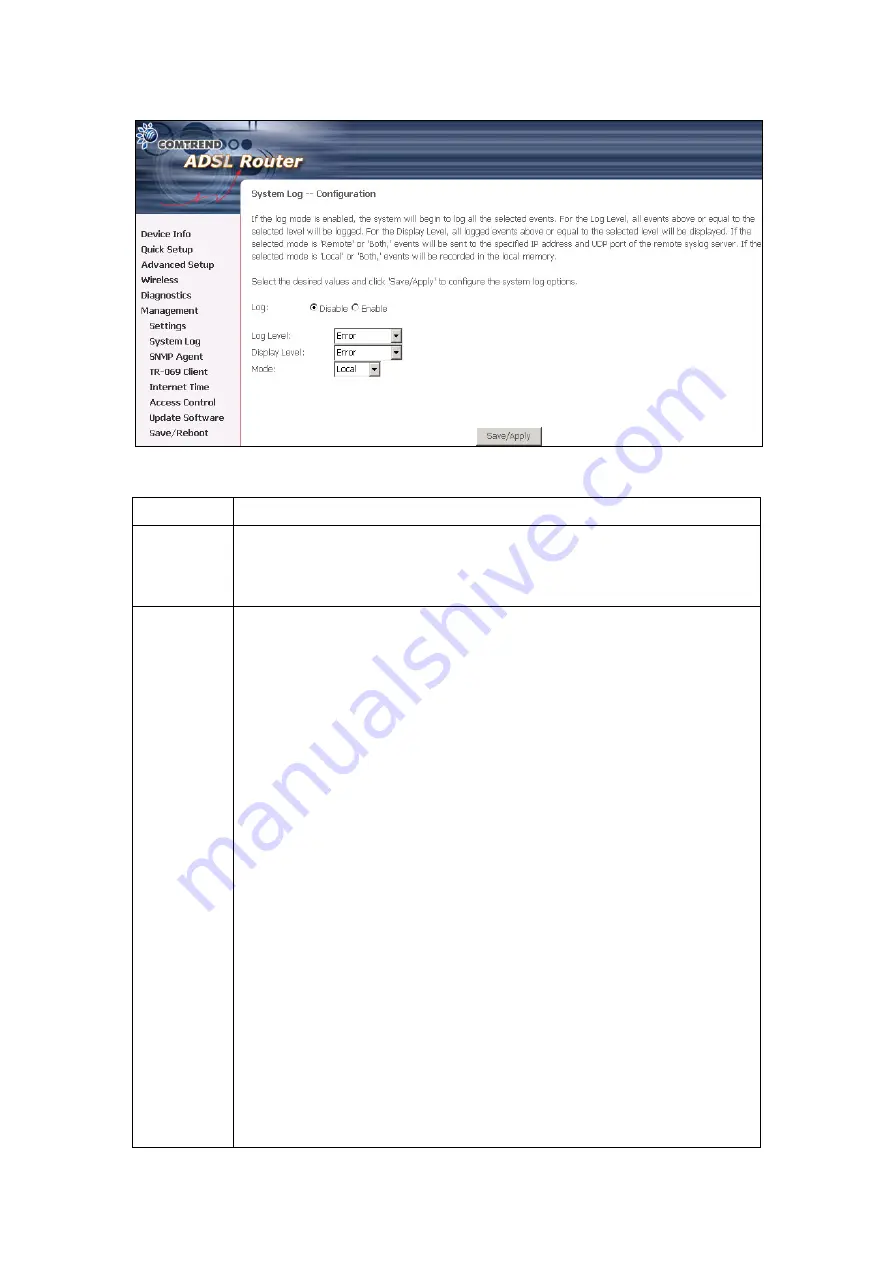
Select desired log options (described below) and click
Save/Apply
.
Option Description
Log
Indicates whether the system is currently recording events. The user
can enable or disable event logging. By default, it is disabled. To
enable it, tick Enable and then Apply button.
Log level
Allows you to configure the event level and filter out unwanted events
below this level. The events ranging from the highest critical level
“Emergency” down to this configured level will be recorded to the log
buffer on the device SDRAM. When the log buffer is full, the newer
event will wrap up to the top of the log buffer and overwrite the old
event. By default, the log level is “Debugging,” which is the lowest
critical level. The following log levels are
•
Emergency = system is unusable
•
Alert = action must be taken immediately
•
Critical = critical conditions
•
Error = Error conditions
•
Warning = normal but significant condition
•
Notice= normal but insignificant condition
•
Informational= provides information for reference
•
Debugging = debug-level messages
Emergency is the most serious event level, whereas Debugging is the
least important. For instance, if the log level is set to Debugging, all
the events from the lowest Debugging level to the most critical level
Emergency level will be recorded. If the log level is set to Error, only
Error and the level above will be logged.
Содержание NexusLink 5631
Страница 1: ...NexusLink 5631 Wireless ADSL2 Bonded Router User Manual Version C1 3 February 19 2008 261076 005...
Страница 7: ...6 1 2 Application This diagram depicts the application of the NexusLink 5631 on a wireless network...
Страница 17: ...16 STEP 6 When the window displays as below click the NEXT button and wait...
Страница 18: ...17 STEP 7 Click the Finish button when the window displays as below STEP 8 Installation is complete...
Страница 52: ...51 5 3 Route 5 4 ARP...
Страница 53: ...52 5 5 DHCP...
Страница 101: ...100 If router mode is PPPoE the following screen will be displayed for your reference...
Страница 118: ...117 Step 6 Click Have Disk and insert the printer driver CD Step 7 Select driver file directory on CD ROM and click OK...
Страница 119: ...118 Step 8 Once the printer name appears click OK Step 9 Choose Yes or No for default printer setting and click Next...


