


5-86
Removal and Replacement Procedures
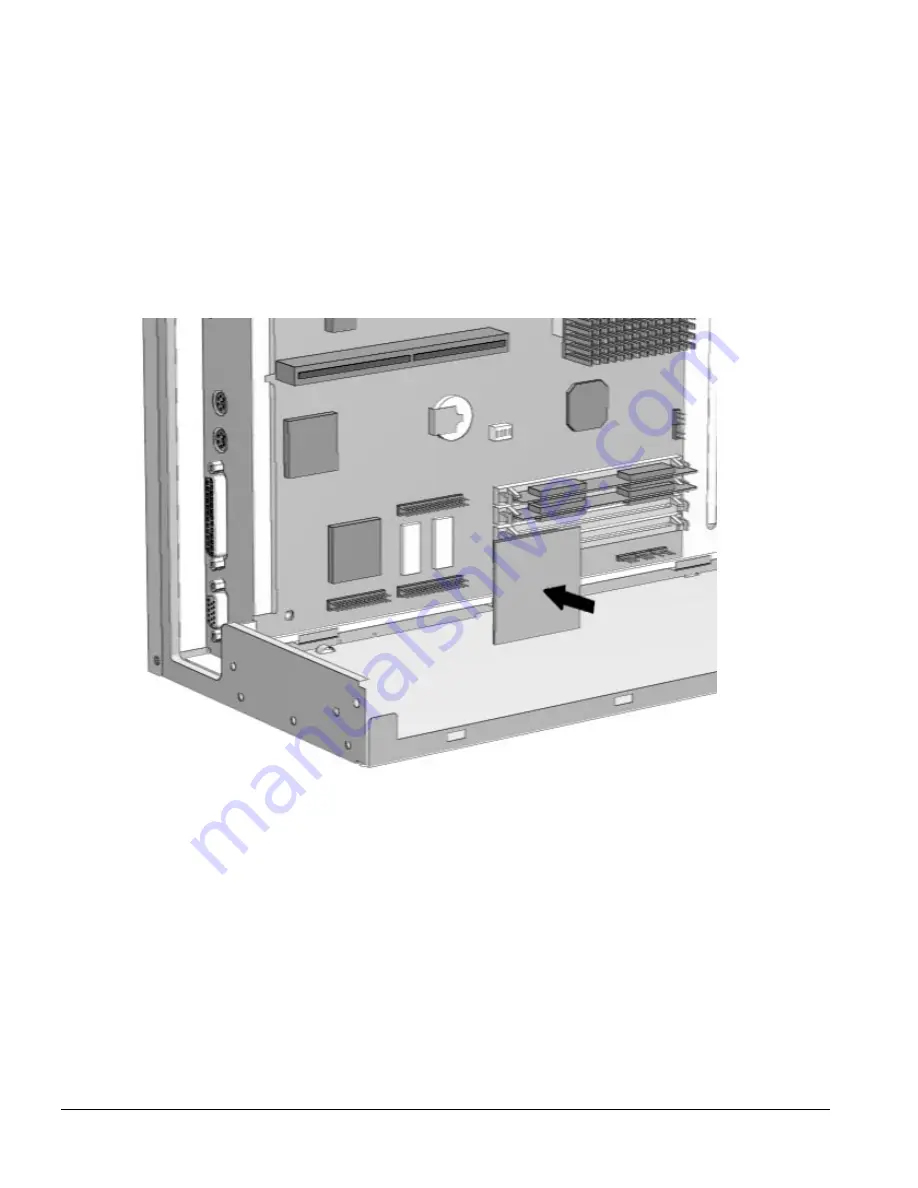
5.2.13.4 PCI Performance Graphics Controller Memory Module Upgrade
To install a graphics memory module upgrade for the Cirrus Logic Performance graphics controller
that is preinstalled in the system board, complete the following steps:
1. Perform preparation procedures described in Section 5.2.3.
2. Remove the access panel (Section 5.2.6.1).
3. Remove the riser brace (Section 5.2.7).
4. Install the graphics upgrade module onto the system board.
Figure 5-78.
Installing a 1-MB EDO DRAM Module onto the System Board
5. Replace the riser board.
6. Replace the access panel.
7. Turn the computer on and start the Windows program.
8. Select the Display icon in the Compaq Utilities group box in Windows NT 3.51 or Windows 3.1, or
the Display icon in Windows 95, to take advantage of the additional display modes now available
with the upgraded memory. Follow the instructions on the screen.
9. Test the system (optional) using the Computer Checkup (TEST) utility. Refer to Chapter 2,
“Troubleshooting.”
Содержание Deskpro 2000 Series
Страница 1: ...MAINTENANCE SERVICE GUIDE COMPAQ DESKPRO 2000 SERIES OF PERSONAL COMPUTERS...
Страница 2: ...243064 001 243211 001...
Страница 4: ...CPS...
Страница 30: ...1 18 Product Description 1 5 1 Front Panel Lights and Controls Figure 1 5 Power Switch and Front Panel Lights...
Страница 32: ...1 20 Product Description Figure 1 6 Drive Positions on the Minitower Computer...
Страница 34: ...1 22 Product Description Figure 1 7 Rear Panel Connectors...
Страница 82: ...3 2 Illustrated Parts Catalog 3 1 System Unit Figure 3 2 System Unit Desktop...
Страница 84: ...3 4 Illustrated Parts Catalog Figure 3 3 System Unit Minitower...
Страница 86: ...3 6 Illustrated Parts Catalog 3 2 Mass Storage Devices Figure 3 4 Mass Storage Devices...
Страница 88: ...3 8 Illustrated Parts Catalog 3 3 Cables Figure 3 5 Cables...
Страница 90: ...3 10 Illustrated Parts Catalog 3 4 Standard and Optional Boards Figure 3 6 Standard and Optional Boards...
Страница 96: ...3 16 Illustrated Parts Catalog 3 6 Monitors Figure 3 9 Monitors...


