


25 Colortrac SmartLF Gx+ Range Installation and Operating Manual
PAS176 P/N: P005530 Colortrac Ltd © 2010
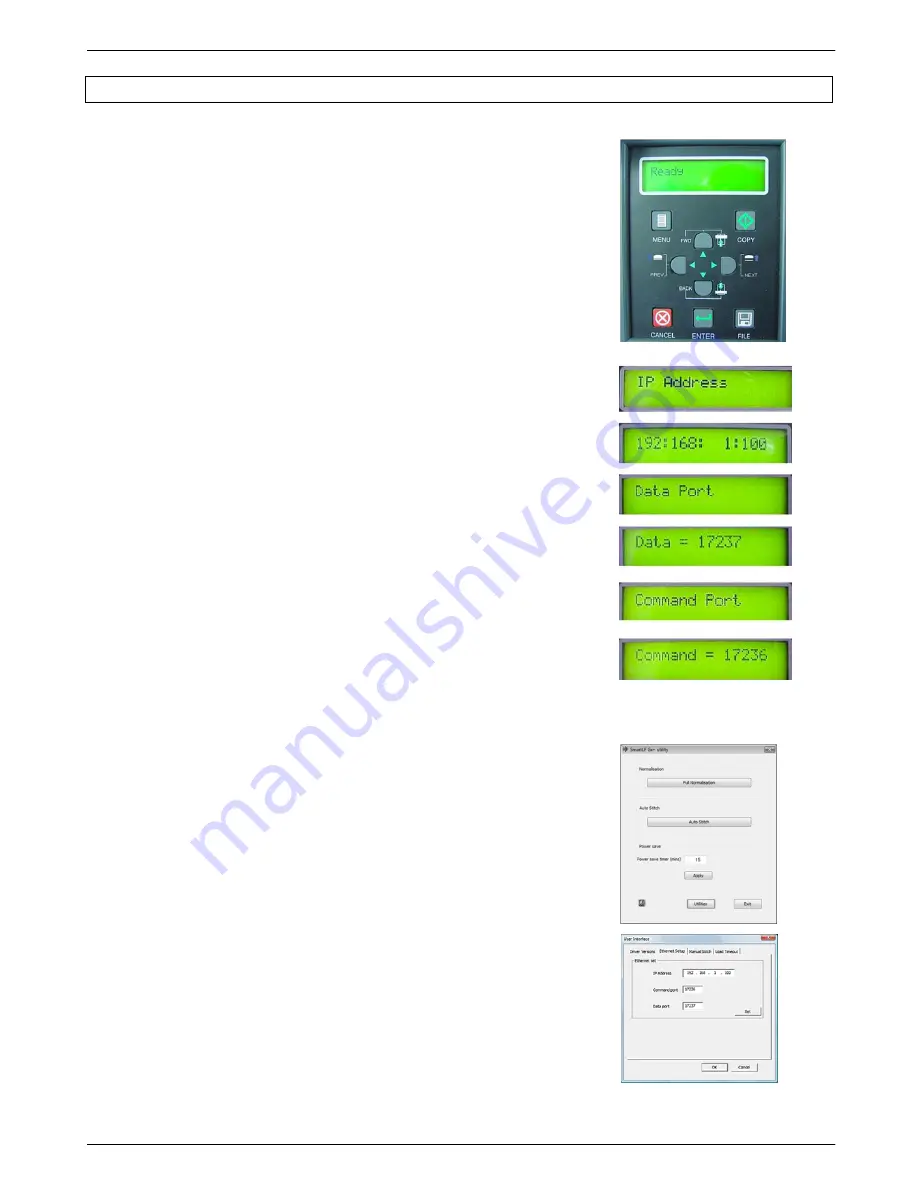
5.3 Setting the scanner IP address
To set IP address of the scanner from the LCD control panel
(Refer to menu tree section 3.4)
You may need to consult your IT administrator for an available IP address for the scanner. You
can check if the address is currently unused by checking for a failed ping return using ping IP
address <ENTER> from the DOS prompt on the computer network you intend to use
1. Press MENU
2. Press FWD or up arrow to navigate to IP address
3. Press ENTER to display the current address
4. Press FWD and BACK to adjust the first byte of the address
5. Press NEXT and PREV to move to other bytes
6. Press FWD and BACK to adjust. Press ENTER to save
7. Press MENU. Press FWD or up arrow to navigate to Data Port
8. Press FWD and BACK to adjust the value. Press ENTER to save
9. Press MENU. Press FWD or up arrow to navigate to Command Port
10. Press FWD and BACK to adjust the value. Press ENTER to save
To set IP address of scanner using Gx+ Utilities
(software)
1. Connect the USB cable (do not connect the Ethernet at this stage).
Start Gx+ Utilities and click the Utilities button. Select the Ethernet
tab. Wake the scanner if necessary by pressing the Cancel button.
2. Enter the IP address
3. Enter the Command Port (default is 17236)
4. Enter the Data Port (default is 17237)
5. Click OK


