


iGate2.0 User Manual
C r e a t e d : D e c e m b e r 3 , 2 0 2 1
c l i m a t e m a s t e r.c o m
9
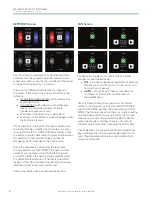
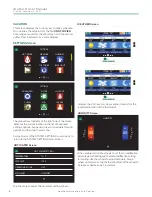
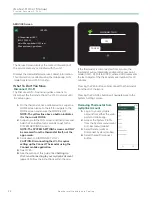
BANNER Screen
BANNER
DATE &
TIME
FAN
STATUS
OUTDOOR
TEMP
COOL
SETPOINT
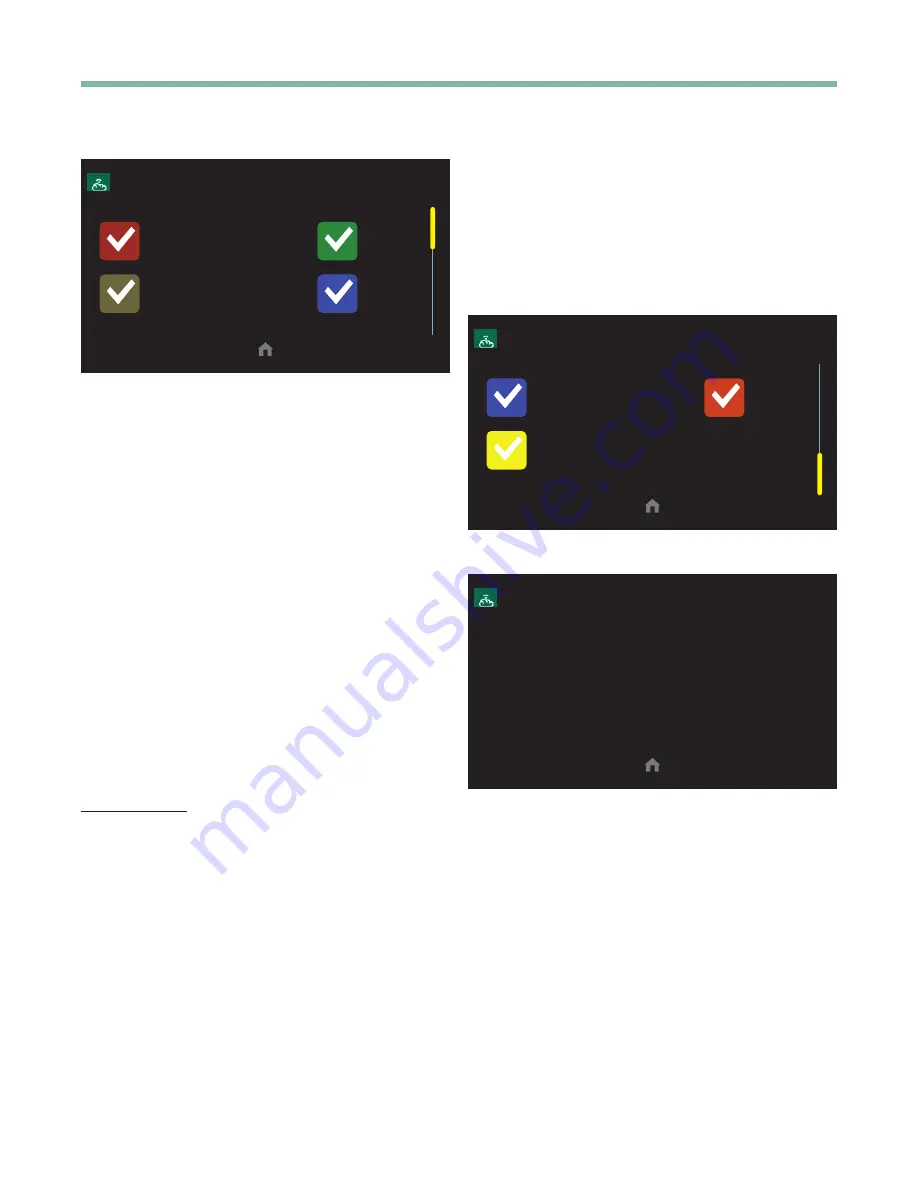
The Banner Screen allows the user to choose which
options are in the list that scrolls through the banner
location . Use the Yellow Scroll Bar on the right to access
more options .
Press the center of the scrolling Banner to switch to the
screen indicated by the text. You can swipe the banner
to change options, or, every 3 seconds a different screen
name scrolls across the top that you can navigate to.
On the thermostat itself, you can select which screens
you want on the Banner by pressing the buttons to
check the ones you want and then uncheck the ones
you do not want .
The default screens are:
• DATE & TIME
• FAN STATUS
• OUTDOOR TEMP
• COOL SETPOINT
• HUMIDITY
• HEAT SETPOINT
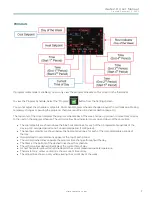
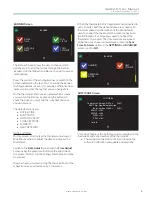
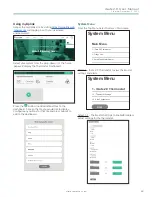
DATE and TIME
On this screen, scroll or tap the Orange Hour wheel or
Blue Minute wheel to adjust the date and time on the
thermostat .
Switch to the
Date Adjust
screen and the
Time Adjust
screen using the green icon button at the right side of
the screen. Scroll or tap the Orange Month wheel or Blue
Day wheel .
Drag a wheel up or down or tap the top or bottom of the
wheel to increase or decrease by 1 increment .
When the thermostat is first registered and connected to
a Wi-Fi router, both the date and time are synced with
the server (based on the location of the phone/tablet
used to connect the thermostat to a router or based on
the ISP location if a computer is used to connect the
thermostat to a router) . The time and date are synced
at the top of each hour automatically, unless the
Sync
Time To Server
option in the
SETTINGS > ADVANCED
screen is set to
NO
.
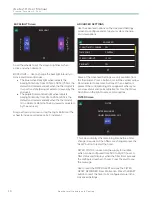
BANNER
HUMIDITY
HEAT
SETPOINT
OPERATING
MODE
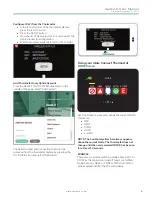
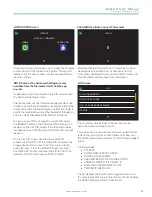
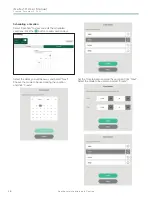
SOFTWARE Screen
SOFTWARE
Thermostat: Version 01.00nz
(CLM)
Wi-Fi Chip: Non-Release Version
Boot: Version 01.00bt
(CLM)
EXM U1: v2.08
EXM U2: v2.08
WXM: v1.01
ZXM: v1.03
Serial #:
This screen Displays the Software version installed on the
thermostat and serial number of the thermostat.
• Thermostats connected to Wi-Fi will receive the
software notification and update automatically.


