


iGate2.0 User Manual
C r e a t e d : D e c e m b e r 3 , 2 0 2 1
c l i m a t e m a s t e r.c o m
7
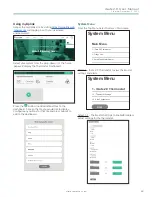
PROGRAM
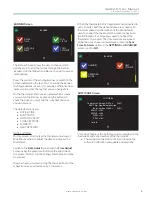
If programmable mode is enabled, you can only view the program schedule on this screen on the thermostat.
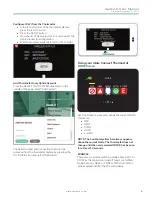
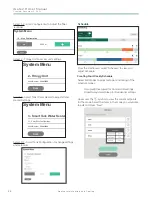
To view the Program Schedule, Select the “Program”
PROGRAM
button from the Settings Screen.
You cannot adjust the schedule or setpoints. Permanent program schedule changes require the myUplink app. Making
temporary changes or pausing the program schedule are outlined in
Schedule Section
(page 14) .
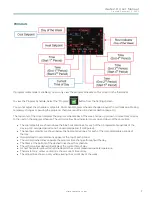
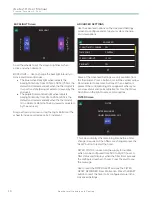
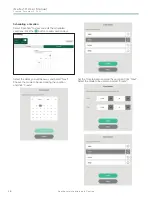
The top center of the screen displays the program schedule day of the week. Swipe up or down to move from one day
to the next on the program schedule. The vertical yellow Row Indicator moves up and down at the same time.
• The cool setpoints are shown above the blue horizontal lines, for each of the 4 programmable periods of the
day (up to 3 occupied periods and 1 unoccupied period, if configured).
• The heating setpoints are shown below the horizontal red lines, for each of the 4 programmable periods of
the day .
• Occupied and Unoccupied icons appear at the top of each period.
• The vertical dashed lines separate the program time changes throughout the day.
• The times at the bottom of the dashed lines show the schedule.
• The vertical yellow dashed line displays the current time of day.
• A short horizontal yellow dashed line depicts the current measured space temperature .
• Thermostat only: yellow vertical line shows current time of day.
• The yellow lines show up only when viewing the current day of the week.


