


iGate2.0 User Manual
C r e a t e d : D e c e m b e r 3 , 2 0 2 1
c l i m a t e m a s t e r.c o m
11
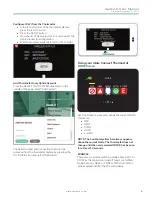
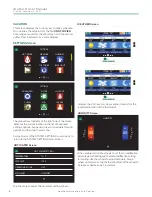
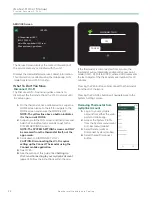
LOCKOUT/PIN Screen
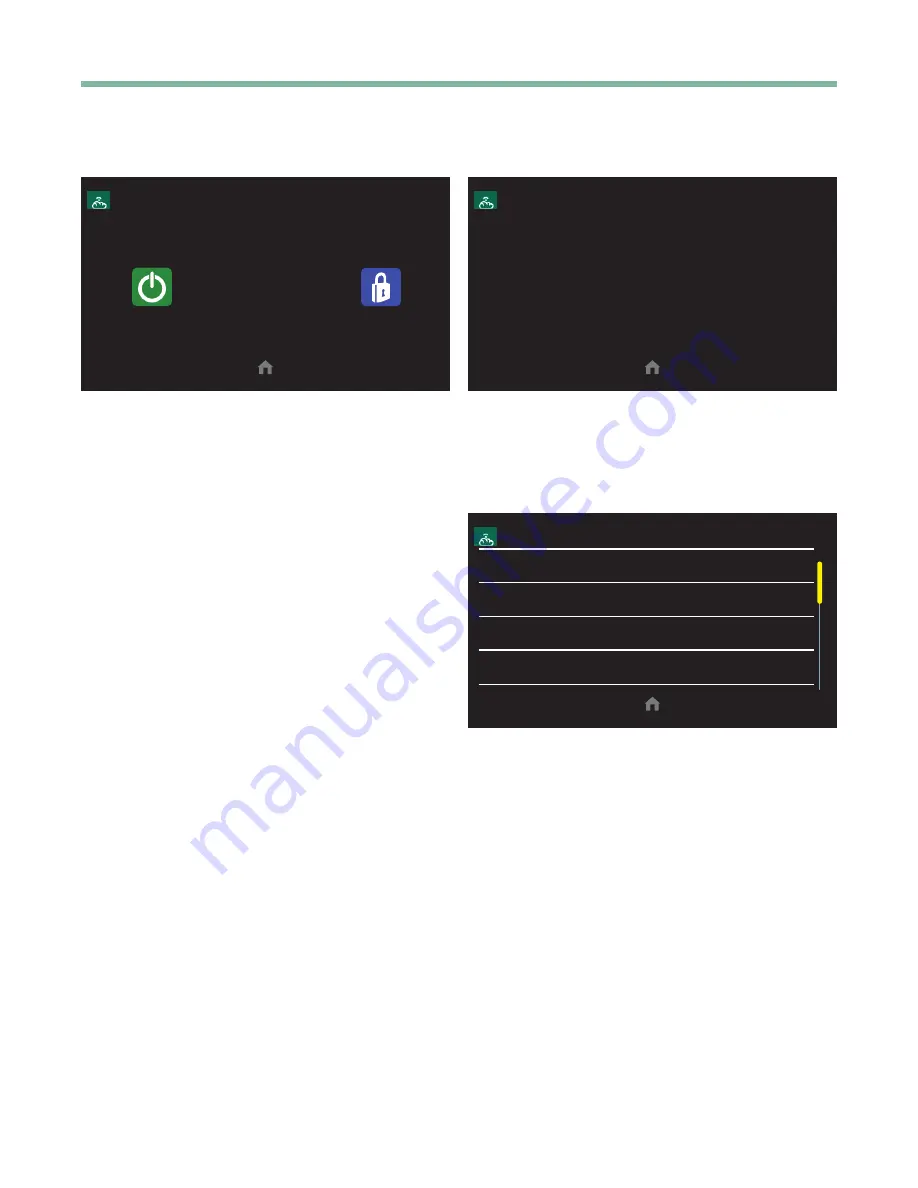
LOCKOUT
LOCKOUT IS DISABLED
ENABLE
CHANGE PIN
If desired, the user can require a pin to make the changes
to the settings of the thermostat. Use the “Change Pin”
button to set the access code . Use the enable button to
lock the settings .
NOTE: Some of the Advanced Settings are only
available from the thermostat itself, not the app
or web.
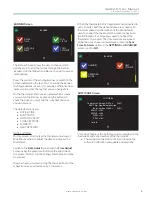
If applicable, enter the 4-digit security PIN code to open
the Advanced Settings screen.
This feature locks out unauthorized changes made on the
touchscreen . All touch interaction is locked out without the
unlock code. After 5 failed attempts, a notification (fault) is
sent to the registered owner of the thermostat through Wi-
Fi. More unlock attempts are blocked for 15 minutes.
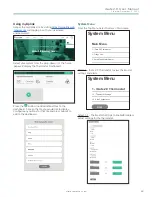
To set up a new PIN or change the current PIN, select
the ENABLE button or the CHANGE PIN button, which
displays on the SET PIN screen. If the thermostat does
not already have a PIN, the CHANGE PIN button cannot
be used .
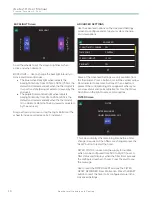
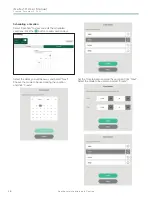
On the SET PIN screen, use the 4 blue-digit PIN
wheels to set the PIN. Set the 4-digit PIN and press the
orange Save button to save the PIN and return to the
Lockout Screen . Press the DISABLE button to cancel
the LOCKOUT function and reset the PIN to 0000. The
default is 0000 and the range is 0001 to 9999.
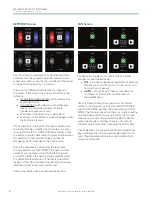
CLEANING the iGate Connect Thermostat
CLEAN
8
Stops touchscreen interaction for 10 seconds to allow
cleaning the screen with a dry nonabrasive cloth. A
10-second countdown shows on the CLEAN screen and
then the thermostat resumes normal operation .
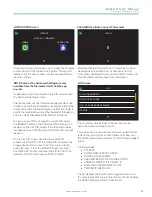
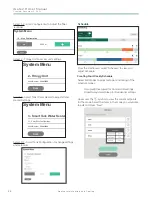
LOG Screen
LOG
ECM CONFIGURATION
LOW LOOP PRESSURE
LOSS OF ZONE DAMPER POWER
STARTUP
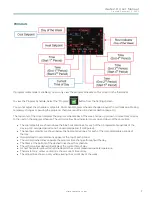
The Log Screen tracks faults to be used by service
personnel when repairing the unit .
This screen can be used to view software update history,
fault history, and system events. Swipe up or down on
the vertical yellow Row Indicator to scroll through logged
events.
The log includes:
• STARTUP
• SOFTWARE UPDATE EVENTS
• POWER CYCLE EVENTS
• PARAMETER OUT-OF-RANGE EVENTS
• SERVER CONNECTIVITY EVENTS
• NON-VOLATILE MEMORY FAULTS
• TEMPERATURE FAULTS
The list displays the 5 most recent logged events, with
the most recent at the top . The last line in the list includes
the RESET LOG command to clear the list.


