


iGate2.0 User Manual
C r e a t e d : D e c e m b e r 3 , 2 0 2 1
G e o t h e r m a l H e a t i n g a n d Co o l i n g
10
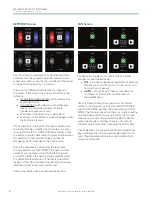
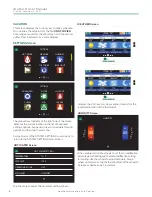
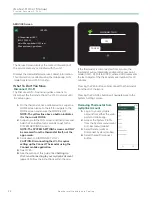
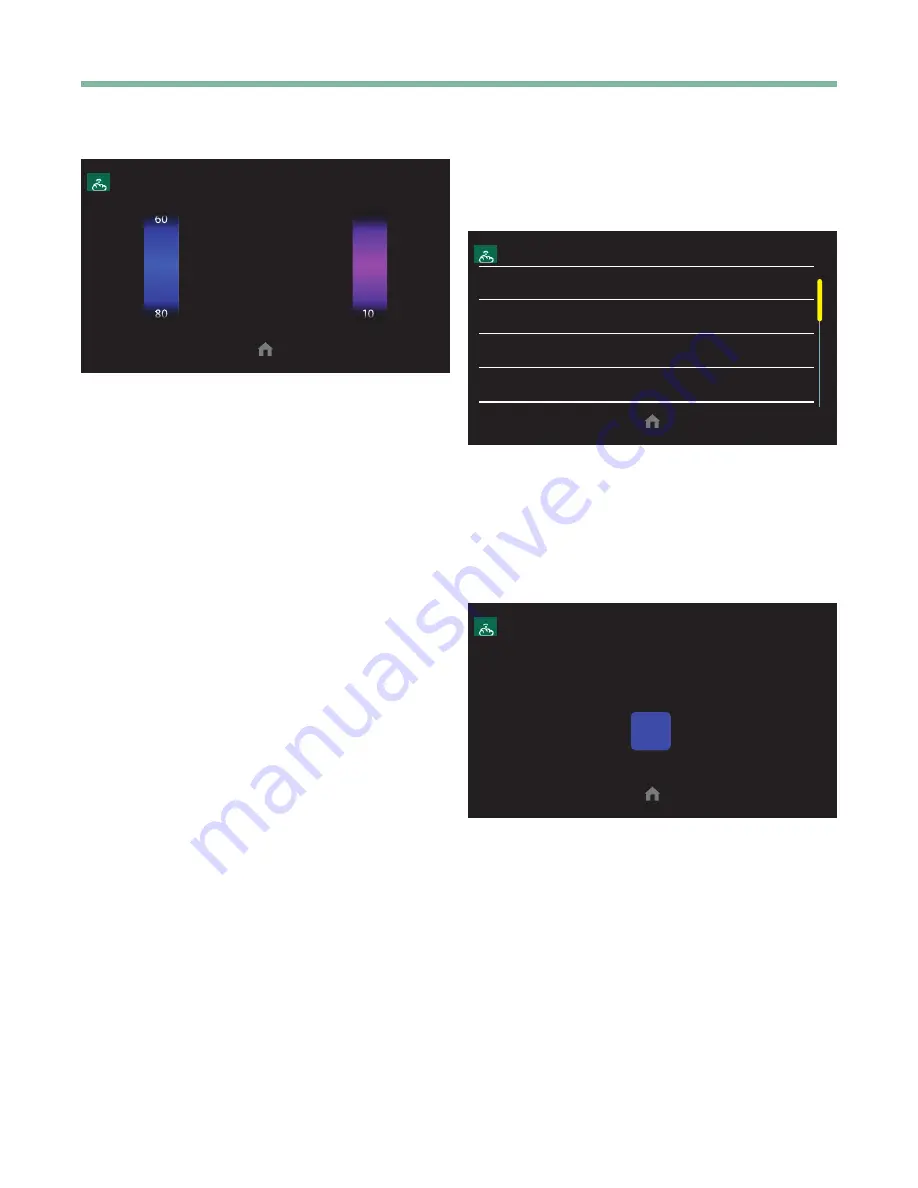
BACKLIGHT Screen
BACKLIGHT
A
C
T
I
V
E
D
O
R
M
A
N
T
75
65
70
5
0
Scroll the wheels to set the screen brightness when
active and when dormant.
BACKLIGHT — Use to change the backlight intensity in
Active and Dormant modes.
• The blue Active Backlight wheel adjusts the
backlight intensity from 10% to 100%, (75% is the
default and recommended) when the thermostat is
in an active state (being accessed or viewed by the
end user) .
• The purple Dormant Backlight wheel adjusts
backlight intensity from 0% to 25%, (25% is the
default and recommended) when the thermostat
is in a dormant state (not being viewed or adjusted
by the end user) .
Drag a wheel up or down or tap the top or bottom of the
wheel to increase or decrease by 1 increment .
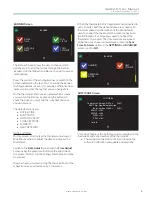
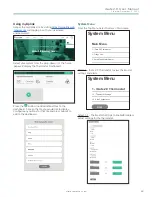
ADVANCED SETTINGS
Use the advanced options on the Advanced Settings
screens to configure and setup your system, change,
and view options.
ADVANCED
SYNCH TIME TO SERVER
TIME ZONE
SCREEN TIMEOUT
PROXIMITY
YES
CENTRAL
15 SEC
YES
Some of the Advanced Settings are only available from
the thermostat. Press a button or scroll the vertical yellow
Row Indicator to see more buttons . When a button is
pressed, the corresponding screen appears where you
can view status and make adjustments. Use the Yellow
Scroll Bar on the right to access more options .
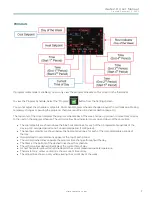
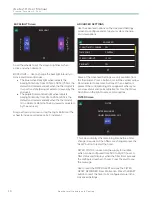
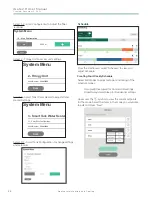
FILTER Screen
FILTER
FILTER REMINDER
HOURS REMAINING: 5475
RESET
This screen displays the remaining time before a filter
change is required. When filters are changed, press the
“Reset” button to restart the timer .
FILTER STATUS is based on the supply fan runtime,
which can be configured from 500 to 15,000 hours. A
filter status alert displays when the filter timer exceeds
the configured number of hours. Press the alert to see
the message .
Use to reset the FILTER ALERT and see the FILTER
RESET REMINDER timer information. Press the RESET
button to reset the timer to its configured value in the
Advanced Settings.


