34
z
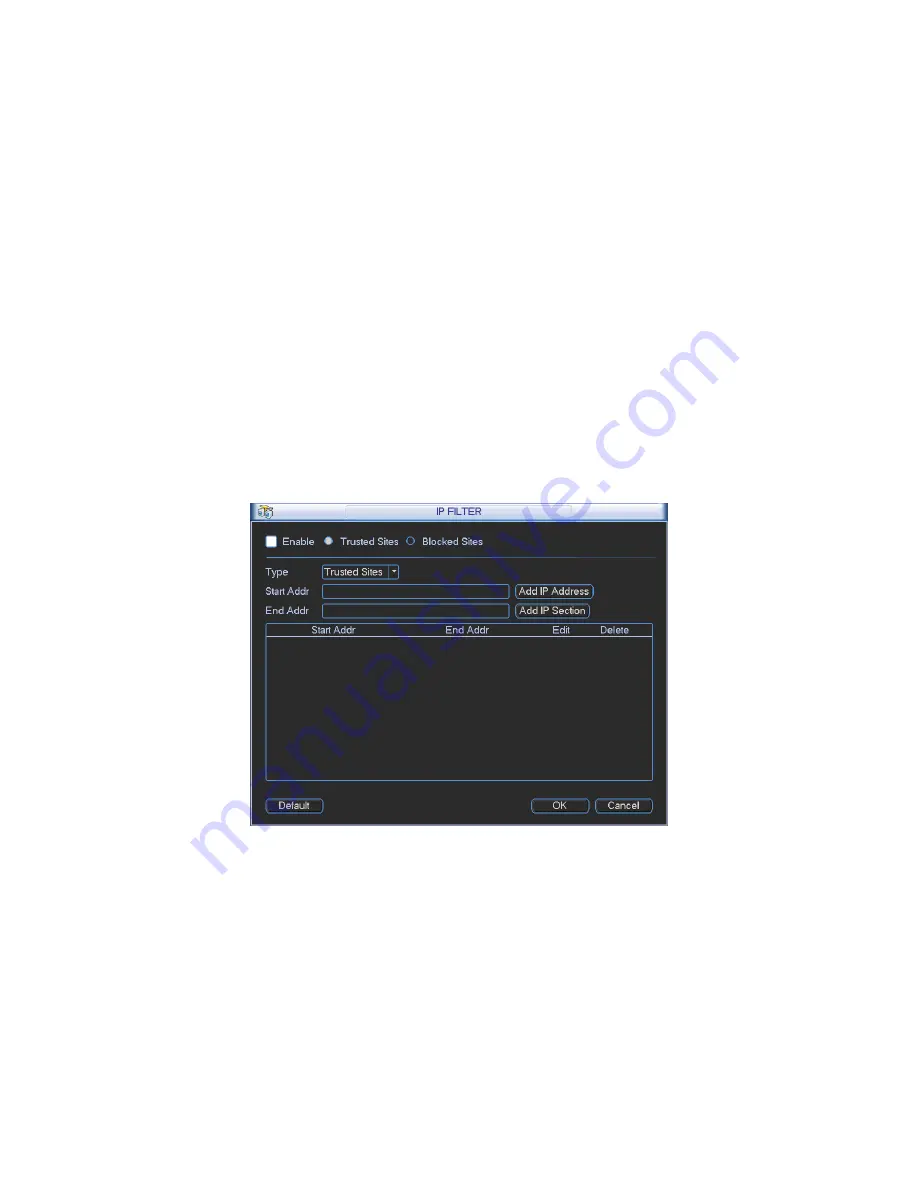
Start address/end address: Select one type from the dropdown list, you can input IP address
in the start address and end address. Now you can click Add IP address or Add IP section to
add.
a) For the newly added IP address, it is in enable status by default. Remove the
Ĝ
before
the item, then current item is not in the list.
b) System max supports 64 items.
c) Address column supports IPv4 or IPv6 format. If it is IPv6 address, system can optimize
it. For example, system can optimize aa:0000: 00: 00aa: 00aa: 00aa: 00aa: 00aa as aa::
aa: aa: aa: aa: aa: aa.
d) System automatically removes space if there is any space before or after the newly
added IP address.
e) System only checks start address if you add IP address. System check start address and
end address if you add IP section and the end address shall be larger than the start
address.
f)
System may check newly added IP address exists or not. System does not add if input IP
address does not exist.
z
Delete: Click it to remove specified item.
z
Edit: Click it to edit start address and end address. System can check the IP address validity
after the edit operation and implement IPv6 optimization.
Figure 4-34
4.6.5.3 NTP Setup
You need to install SNTP server (Such as Absolute Time Server) in your PC first. In Windows XP
OS, you can use command “net start w32time” to boot up NTP service.
NTP setup interface is shown as in Figure 4-35.
z
Host IP: Input your PC address.
z
Port: This series NVR supports TCP transmission only. Port default value is 123.
z
Update interval: minimum value is 1. Max value is 65535. (Unit: minute)
z
Time zone: select your corresponding time zone here.
z
Update period: You can input interval here.
z
Manual update: It allows you to synchronize the time with the server manually.
Содержание Network Video Recorder
Страница 1: ...Network Video Recorder Quick Start Guide Version 3 1 0 ...
Страница 6: ...v z Please refer to the packing list in the box ...
Страница 25: ...19 Figure 2 20 ...
Страница 30: ...Network Video Recorder User s Manual V 3 1 0 ...
Страница 37: ...vii Check the following accessories after opening the box z Please refer to the packing list in the box ...
Страница 85: ...48 Figure 4 54 Figure 4 55 Figure 4 56 ...
Страница 142: ...105 signal which meets the senility standard that is previously set See Figure 6 42 ...
Страница 175: ...138 Teclast Ti Cool 512M Teclast Ti Cool 1G Teclast Ti Cool 2G ...
Страница 178: ...S oftware ...
Страница 179: ...Cost effective HD IR Waterproof Fixed IP Camera Quick Start Guide Version 1 0 1 ...
Страница 184: ...2 Figure 1 3 ...
Страница 186: ...4 Figure 2 2 ...
Страница 192: ...Cost effective HD IR Waterproof Fixed IP Camera User s Manual Version 1 0 2 ...
Страница 201: ...5 Figure 2 2 Figure 2 3 ...
Страница 203: ...7 Figure 3 2 ...
Страница 209: ...IPC Web Operation Manual Version 3 0 0 ...
Страница 236: ...25 Figure 4 11 4 2 6 SMTP e mail The SMTP interface is shown as in Figure 4 12 Figure 4 12 ...
Страница 245: ...34 Figure 4 20 Figure 4 21 ...
Страница 252: ...41 Figure 4 28 Figure 4 29 Figure 4 30 ...
Страница 271: ...software NOT FOR SALE ...
Страница 272: ...Clearview HD IR Waterproof Network Dome Camera Quick Start Guide Version 1 2 0 ...
Страница 285: ...10 Please refer to the Web Operation Manual included in the resource CD for detailed operation instruction ...
Страница 287: ...Clearview HD IR Waterproof Network Dome Camera User s Manual Version 4 0 1 ...
Страница 309: ...18 Please refer to the Web Operation Manual included in the resource CD for detailed operation instruction ...
Страница 312: ...software NOT FOR SALE ...


