background image

FR

FRANÇAIS

Clarke

®


Manuel de l’utilisateur (FR) - FOCUS II MID-SIZE AUTOSCRUBBER

®


71483A

  - 69 -   


Figure 16

Figure 17


MISE EN SERVICE DE LA MACHINE

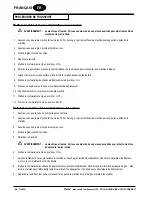
Fonctionnement du suceur

Le suceur racle le sol tandis que le moteur d’aspiration aspire la 
solution d’eau sale. Abaissez ou relevez la poignée de commande du 
suceur à la main. Pour faire fonctionner le suceur, procédez comme 
suit :

1.  Pour baisser la raclette, tournez le levier vers le bas.  Voir Figure 

16.

2. Pour lever la raclette, tournez le levier vers le haut.  Voir Figure 

16.

Remplissage du réservoir de solution

1.  Enlevez le couvercle du réservoir de solution.  Voir Figure 17.

2.  Si la machine n’est pas équipée du système de mélange 

chimique, ajoutez un produit de nettoyage dans le réservoir 
de solution.  Pour connaître les quantités correctes, lisez les 
instructions apposées sur le récipient du produit chimique.

3.  Remplissez le réservoir de solution d’eau.

4.  Replacez le couvercle du réservoir de solution.

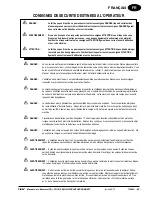
  AVERTISSEMENT: 

Les solutions aqueuses ou les 
nettoyants utilisés avec ce type de 
machine peuvent laisser des zones 
humides sur la surface nettoyée. Ces 
zones constituent un danger potentiel 
pour l’opérateur ou pour d’autres 
personnes. Placez toujours des pan-
neaux “ ATTENTION “ sur le pourtour 
de l’espace que vous nettoyez.

  AVERTISSEMENT : 

Les machines peuvent provoquer 
l’in

fl

 ammation de certains maté-

riaux et vapeurs. Ne pas utiliser la 
machine avec ou près de produits 
in

fl

 ammables comme l’essence, les 

grains de poussière, les solvants et 
les diluants. N’utilisez pas d’autre 
nettoyant que celui recommandé par 
le fabricant.

  AVERTISSEMENT :   Clarke Technology recommande de 

ne pas utiliser une eau dont la tempé-
rature dépasse 49 ºC.

Содержание Cylindrical 28

Страница 1: ...book prior to operating or attempting any service or maintenance procedure to your Clarke machine could result in injury to you or to other personnel damage to the machine or to other property could...

Страница 2: ...Diagram 118 Accessories 119 WARNING The Products sold with this Manual contain or may contain chemicals that are known to certain governments such as the State of California as identified in its Propo...

Страница 3: ...able materials This machine is not suitable for picking up hazardous dust DANGER Lead acid batteries generate gases which can cause an explosion Keep sparks and flames away from bat teries Do not smok...

Страница 4: ...ronment and be illegal The United States Environmental Protection Agency has established certain regulations regarding discharge of waste water Also city and state regula tions regarding this discharg...

Страница 5: ...nths pro rate on batteries 90 days full unconditional Vibration handle 2 5m s2 Sound test operator s ear 65 dBA 65 dBA 67 dBA Model Cylindrical 28 BOOST 28 BOOST 32 Pad Brush Size 2 5 75 x 28 14 6 x 6...

Страница 6: ...the top of the ramp 11 Turn the key switch OFF 12 Fasten the machine to the vehicle How To Remove The Machine From A Van Or Truck 1 Make sure there are no obstructions in the area 2 Make sure the unlo...

Страница 7: ...structions before performing any procedure WARNING Do not use the machine on slopes exceeding the specifications WARNING Do not wash the machine with direct or pressurized water jets Charge Battery Me...

Страница 8: ...scrub solution setting is indicated by two green bars on the meter On cylindrical machines with most floor conditions the solution setting should be set one step higher To increase the flow press the...

Страница 9: ...EN ENGLISH Clarke Operator s Manual EN FOCUS II MID SIZE AUTOSCRUBBER FORM NO 71483A 9 Figure 1 MACHINE CONTROL PANEL I H D E C F G N J M H B K L A...

Страница 10: ...ery tank is empty 3 Tip up the recovery tank to it s full open position See figure 4 CAUTION Before raising the tank be sure tank is empty WARNING Do not operate the machine while the recovery tank is...

Страница 11: ...ress and hold the buttons items E and F at the same time then turn the key switch item A ON c Continue to hold the buttons items E and F until the battery meter LED light turns ON and OFF and then rel...

Страница 12: ...ible damage will occur to the batteries if electrolyte does not cover the plates Keep the electrolyte at the correct level CAUTION Machine damage and discharge across the tops of the batteries can occ...

Страница 13: ...battery charger do the following 3a Plug the required adapter cable into the connector from the battery charger Disconnect the batteries from the machine and push the connector from the adapter plug i...

Страница 14: ...chine 5 Press on a brush or pad under the flex plates See figure 10 NOTE When using a black pad position pad on head Lower head and operate momentarily to affix pad to pad driver if you have difficult...

Страница 15: ...gimbal 7 Pull the brush up until the gimbal locks 8 Repeat steps 5 6 and 7 to install the second brush or pad driv er 9 Reinstall right and left brush housings and latch front cover DANGER Operating...

Страница 16: ...approximately 1 2 inch and remove brush door 6 Remove brush See figure 15 7 Inspect brush condition If damaged or worn replace it Oth erwise turn brush end for end periodically to reverse bristle dir...

Страница 17: ...chine does not have the Chemical Mixing System add a cleaning chemical to the solution tank For the correct amount of chemical follow the directions shown on the container 3 Fill the solution tank wit...

Страница 18: ...s The ratio settings are shown in figure 19 CAUTION Do not operate the chemical pump dry If the chemical container is empty make sure the chemical control is in the off position To operate the chemica...

Страница 19: ...re or objects until you can do the following 1 Move the machine in a straight direction forward and backward 2 Stop the machine safely 3 Turn the machine both left and right and return to a straight d...

Страница 20: ...5 Lower the squeegee 6 Press the one touch control button to lower the brush head as sembly and start vacuum motor 7 Adjust the flow of clean solution to the flow desired 8 Move the machine across th...

Страница 21: ...lean it will need fewer repairs and have lon ger life Do These Procedures When You Begin Your Work Period 1 Turn off key switch 2 Disconnect AC power from battery charger follow charger instructions 3...

Страница 22: ...ater hose into the drain hose 4 Leave the tanks and the recovery drain valve open to dry in the air 5 Check the squeegee blade Use a cloth to clean the squeegee blade If the squeegee blade is damaged...

Страница 23: ...of the tube in each cell Wipe any acid from the machine or the tops of the batteries Do not add acid to battery after installation NOTE Always turn off key switch before servicing the machine WARNING...

Страница 24: ...rection the tilt is changed Turn the adjusting screw clockwise or counterclockwise see figure 26 to achieve uniform squeegee blade flare WARNING Maintenance and repairs must be done by au thorized per...

Страница 25: ...s too low The batteries are not fully charged The charger is damaged The battery is defective The batteries are disconnected Clean the terminals and connectors Replace the damaged cables Charge the ba...

Страница 26: ...EN ENGLISH 26 FORM NO 71483A Clarke Operator s Manual EN FOCUS II MID SIZE AUTOSCRUBBER...

Страница 27: ...EN ENGLISH Clarke Operator s Manual EN FOCUS II MID SIZE AUTOSCRUBBER FORM NO 71483A 27...

Страница 28: ...del conjunto del cabezal de cepillado de Discos 26 102 103 Plano del conjunto del cabezal de cepillado de Discos 28 104 105 Plano del conjunto del cabezal de cepillado de Disco 34 106 107 Plano del co...

Страница 29: ...u otros materiales inflamables ni cerca de ellos Esta m quina no es adecuada para limpiar polvos peligrosos PELIGRO Las bater as de plomo generan gases los cuales pueden causar una explosi n Mantenga...

Страница 30: ...eliminaci n de aguas residuales S rvase cumplir con la legislaci n vigente en su municipio departamento o regi n Inf rmese sobre las disposiciones a este respecto y resp telas No puede ignorar nunca l...

Страница 31: ...as 90 d as total incondicional Vibraci n en la empu adura 2 5m s2 Prueba de sonido a la altura del o do del operador 65 dBA 65 dBA 67 dBA Especificaciones de la m quina Modelo Cylindrical 28 Cil ndric...

Страница 32: ...la rampa 11 Gire el interruptor de llave hasta la posici n OFF apagado 12 Estibe la m quina en el veh culo Sacar la m quina de una furgoneta o un cami n 1 Aseg rese de que no haya ninguna obstrucci n...

Страница 33: ...ADVERTENCIA No utilice la m quina en pendientes cuya inclinaci n supere las especifica ciones ADVERTENCIA No lave la m quina con chorros de agua directos ni a presi n Indicador de carga bater a Contr...

Страница 34: ...limpieza que se descarga en el suelo La configuraci n normal de la soluci n de lavado se se ala con dos barras verdes en el indicador En las m quinas con cepillos cil ndricos para la mayor a de los e...

Страница 35: ...Clarke Manual del operador ES FOCUS II MID SIZE AUTOSCRUBBER 71483A 35 ES ESPA OL Figura 1 PANEL DE MANDO DE LA M QUINA I H D E C F G N J M H B K L A...

Страница 36: ...vac o 3 Incline el dep sito de recuperaci n hasta la posici n en que queda totalmente abierto Consulte la figura 4 PRECAUCI N Antes de levantar el dep sito aseg rese de que est vac o ADVERTENCIA No h...

Страница 37: ...osici n ON encendido c Siga oprimiendo los botones elementos E y F hasta que la luz del LED del indicador de carga de las bater as se encienda y se apague y luego suelte ambos botones d En el t rmino...

Страница 38: ...cas las bater as sufrir n un da o irreversible Mantenga el electrolito al nivel correcto PRECAUCI N La m quina se puede da ar y las partes superiores de las bater as pueden descargarse si se llenan la...

Страница 39: ...guiente 3a Conecte el cable del adaptador requerido en el conector del cargador de la bater a Desconecte las bater as de la m quina y empuje el conector del adaptador de enchufe en el conector del paq...

Страница 40: ...isco debajo de las placas flexibles Consulte la figura 10 NOTA Cuando utilice un disco negro posici nelo sobre el cabezal Baje el cabezal y opere moment neamente para fijar el disco al motor del disco...

Страница 41: ...la suspensi n card nica se trabe 8 Repita los pasos 5 6 y 7 para instalar el segundo cepillo o motor del disco 9 Reinstale los alojamientos de cepillos derecho e izquierdo y trabe la cubierta frontal...

Страница 42: ...ga el cepillo Consulte la figura 15 7 Inspeccione el estado del cepillo Si est da ado o desgastado reempl celo De lo contrario cambie un extremo del cepillo por el otro de forma peri dica para inverti...

Страница 43: ...cto qu mico de limpieza en el dep sito de soluci n Para conocer la cantidad correcta del producto qu mico siga las instrucciones que figuran en el recipiente 3 Llene el dep sito de soluci n con agua 4...

Страница 44: ...UCI N No use la bomba de producto qu mico en seco Si el dep sito de producto qu mico est vac o aseg rese de que el control del producto qu mico est en posici n de desactivaci n Para operar el sistema...

Страница 45: ...te y hacia atr s 2 Detener la m quina de manera segura 3 Girar la m quina tanto hacia la izquierda como hacia la derecha y regresar a la l nea recta Para mover la m quina siga este procedimiento 1 Lib...

Страница 46: ...n ON encendido 5 Baje la bayeta 6 Oprima el bot n de mando de pulsaci n nica para bajar el conjunto del cabezal de cepillado y ponga en marcha el motor de aspiraci n 7 Ajuste el flujo de soluci n lim...

Страница 47: ...a til m s prolongada Efect e estos procedimientos al comienzo del per odo de trabajo 1 Apague el interruptor de llave 2 Desconecte la alimentaci n de energ a de CA del cargador de la bater a siga las...

Страница 48: ...era de agua para lavarlos Coloque la manguera de agua dentro del tubo de drenaje 4 Deje las v lvulas de drenaje y los dep sitos abiertos para que se sequen con el aire 5 Verifique la cuchilla de la ba...

Страница 49: ...de las partes superiores de las bater as No agregue cido a la bater a despu s de su instalaci n NOTA apague siempre el interruptor de llave antes de reparar o mantener la m quina ADVERTENCIA Siempre...

Страница 50: ...de las agujas del reloj o en sentido contrario consulte la figura 26 para lograr una anchura uniforme de cuchilla de la bayeta ADVERTENCIA Solamente personal autorizado puede realizar el mantenimiento...

Страница 51: ...s El cargador est da ado La bater a est averiada Las bater as est n desconectadas Limpie los bornes y conectores Reemplace los cables da ados Cargue las bater as Agregue agua destilada a cada elemento...

Страница 52: ...52 71483A Clarke Manual del operador ES FOCUS II MID SIZE AUTOSCRUBBER ES ESPA OL...

Страница 53: ...Clarke Manual del operador ES FOCUS II MID SIZE AUTOSCRUBBER 71483A 53 ES ESPA OL...

Страница 54: ...sse mod les disque 26 102 103 Sch ma d assemblage de la t te de brosse mod les disque 28 104 105 Sch ma d assemblage de la t te de brosse mod le disque 34 106 107 Sch ma d assemblage de la t te de bro...

Страница 55: ...achine n a pas t con ue pour recueillir les poussi res dangereuses DANGER Les batteries au plomb g n rent des gaz susceptibles de provoquer une explosion Tenez les batteries loign es de toute tincelle...

Страница 56: ...nes Veillez toujours placer une pancarte ATTENTION proximit de la zone que vous nettoyez AVERTISSEMENT L limination sauvage des eaux sales risque d endommager l environnement et constitue un d lit L A...

Страница 57: ...brations au niveau de la poign e 2 5m s2 Nuisances sonores pour l op rateur 65 dBA 65 dBA 67 dBA Sp cifications de la machine Mod le Mod le cylindrique 28 BOOST 28 BOOST 32 Taille de disque brosse 2 5...

Страница 58: ...du plan inclin 11 Mettez le commutateur cl en position OFF 12 Tournez le commutateur cl en position d arr t Retrait de la machine d une camionnette ou d un camion 1 Assurez vous que la zone ne comport...

Страница 59: ...NT N utilisez pas la machine sur des pentes dont l inclinaison est sup rieure aux sp cifications AVERTISSEMENT Ne nettoyez pas la machine en pro jetant directement un jet d eau ou avec un jet d eau so...

Страница 60: ...boutons de contr le de la solution r gulent le d bit de la solution de nettoyage d pos e sur le sol Le r glage normal de la solution de nettoya ge est indiqu par deux barres vertes sur l indicateur S...

Страница 61: ...FR FRAN AIS Clarke Manuel de l utilisateur FR FOCUS II MID SIZE AUTOSCRUBBER 71483A 61 Figure 1 PANNEAU DE COMMANDE I H D E C F G N J M H B K L A...

Страница 62: ...ervoir de r cup ration est vide 3 Basculez le r servoir de r cup ration en position totalement ouverte Voir Figure 4 ATTENTION Avant de soulever le r servoir assurez vous qu il est vide AVERTISSEMENT...

Страница 63: ...ez ensuite le commutateur cl l ment A en position de marche c Maintenez toujours les boutons E et F jusqu ce que le t moin d indication de batterie s allume et s teigne Ensuite rel chez les deux bouto...

Страница 64: ...s les plaques Maintenez un niveau correct d acide ATTENTION Pour viter tout endommagement de la machine ainsi qu une d charge par le couvercle des batte ries ne jamais remplir au del du niveau conseil...

Страница 65: ...efermer violemment Si votre machine est livr e sans un chargeur de batterie int gr proc dez comme suit 3a Branchez le c ble adaptateur requis dans le connecteur du chargeur de batterie D brancher les...

Страница 66: ...plaques flexibles Voir la figure 10 Remarque Lors de l utilisation d un tampon noir placez le tampon sur la t te Abaissez la t te et faites la fonctionner un instant pour fixer le tampon son support...

Страница 67: ...ers le haut jusqu ce que les axes se ver rouillent 8 R p tez les tapes 5 6 et 7 pour installer la seconde brosse ou le second entra neur de disque 9 R installez les logements gauche et droit de la bro...

Страница 68: ...13mm et enlevez la 6 Enlevez la brosse Voir Figure 15 7 Inspectez l tat de la brosse Si elle est endommag e ou us e remplacez la Dans le cas contraire retournez p riodiquement la brosse pour inverser...

Страница 69: ...lution Pour conna tre les quantit s correctes lisez les instructions appos es sur le r cipient du produit chimique 3 Remplissez le r servoir de solution d eau 4 Replacez le couvercle du r servoir de s...

Страница 70: ...TENTION Ne faites pas tourner vide la pompe produit chimique Si le r cipient de produit chimique est vide v rifiez que la commande de m lange chimique est en position d arr t Pour utiliser le syst me...

Страница 71: ...l you can do the following 1 Faire avancer la machine en ligne droite en marche avant puis en marche arri re 2 Arr ter la machine de fa on s curitaire 3 Faire tourner la machine vers la gauche puis ve...

Страница 72: ...ettez l interrupteur cl sur I marche 5 Abaissez le suceur 6 Appuyez sur le bouton de la commande instantan e pour abaisser les brosses et d marrer le moteur d aspiration 7 Ajustez le d bit de solution...

Страница 73: ...s lui assurerez une plus longue dur e de vie utile T ches de d but de travail 1 Mettez l interrupteur cl l arr t 2 D branchez la fiche d alimentation du chargeur de batterie sui vez les instructions d...

Страница 74: ...en introduisant celui ci dans le flexible 4 Laissez les r servoirs et les vannes de vidange ouverts pour qu ils puissent s cher l air 5 V rifiez la lame du suceur Nettoyez la avec un chiffon propre Si...

Страница 75: ...machine ou les bornes de la bat terie Do not add acid to battery after installa tion REMARQUE Toujours mettre l interrupteur cl l arr t avant toute op ration d entretien AVERTISSEMENT Portez toujours...

Страница 76: ...gure 26 pour obtenir un vasement uniforme des lames de la raclette AVERTISSEMENT La maintenance et les r parations doivent tre r alis es uniquement par un personnel autoris AVERTISSEMENT Les r paratio...

Страница 77: ...ont pas enti rement charg es Le chargeur est endommag La batterie est d fectueuse Les batteries sont d branch es Nettoyez les bornes et les connecteurs Remplacez les c bles endommag s Chargez les batt...

Страница 78: ...FR FRAN AIS 78 71483A Clarke Manuel de l utilisateur FR FOCUS II MID SIZE AUTOSCRUBBER...

Страница 79: ...FR FRAN AIS Clarke Manuel de l utilisateur FR FOCUS II MID SIZE AUTOSCRUBBER 71483A 79...

Страница 80: ...80 71483A Clarke Operator s Manual FOCUS II MID SIZE AUTOSCRUBBER NOTES...

Страница 81: ...Operator s Manual FOCUS II MID SIZE AUTOSCRUBBER 71483A 81 Section II Parts Manual 71483A Disc 26 Disc 28 Disc 34 Cylindrical 28 MID SIZE AUTOSCRUBBER U S Patent No 6 105 192 No 6 760 947 and Patent P...

Страница 82: ...82 71483A Clarke Operator s Manual FOCUS II MID SIZE AUTOSCRUBBER SOLUTION TANK ASSEMBLY 17 1 12 23 22 7 6 10 9 3 25 26 8 21 13 11 15 16 20 20 18 2 4 5 24 13 27 28 28 28 revised 10 12...

Страница 83: ...Handle 13 50248a 2 Clamp Hose 14 52548a 1 Tab 1 4 Screw 15 54773a 1 Lanyard 16 59614a 1 Valve Battery Drain 17 61930a 1 Rod Rec Tank Prop 18 80176a 1 Screw M5 X 12 P H S S 19 80179a 1 Screw M6 X 15 2...

Страница 84: ...4 71483A Clarke Operator s Manual FOCUS II MID SIZE AUTOSCRUBBER RECOVERY TANK ASSEMBLY revised 8 12 1 2 3 4 5 6 7 8 9 10 11 12 13 14 15 17 18 16 19 20 21 22 25 24 26 27 28 29 31 32 33 35 36 37 38 30...

Страница 85: ...Lid Tray Debris 17 30832A 1 Suction Hose 18 39718A 1 Gasket Recovery Lid 19 40002A 1 Switch Float Electrical 20 41809A 2 Contact Housing Connector 21 43401A 2 Housing Connector 22 52548A 2 Tab 1 4 Sc...

Страница 86: ...71483A Clarke Operator s Manual FOCUS II MID SIZE AUTOSCRUBBER HANDLE ASSY DISC AND BOOST MODELS revised 9 10 11 24 12 23 13 14 15 10 2 2 3 4 1 5 6 7 9 8 16 17 18 2 22 21 16 17 25 26 18 17 19 20 18 17...

Страница 87: ...Label Control Panel 11 61929A 1 Panel Control 12 39886A 1 Gasket Console 9 50 13 56382501 1 Function Board Service Kit 14 50267A 4 Screw 8 32 x 375 15 30784A 1 Housing Control 16 87902A 4 Screw 6MM x...

Страница 88: ...8 71483A Clarke Operator s Manual FOCUS II MID SIZE AUTOSCRUBBER HANDLE ASSY CYLINDRICAL MODEL revised 9 10 11 24 12 23 13 14 15 10 2 2 3 4 1 5 6 7 9 8 16 17 18 2 22 21 16 17 25 26 18 17 19 20 18 17 1...

Страница 89: ...ntrol Panel Cyl 11 61929A 1 Panel Control 12 39886A 2 Gasket Console 9 50 13 56382501 1 Function Board Service Kit 14 50267A 4 Screw 8 32 x 375 15 30784A 1 Housing Control 16 87902A 4 Screw 6MM x 1 00...

Страница 90: ...90 71483A Clarke Operator s Manual FOCUS II MID SIZE AUTOSCRUBBER ELECTRICAL BOX ASSEMBLY 1 2 3 4 5 6 7 8 9 3 10 11 12 13 14 15 16 17 18 19 20 revised 12 11...

Страница 91: ...f 1 Relay Holder included in 41061A Harness 11 54764A 2 Insert Hex 1 4 20 UNC 12 41075A 1 Relay Vacuum 13 Ref 1 Fuse Holder included in 41061A Harness 14 41073A 1 Fuse 30A Vacuum see WARNING below 15...

Страница 92: ...92 71483A Clarke Operator s Manual FOCUS II MID SIZE AUTOSCRUBBER SQUEEGEE LIFT HOLDER ASSEMBLY revised 4 12 1 2 3 4 5 6 7 8 9 10 11 12 13 14 15 16 17 18 19 20 21 22 23 24 25 26 27 28 29 30 31 9 10 13...

Страница 93: ...5 16 Flat 11 9096052000 1 Support Spring 12 9096538000 1 Spring Squeegee Right 13 87613A 2 Washer Flat 22 x 64 x 10 Nylon 14 61953A 1 Plate Squeegee Support 15 9096497000 1 Pin Squeegee Mounting 16 8...

Страница 94: ...94 71483A Clarke Operator s Manual FOCUS II MID SIZE AUTOSCRUBBER SQUEEGEE ASSY DISC 26 INCH revised 12 12 1 2 3 4 5 5 6 7 8 9 10 11 12 13 14 15 16 17 19 20 21 22 23...

Страница 95: ...e NOTE 3 11 56370711 2 Nut Thumb 12 9096682000 2 Washer Rubber 13 962157 2 Screw 5 16 18 x 1 25 Hex 14 54647A 1 Knob M8 x 30 15 88609A 2 Screw 5 16 x 3 8 x 5 8 SHSS 16 80317A 2 Washer Bowed 455 ID x 7...

Страница 96: ...96 71483A Clarke Operator s Manual FOCUS II MID SIZE AUTOSCRUBBER SQUEEGEE ASSY ALL 28 INCH MODELS 1 2 4 3 5 5 6 7 8 9 10 11 12 13 14 15 16 17 19 20 21 22 23 revised 10 12...

Страница 97: ...ee NOTE 3 11 56370711 2 Nut Thumb 12 9096682000 2 Washer Rubber 13 962157 2 Screw 5 16 18 x 1 25 Hex 14 54647A 1 Knob M8 x 30 15 88609A 2 Screw 5 16 x 3 8 x 5 8 SHSS 16 80317A 2 Washer Bowed 455 ID x...

Страница 98: ...98 71483A Clarke Operator s Manual FOCUS II MID SIZE AUTOSCRUBBER SQUEEGEE ASSY DISC 34 AND BOOST 32 MODELS 1 2 3 4 5 5 6 7 8 9 10 11 12 13 14 15 16 17 19 20 21 22 23 revised 10 12...

Страница 99: ...egee NOTE 3 11 56370711 2 Nut Thumb 12 9096682000 2 Washer Rubber 13 962157 2 Screw 5 16 18 x 1 25 Hex 14 54647A 1 Knob M8 x 30 15 88609A 2 Screw 5 16 x 3 8 x 5 8 SHSS 16 80317A 2 Washer Bowed 455 ID...

Страница 100: ...FRAME ASSEMBLY See Detail A Detail A 1 2 3 4 5 6 7 8 9 10 11 12 13 14 15 9 16 17 18 19 20 21 22 23 14 21 24 25 26 27 28 29 30 31 32 33 34 35 14 36 37 17 33 34 42 14 43 44 45 46 47 48 29 49 16 33 17 59...

Страница 101: ...02 3 Tie Wire Not Shown Revised or new since last update NOTE 1 Only used on models with on board charger NOTE 2 Only used on models without on board charger NOTE 3 Transaxle 56380160 is obsolete and...

Страница 102: ...tor s Manual FOCUS II MID SIZE AUTOSCRUBBER BRUSH HEAD ASSY DISC 26 revised 8 12 2 13 14 23 40 3 43 6 7 42 9 36 35 21 39 25 26 27 37 28 32 33 34 38 5 31 19 20 30 4 27 43 33 30 10 1 18 22 11 12 3 7 6 8...

Страница 103: ...ew M6 1 X 20 20 59856A 2 Washer Rubber 21 59950A 1 Wheel Guide 3 1 2 22 61925A 1 Plate 26 Brush Wldmt 23 61926A 1 Bracket Head Lift 24 71017A 2 Label Moving Parts 25 80183A 3 Bolt M8 1 25 X 20 Hex 26...

Страница 104: ...ator s Manual FOCUS II MID SIZE AUTOSCRUBBER BRUSH HEAD ASSY DISC 28 revised 8 12 2 13 14 23 42 43 9 35 25 26 27 37 32 34 38 31 19 20 30 4 27 40 33 30 10 1 18 3 6 7 11 12 36 21 22 39 28 40 7 3 16 6 8...

Страница 105: ...ew M6 1 X 20 20 59856A 2 Washer Rubber 21 59950A 1 Wheel Guide 3 1 2 22 61924A 1 Plate 28 Brush Wldmt 23 61926A 1 Bracket Head Lift 24 71017A 2 Label Moving Parts 25 80183A 3 Bolt M8 1 25 X 20 Hex 26...

Страница 106: ...ator s Manual FOCUS II MID SIZE AUTOSCRUBBER BRUSH HEAD ASSY DISC 34 revised 8 12 16 2 11 12 14 22 23 3 40 5 6 8 43 9 36 35 21 39 25 26 27 37 28 32 33 34 38 4 31 19 20 30 25 27 40 33 30 10 1 18 13 3 6...

Страница 107: ...6 1 X 20 20 59856A 2 Washer Rubber 21 59950A 1 Wheel Guide 3 1 2 22 61923A 1 Plate 34 Brush Wldmt 23 61926A 1 Bracket Head Lift 24 71017A 2 Label Moving Parts 25 80183A 11 Bolt M8 1 25 X 20 Hex 26 801...

Страница 108: ...US II MID SIZE AUTOSCRUBBER BRUSH HEAD ASSY BOOST 28 1 2 3 4 5 6 7 8 9 10 11 12 13 14 15 16 17 18 19 20 21 22 23 24 25 26 27 29 30 31 32 33 34 35 36 37 38 39 40 41 42 43 44 45 46 47 48 49 50 51 52 53...

Страница 109: ...1 Retainer Eccentric 31 56381724 1 Plate Upper 28 32 61733B 2 Bracket Lift 33 1 Eccentric NOTE 2 34 61775A 1 Retainer Bearing 35 61782A 4 Sleeve Guide Wheel 36 56381532 2 Stud Stablizer_Short 37 61935...

Страница 110: ...D SIZE AUTOSCRUBBER BRUSH HEAD ASSY BOOST 32 56 57 1 2 3 4 5 6 7 8 9 10 11 12 13 14 15 16 17 35 19 20 21 22 23 24 25 44 27 31 32 30 33 26 36 37 38 39 40 41 42 43 48 45 46 47 48 49 50 51 52 53 54 55 43...

Страница 111: ...ght Upper Boost 32 31 61327A 1 Retainer Bumper 32 61724A 1 Retainer Eccentric 33 61733B 2 Bracket Lift 34 1 Eccentric NOTE 2 35 61775A 1 Retainer Bearing 36 61782A 4 Sleeve Guide Wheel 37 56381531 2 S...

Страница 112: ...DRICAL 28 BRUSH HEAD ASSY revised 8 12 62 63 15 1 4 39 42 43 44 11 48 49 52 53 54 55 8 57 59 60 64 17 18 25 26 28 35 36 50 30 29 9 37 38 6 20 24 26 29 2 24 18 43 29 2 26 18 17 26 36 38 45 51 58 5 66 2...

Страница 113: ...S 30 87039A 2 Washer Fender 1 4 32 88617A 8 Screw M10xm12x16mm S B S H 33 88618A 1 Nut M12 Nylon Insert Item Ref No Qty Description 34 88619A 1 Screw M12 1 75 X 160mm Hex 35 88626A 2 Screw M6 1 X 40mm...

Страница 114: ...or s Manual FOCUS II MID SIZE AUTOSCRUBBER CHEMICAL MIXING KIT revised 8 12 MEASURE 2 3 4 FROM SOLUTION VALVE AND CUT HOSE 30828A INSTALL TEE AND TWO HOSE CLAMPS 1 2 3 4 5 6 7 8 9 10 11 12 14 15 16 17...

Страница 115: ...Hose 1 4 ID x 15 25 Clear 9 39726A 1 Hose 1 4 ID x 11 50 Clear 10 39727A 1 Hose 3 8 x 11 5 Clear 11 40850A 1 Module Chemical 12 41084A 1 Harness Chemical 13 53186A 10 Tie Wire not illustrated 14 5371...

Страница 116: ...116 71483A Clarke Operator s Manual FOCUS II MID SIZE AUTOSCRUBBER ELECTRICAL SCHEMATIC 1 revised 12 11...

Страница 117: ...Clarke Operator s Manual FOCUS II MID SIZE AUTOSCRUBBER 71483A 117 ELECTRICAL SCHEMATIC 2 revised 12 11...

Страница 118: ...118 71483A Clarke Operator s Manual FOCUS II MID SIZE AUTOSCRUBBER CONNECTION DIAGRAM revised 4 11...

Страница 119: ...Kit 11338A 1 Red Gum Rubber Squeegee Blade Kit 11335A 1 Gum Squeegee Blade Kit Boost 32 Item Ref No Qty Description Pads Brushes 997005 1 White Pad 14x32 5 pack 997004 1 Red Pad 14x32 5 pack 997007 1...

Страница 120: ...1424B 2 Poly Brush 17 10875A 2 Soft Nylon Brush 17 10384A 2 Lite Grit Brush 17 11430B 2 Medium Grit Brush 17 11425B 2 Heavy Grit Brush 17 41 Squeegee Blades front rear 11331A 1 Urethane Squeegee Blade...

Страница 121: ......

Страница 122: ......

Страница 123: ......

Страница 124: ...A Nilfisk Advance Brand 14600 21st Avenue North Plymouth MN 55447 3408 www clarkeus com Phone 800 253 0367 Fax 800 825 2753 2012 Nilfisk Advance Inc...

Отзывы: