34
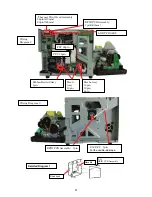
Replacement Procedure 6-10 GEAR_DUMPER
Disassembly mechanical Assy 2 screws.
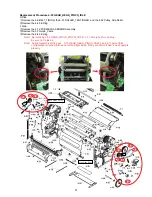
Replacement Procedure 6-11 GEAR_HEAD_PINCH_CAM_R
1-23 COVER_MECHA_R
E Ring 1 place.
Note) Be sure to lubricate gears and cams.
During assembly
5-15 GEAR_HEAD_PINCH_CAM_L and 6-11 GEAR_HEAD_PINCH_CAM_R
CAM-configuration must be matched on left and right sides. If they are not matched, it won't
operate properly.
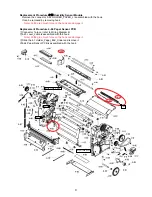
Replacement Procedure 6-30 STEP_MOTOR_MAIN_LC
1-4 CASE_FRONT
1-2 CASE_SIDE_R
1-22 COVER_MECHA_L
1-23 COVER_MECHA_R
4-68 Auto Cutter Unit
4-9 BELT_TIMING
4-22 Pulley, Grip Roller
4-53 GEAR_HEAD_PINCH_IDLE
4-55 GEAR_ROLL_REDUCTION_3
Please remove parts respectively.
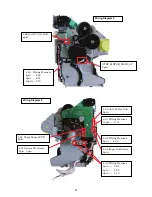
4-60 Wiring Harness 6pin
(
refer to Wiring Diagram 5
)
6-18 HOLDER_CABCLE_B
Remove the 6-4 STAY_MAIN_MOTOR the screw from 3 places.
Note) Be careful not to drop or lose the 6-7 Damper_Motor and the 6-27 Spcer_Motor_Damper
Remove the connector, and remove the screws from 2 places
Note) Check the warnings for all parts.
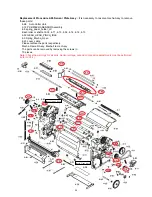
Replacement Procedure 6-12 Bearing(d6-D12)
1-23 COVER_MECHA_R
4-9 BELT_TIMING
4-22 Pulley, Grip Roller
4-7 SPRING_PINCH
Remove the 6-1 PLATE_PINCH_UP_
R
the E Ring from 2 place
E Ring 1 place.
Replacement Procedure 6-13 Holder_Ribbon_RFID
1-23 COVER_MECHA_R
2 screws
(
Screw torque 0.60
±
0.5N
・m)
Replacement Procedure 6-29 Holder_Ribbon_Supply_R
1-23 COVER_MECHA_R
3-22 screws 2 place

