14
Chain (47).
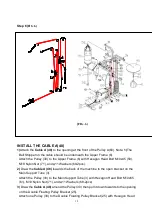
7)Attach a Chain (47) to the Cable B (49) by using a C-Clip (52). Attach the Arm Curl
Handle (20) to the Chain (47) by using another C-Clip (52). Adjust the Chain (47) to the
desired length.
Remove the Chain (47) and the Handle when using the Leg Developer.
INSTALL THE CABLE C(50)
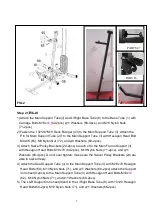
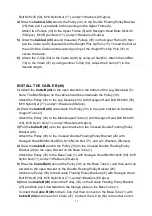
Attach one end of the Cable B (50) to the hook on the Right Butterfly Arm (11R).
1) Draw the CableC (50) to the right Swivel Pulley Bracket (24).
Attach a Pulley (30) to the right Swivel Pulley Bracket (24) with Hexagon Head Bolt
M10x45 (59), M10 Nylon Nut (71), and
φ
11Washers (68-2pcs).
2) Draw the Cable C (50) around the Pulley (30) on the right Swivel Pulley Bracket (24)
then pull it downwards to the Crossed Double Floating Pulley Bracket (26).
Attach the Pulley (30) to the Crossed Double Floating Pulley Bracket (26) with
Hexagon Head Bolt M10x45 (59), M10 Nylon Nut (71), and
φ
11 Washers (68-2pcs).
3) Draw the CableC (50) around the Pulley (30) on the Crossed Double Floating Pulley
Bracket (26) then pull it upwards to the left Swivel Pulley Bracket (24).
Attach a Pulley (30) to the left Swivel Pulley Bracket (24) with Hexagon Head Bolt
M10x45 (59), M10 Nylon Nut (71), and
φ
11Washers (68-2pcs).
Draw the CableC (50) around the Pulley (30) on the left Swivel Pulley Bracket (24)
then pull it forwards to the Left Butterfly Arm (12L).
Attach the other end of the CableC (50) to the hook on the Left Butterfly Arm (12L).
4)Finally, tighten the M10 Knob (44) onto the Pin for Main Support Tube (27).
Содержание CD-2006A
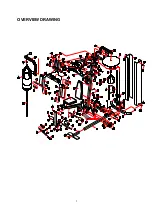
Страница 4: ...3 OVERVIEW DRAWING...


