Section 3: Operation
020-100001-01 Rev. 01 (04/07)
3-15
.
previously through the same input location. Once you have adjusted a display
parameter, such as pixel tracking or contrast, all current settings are collectively stored
in the projector's memory as a unique two-digit channel, such as
0
9
. You can
have numerous distinct channels available for the same input, any of which can be
selected by using the
Channel
key on the keypad followed by the two-digit channel
number.
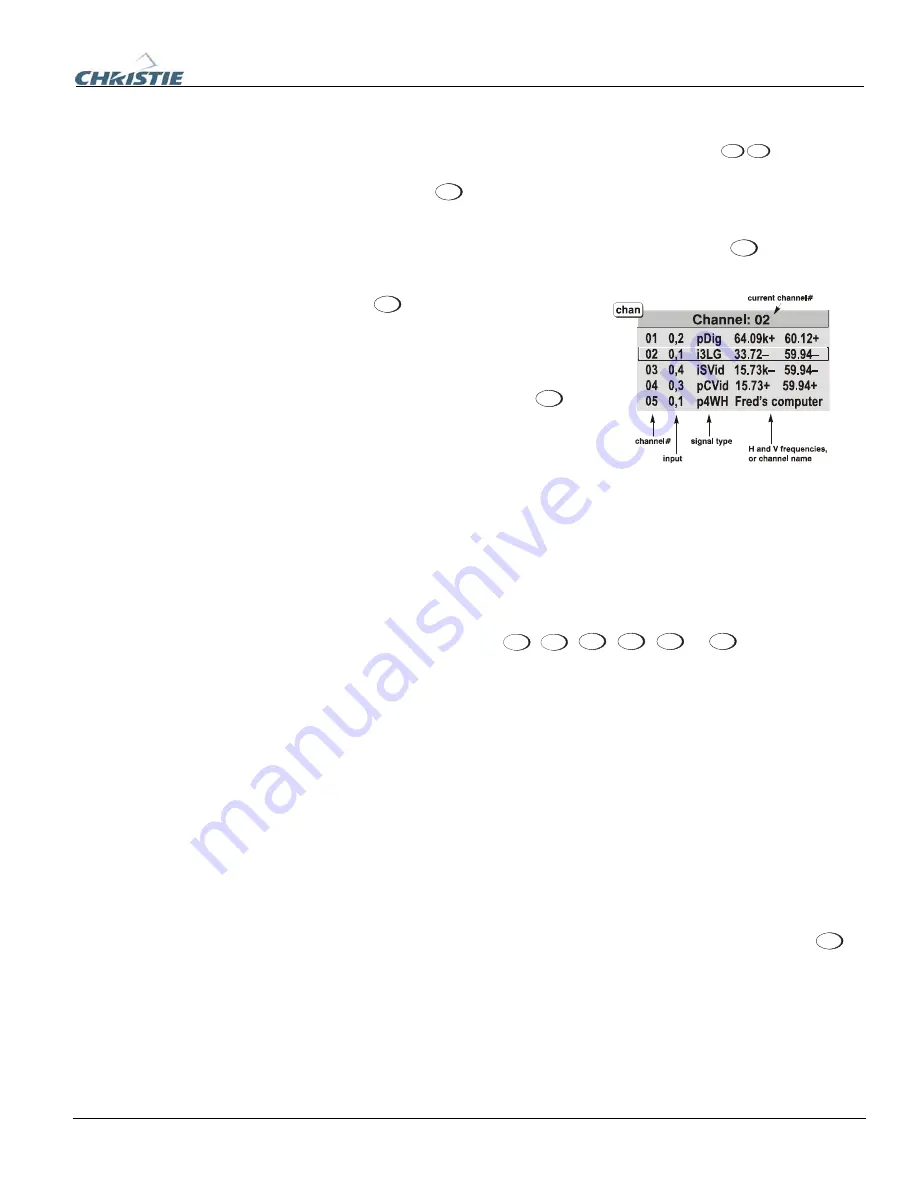
Shown at right is a sample channel list as would be available from
Channel
. This is
typically called the
channel list
.
NOTE:
The
Channel
key may display a channel
list or not, depending on what you have
defined for “Display Channel List” (see
Menu Preferences later in this section).
In order to access channels by using
Channel
on
the keypad, you must first create the channels.
See below.
To use a new source with the projector, a new channel must be added to projector
memory so that the projector will respond properly to an input signal from that source
in the future. A new channel can be created automatically, as described here, or it can
be copied from an existing channel and then edited as necessary (see
Copying or
Deleting Channels
later in this section).
When you select a direct input (
Input 1
,
Input 2
,
Input 3
,
Input 4
,
Input 5
or
Input 6
), any existing
channels in the projector are searched for matching input and signal parameters – this
only occurs if Auto Source is enabled on these channels. If no match to the incoming
input signal is found in currently defined channels, a new channel is temporarily
created based on factory-defined defaults for this type of signal. The
channel number
assigned is the lowest available number from 01-50.
NOTES: 1)
An automatic channel will be discarded unless one or more of its
parameters are changed and will not appear in the channel list (see below).
2)
If two
channels have the same distinguishing source characteristics except for the reversal
of sync connectors (i.e., H-sync and V-sync, are switched), they are still defined as
distinct channels.
3)
You cannot define a new channel without an incoming signal.
If the incoming signal
does
match an existing channel, the image will be set up and
displayed as usual according to the parameters currently defined for that channel.
USING A CHANNEL:
You can normally select a channel at any time by pressing
Channel
(see right). If you want to prevent a channel from appearing in this list, you must edit
the channel as described in
Channel Edit
later in this section. Such a channel can still
be selected by entering its number as shown at right.
Channel List
Creating
a
New
f
Channel
– AUTOMATIC –
Содержание DW6Kc
Страница 1: ...U s e r s M a n u a l U s e r s M a n u a l 020 100001 01 ...
Страница 3: ......
Страница 5: ......
Страница 9: ......
Страница 16: ...Section 2 Installation and Setup 020 100001 01 Rev 01 04 07 2 7 Figure 2 1 Vertical Offset Examples ...
Страница 17: ...Section 2 Installation and Setup 2 8 020 100001 01 Rev 01 04 07 Figure 2 2 Lens Vertical Offsets ...
Страница 19: ...Section 2 Installation and Setup 2 10 020 100001 01 Rev 01 04 07 Figure 2 4 Lens Horizontal Offsets ...
Страница 103: ......
Страница 119: ......
Страница 127: ......
Страница 135: ......
Страница 137: ......
Страница 139: ......
Страница 141: ...Appendix D Throw Distance D 2 020 100001 01 Rev 01 04 07 SXGA Lenses f ...
Страница 142: ...Appendix D Throw Distance 020 100001 01 Rev 01 04 07 D 3 ...
Страница 143: ...Appendix D Throw Distance D 4 020 100001 01 Rev 01 04 07 ...
Страница 144: ...Appendix D Throw Distance 020 100001 01 Rev 01 04 07 D 5 ...
Страница 145: ...Appendix D Throw Distance D 6 020 100001 01 Rev 01 04 07 ...
Страница 146: ...Appendix D Throw Distance 020 100001 01 Rev 01 04 07 D 7 ...
Страница 147: ...Appendix D Throw Distance D 8 020 100001 01 Rev 01 04 07 ...
Страница 148: ...Appendix D Throw Distance 020 100001 01 Rev 01 04 07 D 9 ...
Страница 149: ...Appendix D Throw Distance D 10 020 100001 01 Rev 01 04 07 ...
Страница 173: ......


