Section 3: Operation
020-100001-01 Rev. 01 (04/07)
3-11
.
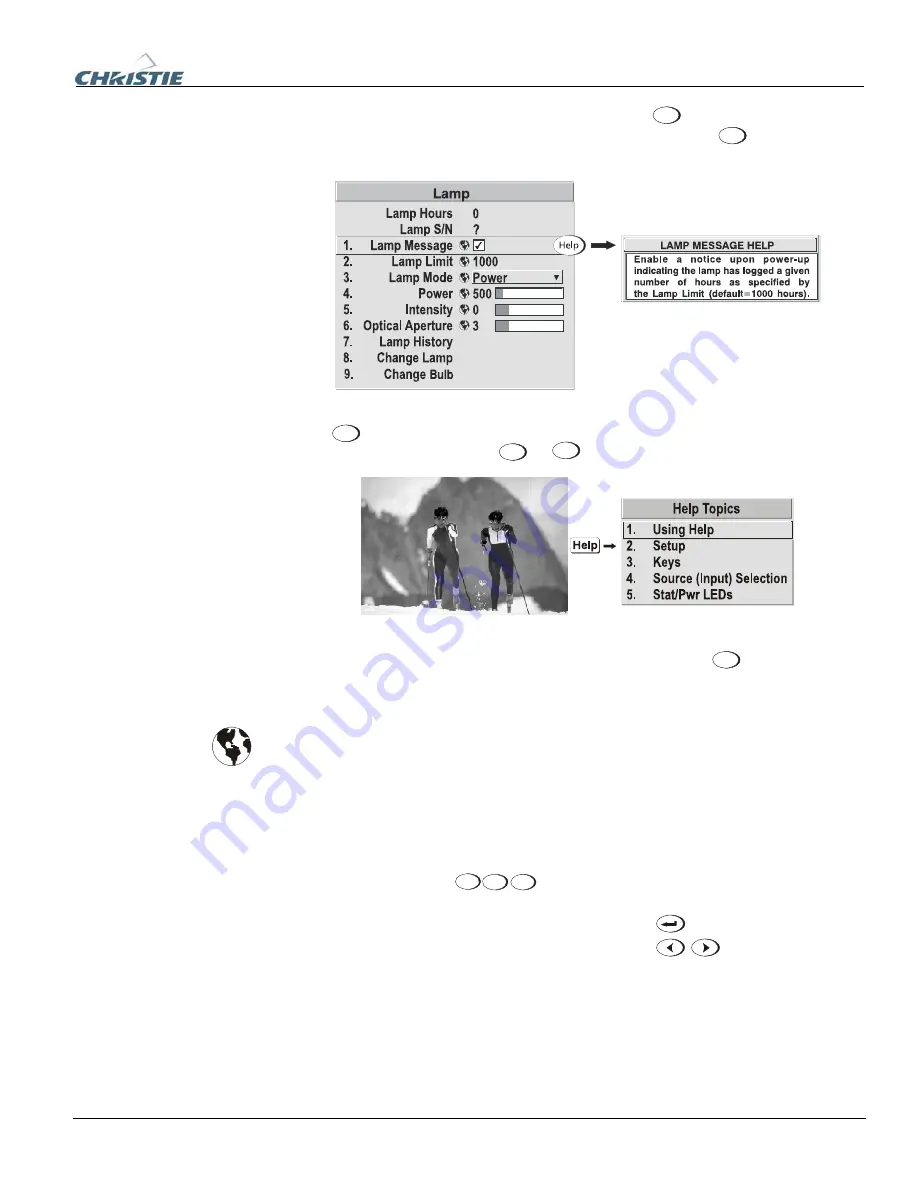
If at any time you are uncertain what to do next, press
Help
to display summary
information about the current menu or highlighted option. Press
Help
again to exit. In
addition, a line of “hint” text is included at the bottom of some menus.
Press
Help
from the presentation level to access general
Help Topics
. Scroll as
necessary within a topic; press
Help
or
Exit
to return to your presentation.
If a slide bar, menu, or message is displayed, you have limited time in which to make
a keypad entry before the projector returns to presentation level
Help
and the graphic
disappears. These time-outs may vary depending on what is displayed.
Menu options that include this icon apply universally to any incoming signal.
Most of the function menus allow you to change settings by using slide bars,
checkboxes, and pull-down lists. To select a slide bar, toggle a checkbox status, or
view a pull-down list, do one of the following within the function menu:
•
Enter the menu option number corresponding to the setting you wish to change
(for example, press
1
3
Menu
to select “Vertical Stretch” in the
Size &
Position
menu).
•
Move the highlight to the option desired and press
(Enter).
•
Move the highlight to the option desired and press
to adjust
immediately.
•
Bypass the menus entirely and use a single key to immediately access an
adjustment during your presentation (applies only to options having their own
key, such as Contrast, Brightness, Gamma, etc.).
•
For “blind” access, hide the entire menu system (see OSD key, above) and/or
direct slide bars activated by their own key (such as Contrast, Brightness, etc.).
Control by using the proper key press or numerical sequence of key presses.
On-line
Help
f
Time-outs
f
The
Global
Icon
f
Using Slide bars and
f
Other
Controls
Содержание DW6Kc
Страница 1: ...U s e r s M a n u a l U s e r s M a n u a l 020 100001 01 ...
Страница 3: ......
Страница 5: ......
Страница 9: ......
Страница 16: ...Section 2 Installation and Setup 020 100001 01 Rev 01 04 07 2 7 Figure 2 1 Vertical Offset Examples ...
Страница 17: ...Section 2 Installation and Setup 2 8 020 100001 01 Rev 01 04 07 Figure 2 2 Lens Vertical Offsets ...
Страница 19: ...Section 2 Installation and Setup 2 10 020 100001 01 Rev 01 04 07 Figure 2 4 Lens Horizontal Offsets ...
Страница 103: ......
Страница 119: ......
Страница 127: ......
Страница 135: ......
Страница 137: ......
Страница 139: ......
Страница 141: ...Appendix D Throw Distance D 2 020 100001 01 Rev 01 04 07 SXGA Lenses f ...
Страница 142: ...Appendix D Throw Distance 020 100001 01 Rev 01 04 07 D 3 ...
Страница 143: ...Appendix D Throw Distance D 4 020 100001 01 Rev 01 04 07 ...
Страница 144: ...Appendix D Throw Distance 020 100001 01 Rev 01 04 07 D 5 ...
Страница 145: ...Appendix D Throw Distance D 6 020 100001 01 Rev 01 04 07 ...
Страница 146: ...Appendix D Throw Distance 020 100001 01 Rev 01 04 07 D 7 ...
Страница 147: ...Appendix D Throw Distance D 8 020 100001 01 Rev 01 04 07 ...
Страница 148: ...Appendix D Throw Distance 020 100001 01 Rev 01 04 07 D 9 ...
Страница 149: ...Appendix D Throw Distance D 10 020 100001 01 Rev 01 04 07 ...
Страница 173: ......


