English — 5
In Stage 1, motor-driven, highly effective diamond abrasive disks remove the dull edge
and create a sharp fully faceted edge at the conventional 20 degrees. In Stage 2 similar
technology is used with finer diamond abrasives at a slightly larger angle to create a
small second bevel along the edge. This two step sharpening and honing process leaves a
stronger – arch shaped profile along the edge for greater strength and durability. In Stage
3 the edge is further refined to create a razor sharp Trizor edge of increased perfection,
sharpness and durability.
In Stage 1, 2 and 3 there are two knife-guiding slots. These are referred to as the left
and right slots that sharpen alternately the right and left side of the blade’s edge. When
sharpening, always follow an alternating pattern of sharpening in the right and left slots.
This pattern insures that both sides (facets) of the edge are sharpened alike for better
control of the cutting action of blade.
This three stage design provides the ultimate in versatility of the knife edge so that you
can tailor the edge geometry to your cutting needs. You will find that the DC 320 gives
you a very sharp edge and one that retains a significant bite for some of the more difficult
cutting tasks.
USING THE DC 320 SHARPENER
Note:
Always clean your knife before sharpening in the sharpener! For your safety, keep
your fingers clear of the blade edge at all times.
Try a practice pull through the sharpener with the power “OFF”. Slip the knife blade
smoothly into the left slot between the left angle guide of Stage 1 or Stage 2. Do not twist
the knife. Move the blade down in the slot until you feel it contact the diamond disk. Pull it
towards you lifting the handle slightly as you approach the tip. This practice pull will give
you a feel for the spring tension. Remove the knife and read the following instructions
specific to the type of knife you will be sharpening.
STAGE 1
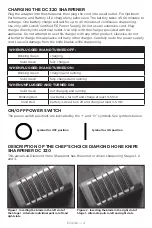
To sharpen, place the sharpener on the table gripping it securely with your hand. Push
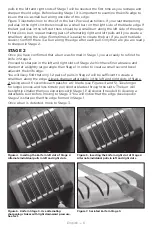
on the power switch. Insert the knife blade, (Figure 1) near its handle, into the far left slot
of Stage #1 and allow the left face of the blade to rest on the left face of the slot as you
pull the knife toward you. The knife edge should be in sustained moving contact with the
rotating diamond abrasive coated disk. Only light downward force will be necessary as
you pull the blade toward you. Listen carefully to insure your knife maintains good contact
with the rotating diamond disk. Each pull should be at a speed of around one inch per
second (6” blade=6 second pull).
Always pull the blade toward you. Never push the blade away from you. Make one pull of
the blade in the left slot as described above and then repeat the same procedure in the
adjacent (right) slot of Stage 1. As you pull the knife through the right slot, (see Figure
2), hold the right face of the knife against the slanted right face of the slot. If your knife,
before sharpening, is not very dull you will find that only about 5 pairs of pulls, alternating
in the left and right slots of Stage 1, will be sufficient to create a burr on the blade.
However, if the knife is initially very dull you may find that 10 or more alternating pairs of
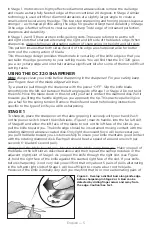
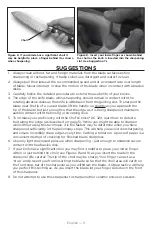
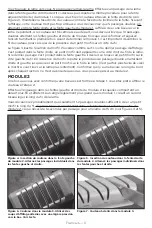
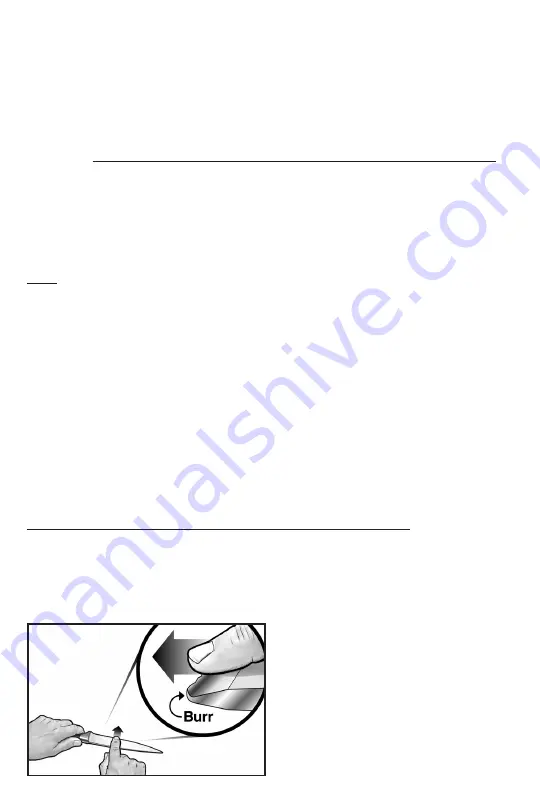
Figure 3. Develop a distinct burr along knife edge
before sharpening in Stage 2 or 3. Burr can be
detected by sliding finger across and away from
the edge. Caution! See text.
Содержание EdgeCraft DC 320
Страница 10: ...English 10 NOTE ...


