


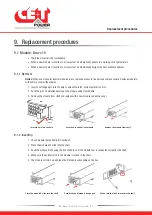


9. Replacement procedures
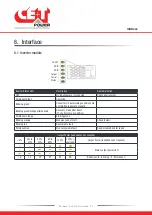
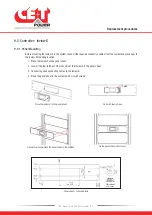
9.1 Module - Bravo 10
•
The Bravo inverter is hot swappable.
•
When a new module is inserted in a live system it automatically adapts to a working set of parameters.
•
When a new module is inserted in a live system it automatically assigns the next available address.
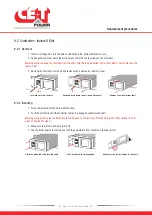
9.1.1 Removal
Notice:
When one or several inverter modules is/are removed access to live parts becomes possible. Replace module(s)
with dummy cover without delay.
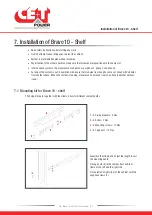
1. Insert a soft edged pin into the hole to unlock the latch. (Hole diameter is 3 mm)
2. Push the pin and simultaneously pull the module using front handle.
3. Remove the module from shelf and replace with a new module or dummy cover.
Push the pin and pull the module
Remove the module from shelf
Insert the pin into the hole
Pin
Hole
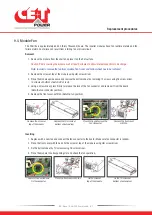
9.1.2 Inserting
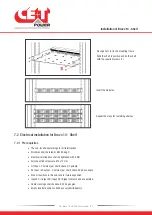
1. Check module compatibility (DC Voltage!).
2. Place the module and slide into the shelf.
3. Push the module firmly using the front handle, until the module rear is connected correctly with shelf.
4. Make sure the bottom latch in the module is locked in the shelf.
5. The module will start up and take the first address available on the bus.
Push firmly until module is engaged
Make sure the latch is locked in the shelf
Place the module & slide into the shelf
Replacement procedures
30
- Bravo 10 - 48/230 - User manual - v1.2
Содержание Bravo 10 - 48/230
Страница 43: ......


