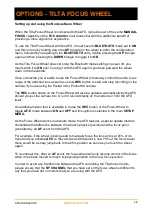
Component connection order.
As the AFX system comprises a number of mandatory and optional devices that connect
both wirelessly and wired, it is important that they are powered on in order.
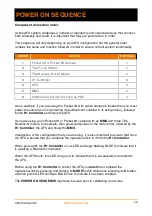
This sequence will vary depending on your AFX configuration but the general order
remains the same and must be followed in order to ensure correct system functionality.
As an example, if you are using the Pocket 4K with native electronic lenses then you must
power the camera on first (ensuring it has Bluetooth enabled in its setup menu), followed
by the
R1 Controller
and finally the AFX.
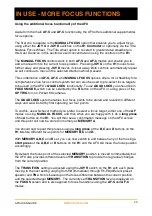
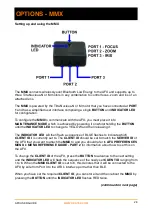
If you are using a non Pocket 4K or Pocket 6K camera with an
MMX
and three Tilta
Nucleus-N motors, for example, then you would power on the motors first, followed by the
R1 Controller
, the AFX and finally the
MMX.
Irrespective of the configuration that you are using, it is also important to ensure that once
the AFX is booted that you complete the operational link to it from the
R1 Controller
.
When you switch the
R1 Controller
on, its LED will begin flashing BLUE to indicate that it
is awaiting a Bluetooth connection.
When the AFX boots, this LED will go out to indicate that it is successfully connected to
the AFX.
Before using the
R1 Controller
to control the AFX you
must
then complete the
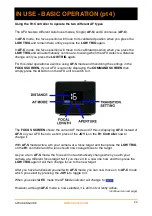
operational link by pressing and holding its
MODE
button whilst also pressing its
C
button,
at which point its LED will flash BLUE once to indicate it has been enabled.
The
POWER ON SEQUENCE
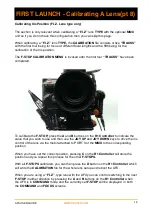
must also be used prior to calibrating a new lens.
ORDER
DEVICE
OPTIONAL
1
Pocket 4K or Pocket 6K Camera
✓
2
Tilta Focus Wheel
✓
3
Tilta Nucleus-N or M Motors
✓
4
R1 Controller
X
4
AFX
X
5
MMX
✓
6
Additional Client devices such as PBC
✓
AFX USER GUIDE
WWW.CDATEK.COM
29
POWER ON SEQUENCE


