E-18
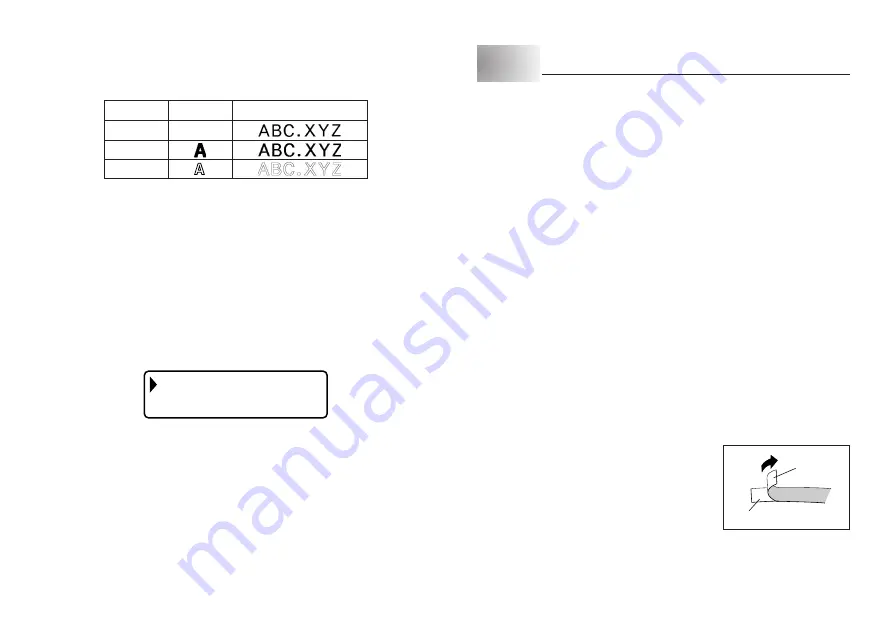
Tape
Backing
Character Styles
There are three character styles that you can assign; normal, bold, and outline.
The following shows examples of each.
Style
Indicator
Sample
Normal
None
Bold
Outline
Character style changes are applied to printed text only. The appearance of the
displayed text does not change, but the character style indicators will show you
when a character style is being used.
Important!
•
The character style effect setting is applied to all of the characters within the
block. You cannot make multiple specifications for specific characters.
•
Only one character style can be in effect at a time. You cannot combine
character styles.
To specify a character style
1. Input the text.
2. Press
FUNC 2
(STYLE) to display a menu of character styles.
N R M A L
D
O
L
O
B
3. Use
z
and
x
to move the pointer to the style you want to use.
4. When the pointer is located at the style you want to specify, press
SET
to
select it and return to the text display.
Note
•
You could also perform the above procedure in reverse, specifying the character
style first and then inputting the text.
Part 6
Printing
This part of the manual includes all the information you need to print tapes.
Printing Precautions
•
Never turn power off while printing is being performed.
•
Make sure that the tape outlet is not blocked before you start printing.
•
Never operate the tape cutter while printer is being performed (indicated by
the message “NOW PRINTING” on the display).
Important!
•
Never touch the tape cutter while a tape cut operation is being performed.
Doing so can result in cuts and other personal injury.
Printing a Tape
Printing a tape is as easy as pressing the
key.
To print a tape
1. While the text input screen is displayed, press
.
•
This will display a screen for specifying the number of copies.
2. Use
c
and
v
, or the number keys to specify the number of copies.
3. Press
SET
to start printing.
•
To stop a print operation that is in progress, press
ESC
.
4. After the print operation is complete, press down on the tape cutter button to
cut the tape.
5. Use scissors to trim the tape to the size you want, if necessary.
•
After you print a tape, you can peel off its paper
backing and stick the tape onto the object you
want. Note that the tape will not stick on coarse,
wet, oily, or soiled surfaces. Also, you should not
try to use the tape where it is exposed to direct
sunlight or rain. Do not stick the tape onto human
skin.
•
Do not affix labels to any container you plan to
use in a microwave range.
Содержание KL-120
Страница 1: ...E RJA518623 001V01 KL 120 User s Guide...
Страница 29: ...E 28 Alpha Characters Symbols...


