background image

Flexicode 

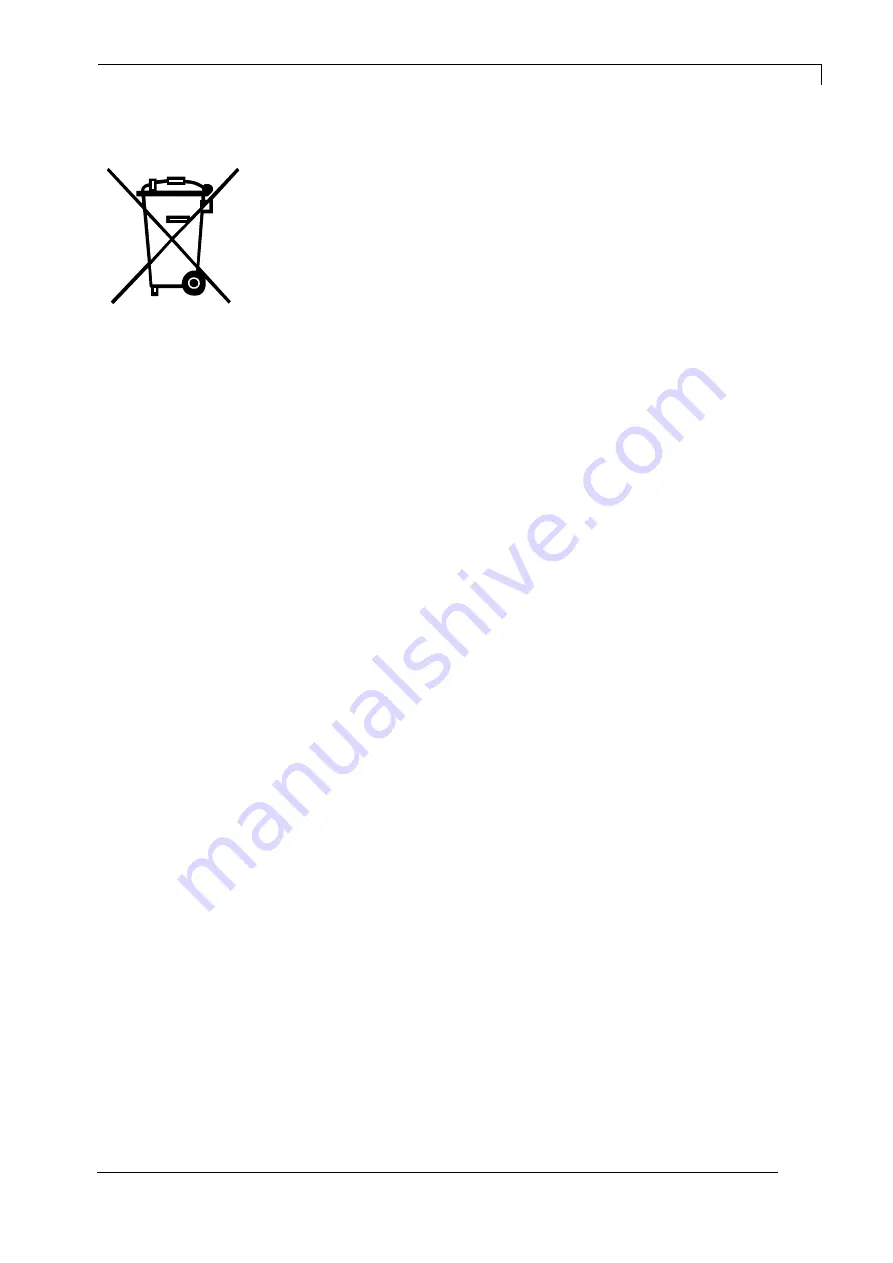
Environmentally-Friendly Disposal 


11.19 

Operating Manual 

115 


13  Environmentally-Friendly Disposal 

Hersteller von B2B-Geräten sind seit 23.03.2006 verpflichtet 
Altgeräte, die nach dem 13.08.2005 hergestellt wurden, 
zurückzunehmen und zu verwerten. Diese Altgeräte dürfen 
grundsätzlich nicht an kommunalen Sammelstellen abgegeben 
werden. Sie dürfen nur vom Hersteller organisiert verwertet und 
entsorgt werden. Entsprechend gekennzeichnete Valentin Produkte 
können daher zukünftig an Carl Valentin GmbH zurückgegeben 
werden. 

Die Altgeräte werden daraufhin fachgerecht entsorgt.  

Die Carl Valentin GmbH nimmt dadurch alle Verpflichtungen im 
Rahmen der Altgeräteentsorgung rechtzeitig wahr und ermöglicht 
damit auch weiterhin den reibungslosen Vertrieb der Produkte. Wir 
können nur frachtfrei zugesandte Geräte zurücknehmen. 

Die Elektronikplatine des Drucksystems ist mit einer Lithium Batterie 
ausgestattet. Diese ist in Altbatteriesammelgefäßen des Handels oder 
bei den öffentlich-rechtlichen Entsorgungsträgern zu entsorgen. 

Weitere Informationen finden Sie in der WEEE Richtlinie oder auf 
unserer Internetseite www.carl-valentin.de. 


Содержание FLEXICODE 53

Страница 1: ...FLEXICODE Operating Manual ...

Страница 2: ...s between manual and device can occur Please check www carl valentin de for the latest update Trademarks All named brands or trademarks are registered brands or registered trademarks of their respective owners and may not be separately labelled It must not be concluded from the missing labelling that it is not a registered brand or a registered trademark Carl Valentin direct print modules comply w...

Страница 3: ... 37 5 7 Initial Operation 37 5 8 Load Transfer Ribbon 38 5 9 Increase the Clamping Force for Ribbon Roll 39 6 Operation Panel 41 6 1 Keyboard Standard 41 6 2 Keyboard Text Entry User Guiding 42 7 Function Menu 45 7 1 Menu Structure Continuous Mode 45 7 2 Menu Structure Intermittent Mode 48 7 3 Print Settings 51 7 4 Machine Parameters Continuous Mode 52 7 5 Machine Parameters Intermittent Mode 54 7...

Страница 4: ...Drawing Roller 88 9 3 Clean the Printhead 88 9 4 Replace the Printhead 89 9 5 Angle Adjustment Intermittent Mode 91 9 6 Print Quality Optimisation 92 9 7 Cycle optimisation Intermittent Mode 93 10 Signal Diagrams 95 10 1 Continuous Mode 95 10 2 Intermittent Mode 99 11 Error Correction 101 12 Additional Information 111 12 1 Column Printing 111 12 2 Hotstart 112 13 Environmentally Friendly Disposal ...

Страница 5: ...me into contact with hot surfaces CAUTION indicates a potentially dangerous situation which could lead to moderate or light bodily injury or damage to property NOTICE gives you tips They make a working sequence easier or draw attention to important working processes Gives you tips on protecting the environment Handling instruction Optional accessories special fittings Datum Information in the disp...

Страница 6: ...int module in explosive atmosphere and not in proximity of high voltage power lines Operate the direct print module only in an environment protected against abrasive dust swarf and other similar impurity Maintenance and servicing work can only be carried out by trained personnel Operating personnel must be trained by the operator on the basis of the operating manual Depending on use ensure that cl...

Страница 7: ...njured CAUTION Two pole fuse Before opening the housing cover disconnect the printing system from the mains supply and wait for a moment until the power supply unit has discharged 1 4 Decommissioning and Dismantling NOTICE The decommissioning of printing system can only be carried out by trained staff CAUTION Danger of injury by imprudent handling when lifting or placing the printing system Do not...

Страница 8: ...Introduction Flexicode 8 Operating Manual 11 19 ...

Страница 9: ...nt module has a large selection at different font types It can be printed inverse in italic format or 90 degrees turned fonts The handling of our durable direct print modules is easy and comfortable The parameter settings are made with the keys of the foil keyboard At each time the graphic display shows the current status By a new developed electronics a maximum print speed up to 400 mm s can be a...

Страница 10: ...ring catch 4 Handle The cover 2 can be removed by the handle 4 with the spring catch 3 pressed down NOTICE No print job can be initiated when the cover is removed An internal cover sensor 1 checks the status of the cover open closed This sensor does not satisfy the requirements of a standard compliant safety switch see chapter 1 3 on page 6 Connection side of print mechanics Front of the print uni...

Страница 11: ...ard and USB memory stick 4 Encoder connection 5 USB interface 6 External inputs outputs 7 CF card slot 8 Touch Panel connection 9 Ethernet interface 10 RS 232 interface 11 Power supply with switch Connector assignment of control unit 12 LED green 12 Lighting Speed 100 MBit 12 Off Speed 10 MBit 13 LED orange 13 Lighting Connection active 13 Flashing Data transfer 13 Off No connection ...

Страница 12: ...nt order the printhead moves against the print medium The feed of material is registered by the encoder and then evaluated The printhead is in start position as long as the printing onto the moving material is finished and then it moves back to its home position Figure 5 NOTICE In case the encoder is connected to the counter pressure roll or the encoder roll you have to observe that the material h...

Страница 13: ...orresponding to the set or transferred layout length linear over the material which is to be printed After the print procedure the printhead again lifts up and the printing carriage moves again to the starting position The direct print module has a print length of 40 mm maximum The print start position is in a difference of approx 40 mm to the side panel ca 40m m m ax 40m m A B Figure 7 A Start po...

Страница 14: ...Machine Overview Flexicode 14 Operating Manual 11 19 ...

Страница 15: ...nd chapter 9 Maintenance and Cleaning These indications are also valid for someone else s equipment supplied by us Only use original spare and exchange parts Please contact the manufacturer with respect to spare wear parts The installation place of direct print module should be even free of vibration and currents of air are to be avoided The direct print modules have to be installed to ensure opti...

Страница 16: ...owed to guide lines parallel to power lines If a parallel guiding cannot be avoided a distance of at least 0 5 m has to be observed Temperature of lines between 15 80 C It is only allowed to connect devices which fulfil the request Safety Extra Low Voltage SELV These are generally devices which are checked corresponding to EN 60950 EN 62368 1 The data cables must be completely protected and provid...

Страница 17: ...test running and test printing Herewith you avoid faulty results reports and evaluation Only specially trained staff is allowed to operate the direct print modules Control the correct handling of our products and repeat training We do not guarantee that all features described in this manual exist in all models Caused by our efforts to continue further development and improvement technical data mig...

Страница 18: ...Operating Conditions Flexicode 18 Operating Manual 11 19 ...

Страница 19: ...idth Control unit 242 mm x 117 mm x 220 mm connecting cable set to mechanics 2 5 m Weight Print mechanics 6 0 kg Electronics with cable 3 7 kg Electronics Processor High Speed 32 Bit RAM 16 MB Slot Compact Flash card type I Battery cache for Real Time clock storage of data with shut down Warning signal acoustic signal when error Interfaces Serial RS 232C up to 115 200 Baud Parallel SPP USB 2 0 Hig...

Страница 20: ...n width and height 0 8 5 6 zoom 2 9 orientation 0 90 180 270 Vector fonts TrueType fonts size in width and height 1 99 mm variable zoom orientation 0 90 180 270 Font attributes depending on character font bold Italic inverse vertical Font width variable Bar Codes 1D bar codes CODABAR Code 128 Code 2 5 interleaved Code 39 Code 39 extended Code 93 EAN 13 EAN 8 EAN ADD ON GS1 128 Identcode ITF 14 Lei...

Страница 21: ... The ports are provided by means of a D Sub bushing 26pin HD at the rear panel of the printer system and are galvanically isolated from protective earth PE by means of an optocoupler semi conductor route Each port can be configured as input and as output This function however is predefined in the printer software and cannot be changed by the user The following parameters can be changed and set by ...

Страница 22: ...6 pink 7 blue 8 red 9 black 10 violet 11 grey pink 12 red blue 13 white green 14 brown greed 15 white yellow 16 yellow brown 17 white grey 18 grey brown 19 white pink 20 pink brown 21 white blue 22 brown blue 23 white red 24 brown red 25 white black 26 brown black Configuration of D Sub socket Cable identification ...

Страница 23: ...d with the terminal of the control voltage and the control inputs are switched to active By means of the option 2nd LED COM VDC for Inputs can optionally be connected with the terminal of the control voltage Then the control inputs are switched to active VDC for Outputs 20 Common supply connection of all control outputs VDC for Outputs must be connected with the terminal of the control voltage Nev...

Страница 24: ...odule and can be used e g as control voltage Never apply any external voltage to this output Port 1 to Port 16 Assignment for I O Profile Std_Direct Port Pin Description Function 11 Input 10 Print start 12 Input 11 No function 13 Input 11 Counter reset 14 Input 12 No function 15 Input 12 Error reset 16 Input 13 No function 17 Input 13 No function 18 Input 14 No function 19 Output 15 Error 10 Outpu...

Страница 25: ...t 19 Output 15 Error 10 Output 16 No function 11 Output 16 No function 12 Output 17 No function 13 Output 17 Ready 14 Output 18 No function 15 Output 18 Return printing carriage 16 Output 19 Transfer ribbon prior warning The files must be saved onto the CF card in the user directory see chapter 8 4 page 79 The files must start with one or two digits 1_Etikett prn 02_Etikett prn The files can be sa...

Страница 26: ...ut 17 Printing 13 Output 17 Ready 14 Output 18 No function 15 Output 18 Return 16 Output 19 Transfer ribbon prior warning Port 1 to Port 16 Assignment for I O Profile Old_Direct0 Port Pin Description Function 11 Input 10 Print start 12 Input 11 Error reset 13 Input 11 Counter reset 14 Input 12 No function 15 Input 12 No function 16 Input 13 No function 17 Input 13 No function 18 Input 14 No functi...

Страница 27: ... 100nF 10 kΩ Output Voltage 5 VDC 24 VDC Impedance 47Ω 100nF 10 kΩ 47Ω Current max High 15 mA Low 15 mA Port 16 Input Voltage 5 VDC 24 VDC Impedance 100nF 10 kΩ Output Voltage 5 VDC 24 VDC Impedance 100nF 10 kΩ Current max High 500 mA Darlington BCP56 16 Low 500 mA Darlington BCP56 16 Optocoupler Output TCMT4106 CTR 100 300 Vishay or TLP281 4 GB CTR 100 600 Toshiba Input TCMT4106 CTR 100 300 Visha...

Страница 28: ...Technical Data Flexicode 28 Operating Manual 11 19 Device connection to a machine with S7 300 SPS Figure 10 Device connection to a operating panel Figure 11 Example 1 Example 2 ...

Страница 29: ... internal voltages 5 VDC EXT or 24 VDC EXT is used an external fuse e g 0 5 AF should be additionally installed to protect the printer electronics In the event of an inductive load an antiparallel connected diode for instance must be used to discharge the induction energy In order to minimise the influence of leakage currents at control outputs a resistor must depending on what is connected be ins...

Страница 30: ...n connecting bushing contacts according to DIN 45322 PIN1 5 VDC PIN2 Encoder signal channel A PIN3 Encoder signal channel B PIN4 GND Operating voltage 5 VDC Output signal TTL level Resolution Can be set at the print module only for continuous mode Electrical data of encoder Connect the encoder ...

Страница 31: ...ule out of the box Check the direct print module for transport damages Remove the foam transportation safeguards near the printhead Check delivery for completeness Print mechanics Control unit Power cable Connecting cable Mini controller Manometer Pneumatic tube Push on connector I O accessories female connectors for I O I O 24 cable 1 transfer ribbon roll Empty core mounted on transfer ribbon rew...

Страница 32: ...from printhead to brake stator of 1 2 5 mm see illustration NOTICE A distance of 2 mm is recommended The best print results can be received if the silicon of printing roll consists of a hardness of approx 60 5 Shore A average value of roughness Ra 3 2 mm The print surface has to be installed parallel to the linear movement of print unit and the focal line of printhead Discrepancies to the focal li...

Страница 33: ... 1 78 1 90 3 5 40 208 1 77 5 76 ca 40 Figure 14 NOTICE The well thought out housing concept provides multiple possibilities for the cable outgoing With small space requirements the cables can be directed upwards downwards and to the side Required space for outgoing cable ...

Страница 34: ...to make a connection between the pressure regulator and the print mechanics via a plastic tube Ø 8 mm Please observe the following notes Position the pressure regulator as near as possible to the print mechanics The pressure regulator is only to operate in the direction that is indicated on its underside The direction shows the way of the streaming air It is not allowed to bend the plastic tubes S...

Страница 35: ...ssipation while printing the printhead is damaged An error message appears in case of too less pressure This error message serves to prevent overheating the printhead and is not suitable as pressure quality monitoring The print quality is also reduced with too low pressure Lift indicates the distance between the printhead and counter pressure plate in idle mode of device Recommended pressure power...

Страница 36: ... of power cable into a grounded electrical outlet NOTICE Insufficient or missing grounding can cause faults during operation Ensure that all computers and connection cables connected to the direct print module are grounded Connect the direct print module to a computer or network with a suitable cable 5 5 Before Initial Operation Mount the print mechanics Connect all cables between the print mechan...

Страница 37: ... or Ethernet The print is started by a start signal to the print start control input So that the control unit detects when the start signal can be set it is possible and mostly necessary to track the print status via the control outputs 5 7 Initial Operation After all connections are completed switch on the control unit The main menu appears which shows the model type current date and time Insert ...

Страница 38: ... go onto the rewinding unit 4 Insert the transfer ribbon according to the illustration 5 Fix the ribbon with an adhesive tape at the empty roll and tighten it by some turns of the core 6 Reinstall the protection cover NOTICE Before a new transfer ribbon roll is loaded the printhead must be cleaned using printhead and roller cleaner 97 20 002 For detailed information please see page 88 The handling...

Страница 39: ...ot sufficient in order to position the rolls surely and to protect it against rotating When using transfer ribbons with plastic cores a safe positioning of the roles cannot be ensured CAUTION Slippage of transfer ribbon roll placed on the rewinding unwind unit or the empty cardboard core leads to malfunctions When using transfer ribbon rolls with plastic cores the groove must be shimmed Remove the...

Страница 40: ...Installation and Initial Operation Flexicode 40 Operating Manual 11 19 ...

Страница 41: ...f start signal Confirm settings and modifications Stop and continue current print orders Delete a stopped print order with the key No further layout of the print order is printed Return to the previous input field Press the keys and to change the values Skip to the next input field Press the keys and to change the values In function menu increase the figure at the cursor position In main menu upwa...

Страница 42: ...Modus 0 Standard starting with figures M Starting with capital letters m Starting with small letters A Input Alt a Input Alt is switched off after one character Mode 0 This mode is displayed as default At first the figure which corresponds to the key is displayed then all capital and afterwards the small letters Mode M At first all capital then the small letters and at last the corresponding figur...

Страница 43: ...ect the entry mode Confirm the entry and change to the main menu Confirm and or finish the entry Cursor moves one position to the left Cursor moves one position to the right Customized variables user guiding Change between the individual entries Customized variables user guiding Change between the individual entries C Delete the complete input The input is deleted only if before entered by using t...

Страница 44: ...Operation Panel Flexicode 44 Operating Manual 11 19 ...

Страница 45: ...ameters Check Material Speed Resolution Material Feed Material Speed Print length Column printing Material selection Flip layout Rotate layout Layout Settings Alignment Operating Mode Ribbon Save Transfer Ribbon Correction Distance Number Cycles Speed Expert Parameters Field Handling Codepage External Parameters Buzzer Display Language Customized Entry Hotstart Standard Layout Device Settings Layo...

Страница 46: ...ame Network MAC Address Operation Network Password COM1 Baud Parity Data Bits Stop Bit Interface Start Sign Stop Sign Data Memory Port Test Protocol Printhead Resolution Drive Mapping Emulation PJL Set Date Time Summertime Start of Summertime Format Start of Summertime Date Start of Summertime Time End of Summertime Format End of Summertime Date End of Summertime Time Time Shifting Date Time ...

Страница 47: ...ance Printhead Temperature Print Examples Input Output Online Offline Transfer Ribbon Prior Warning Service Functions Transfer ribbon Write log files to memory card Load Layout Change Directory Load File Save Layout Save Configuration Delete File Formatting CF Card USB Stick Copying Firmware Update ...

Страница 48: ...ffset Print Position Layouts Cycle Maschine Parameters Print length Column printing Material selection Flip layout Rotate layout Layout Settings Alignment Operating Mode Ribbon Save Transfer Ribbon Correction Expert Parameters Field Handling Codepage External Parameters Buzzer Display Language Customized Entry Hotstart Standard Layout Device Settings Layout Confirmation Keyboard ...

Страница 49: ...ready Error I O Parameters Save signal I O Profile IP Address Netmask Standard Gateway Speed Duplex DHCP Printer Name Network MAC Address Operation Network Password COM1 Baud Parity Data Bits Stop Bit Interface Start Sign Stop Sign Data Memory Port Test Protocol Printhead Resolution Drive Mapping Emulation PJL ...

Страница 50: ...ate End of Summertime Time Time Shifting Date Time Photocell Parameters Paper Counter Heater Resistance Printhead Temperature Print Examples Input Output Online Offline Transfer Ribbon Prior Warning Service Functions Transfer ribbon Write log files to memory card Load Layout Change Directory Load File Save Layout Save Configuration Delete File Formatting CF Card USB Stick Copying Firmware Update ...

Страница 51: ... menu item Examination if the transfer ribbon roll is empty and or if the ribbon was torn at the unwinding roll The current print order is interrupted and an Error Message appears at the printer display Off The ribbon control is deselected i e the printer continues without an error message On weak sensibility default The printer reacts at approx 1 3 more slowly to the end of the transfer ribbon On...

Страница 52: ... entered at print start is printed level evaluation of print start signal IO ST F IO static continuous Corresponds to IO static Continuous means that not only a defined number of pieces is processed but the same layout is printed as long as new data is transferred by interface IO DY IO dynamic The external signal is evaluated dynamically i e in case the direct print module is in waiting mode a sin...

Страница 53: ...key to move to the next menu item Indication of number of printed layouts per print start cycle Value range 1 25 Press the key to move to the next menu item Check material speed at print start signal Off Default Material speed is only checked if the set offset value is taken into consideration The print start signal can be given although the material is not yet moving However until the end the mat...

Страница 54: ...is transferred After the generating process the target number and the actual number of pieces is shown in the display A cycle is started via signal input 1 or with the key With each cycle the actual number of pieces is increased by the number of printed layouts In case the target number of pieces is reached the print order is finished and the display shows again the main menu Continuous A print or...

Страница 55: ...ife of the printhead Because of the mass moment of inertia it could be better to reduce the speed at an installation position of the print unit at 30 horizontal Value range 50 600 mm s Press the key to move to the next menu item Indication of distance of the layout res the first layout in case more layouts per cycles are to be printed to the zero point of machine Value range 0 999 mm Default 0 mm ...

Страница 56: ...flection is in the middle of the layout If the layout width was not transferred to the direct print module automatically the default layout width i e the width of the printhead is used It is recommended to use layouts with the same width as the printhead Otherwise this can cause problems in positioning Press the key to move to the next menu item According to standard the layout is printed ahead wi...

Страница 57: ...d with the available time which is needed for decelerating and accelerating of transfer ribbon There are two different types of ribbon save It is tried to save transfer ribbon with gaps within the layout Because of the fact that the gaps are usually very small only little time is available Therefore a feedback is not reasonable lack of time The gaps between the layouts are optimised Usually more t...

Страница 58: ... e g feedback distance and smallest possible print offset are being calculated Example Speed 400 Mode Standard Very good ribbon save result between 50 mm s 400 mm s However if you print with a speed higher than 400 mm s then the ribbon save result is decreased and or the ribbon save can no longer be executed because the back feed way was designed to 400 mm s Please consider if speed is set to 400 ...

Страница 59: ...r This causes that it is printed onto the transfer ribbon in the previous printout W W W W W W W W Press the key to move to the next menu item sa mm The smallest possible distance of two prints with full ribbon save the print offset must be set to the minimum value As basis for the calculation the set ribbon save parameters are used as well as mode and especially the indicated max print speed cmin...

Страница 60: ...rameter as maximum speed If the material speed exceeds the maximum speed the print is interrupted as long as the material speed is again under the maximum speed Press the key to move to the next menu item PHupT printhead up time in ms Is used from ribbon save algorithm to calculate if a field ribbon save can be made or not PhVReactT valve reaction time in ms It is calculated when the printhead upw...

Страница 61: ...rint position If the ribbon save algorithm is not able due to fast changes in material speed to keep the demanded ribbon save ribbon correction then the print position can be kept by an increased transfer ribbon use Press the key to move to the next menu item If 0 default value is set the parameter has no influence to the ribbon save Otherwise the ribbon save algorithm does not use the measured sp...

Страница 62: ...imal ribbon save is reached no loss of transfer ribbon This is rather rarely realised as the ribbon position can deviate because of inaccuracies at speed measurement encoder Default 1 mm xx mm The feedback can be made smaller It causes loss of transfer ribbon but the number of cycles is increased If the value is increased to the complete backfeed length then the direct print module sets automatica...

Страница 63: ...to move to the next menu item PhVReactT valve reaction time in ms It is calculated when the printhead upwards movement is started Press the key to move to the next menu item Tension Indication of length which is transported forward after measuring the transfer ribbon 0 The transfer ribbon is retracted after each printout over the complete print length i e no ribbon save between the individual layo...

Страница 64: ...e All graphics and TrueType fonts are again printed Exception With column printing always full columns must be printed number of pieces always multiple of the columns Deleted columns are not restored Press the key to move to the next menu item Indication of the font used in the direct print module The following possibilities are available ANSI character set Codepage 437 Codepage 850 GEM German GEM...

Страница 65: ...he customized variable appears after every layout without additional query for the quantity Press the key to move to the next menu item On Continue an interrupted print order after switching on the printer anew Off No question appears at the display In this case the stored default value is printed 12 2 page 112 Press the key to move to the next menu item On A layout which was loaded once from CF c...

Страница 66: ...is printed as long as the confirmation is effected at the device Off No query appears at the display of control unit Press the key to move to the next menu item On If a print order is started without previous definition of layout the standard layout is printed Off If a print order is started without previous definition of layout an error message appears in the display Layout confirmation Standard ...

Страница 67: ...n case the start signal is not clear then you can debounce the input by means of this menu item Press the key to move to the next menu item Indication in time per second of the delay for the start signal Value range 0 00 9 99 Press the key to move to the next menu item On If a print order is active but the direct print module is not ready to process the order e g if it is already in printing mode ...

Страница 68: ...lease see the separate manual 7 13 Password Switch on the label printer and the display shows the main menu Press the key to access the function menu Press the key until the menu Password is displayed Press the key to select the menu With a password different functions can be blocked for the operator There are different applications with which such a password protection can be used reasonably To r...

Страница 69: ...e password protection prevents that prints can be produced manually Press the key to move to the next menu item In order to execute a blocked function first of all the valid password has to be entered If the correct password is entered then the desired function can be executed Network Entering a 15 digit password The password can consists of alphanumeric and special characters Press the key to mov...

Страница 70: ...stop bits between bytes Value range 1 or 2 stop bits Press the key to move to the next menu item SOH Start of data transfer block Hex format 01 ETB End of data transfer block Hex formal 17 Two different start en signs can be set The settings are normally SOH 01 HEX and ETB 17 HEX Several host computers cannot process these signs and therefore SOH 5E HEX and ETB 5F cannot be set Press the key to mo...

Страница 71: ...on of the emulated device must be set e g 11 8 Dot mm 300 dpi NOTICE If the printhead resolution of the Zebra printer differs from that of the Valentin device then the size of objects e g texts graphics complies not exactly Press the key to move to the next menu item The access to Zebra drives B CF card R RAM Disk standard drive if not indicated is rerouted to the corresponding Valentin drives A C...

Страница 72: ... of this function you can enter the date at which summertime has to start This entry refers to the previously selected format Press the key to move to the next menu item By means of this function you can define the time when you want to start summertime Press the key to move to the next menu item Select the format in which you want to define end of summertime The example above indicates the defaul...

Страница 73: ... for the status of transfer ribbon unwinding roll 4 possibilities are indicated no marking in photocell marking from right marking from left marking completely in photocell E Encocer Indication of current state of encoder C Carriage Indication of print carriage position Press the key to move to the next menu item D Indication of printhead attainment in meters G Indication of device attainment in m...

Страница 74: ...al Interrupts The start input impulses are counted directly at the Interrupt Dbnc Debounced The start input impulses that are longer than the set debounce time are counted Only these start impulses can lead to a print If a start impulse is too short no print is released This is recognized by the fact that RInt is counted Dbnc not NPrn Not Printed The debounced start input impulses that have not le...

Страница 75: ...ching the transfer ribbon advance warning diameter with the message too less ribbon Press the key to move to the next menu item Starting with firmware version 1 70 the printer logs different events internally In case of service the error cause can be located faster With this command different log files are saved on an existing storage medium memory card or USB stick After the Finish message the st...

Страница 76: ... print order The display shows the following Press the key key to continue the interrupted print order In case an active print order was interrupted by means of key and afterwards the key pressed then the print order was cancelled and the direct print module changes to the main menu During the print order the number of layouts which already printed is indicated Press the key to move to the menu it...

Страница 77: ...it is recommend to copy the most important data by means of a commercial Card Reader 8 2 Display Structure Load layout A STANDARD File_name1 prn File_name2 prn File_name3 prn File_name4 prn 1 Current function 2 2 lined header 3 Scroll range 4 File names directory names 5 Marking of the selected file cursor 6 Current path drive directory The two line header 2 contains the current function name 1 an...

Страница 78: ...evious menu Function Load layout Change to the File Explorer File Explorer Change to the context menu Select a file directory if a multiple selection is possible Main menu Access to the memory menu File Explorer Create a new file Start the current function for the active file directory Change to the superordinate directory Change to the currently marked directory In the current directory scroll up...

Страница 79: ...f CF card is effected at PC and thus the STANDARD directory was not created automatically The user directory is the root directory in which the user saves usually the most frequently used files layouts The utilisation of the user directory permits the quick and direct access to the files saved in the defined user directory The definition of a user directory saves thus a long search of the file to ...

Страница 80: ...as user directory 8 5 Load Layout Loads a layout within a defined user directory The function allows quick access to the desired layout as only layout files are displayed and directories hidden Press the key to access the memory menu Press the keys to select the layout to be printed Press the key to confirm the selection The printer display shows automatically the window to insert the number of co...

Страница 81: ...e key to access the File Explorer Following functions are available Change drive and or directory Load file Save layout and or configuration Delete file s Format CF card Copy file s Selection of drive and or directory in which the files are saved Press the key to access the memory menu Press the key to call the File Explorer Press the keys to select the directory Press the key to confirm the selec...

Страница 82: ...to load the selected file If the selected file is a layout then the number of copies to print can be entered immediately Saves the currently loaded layout under the selected name Press the key to access the memory menu Press the key to call the File Explorer Press the key to move to the menu Save file Select the function Save layout and press the key to confirm the selection If an USB keyboard is ...

Страница 83: ...letes one or more files and or directories irrevocably With the deletion of a directory both the contained files and the subdirectories are deleted Press the key to access the memory menu Press the key to call the File Explorer Press the keys and to select the file Press the key to mark the files which are to be deleted The marked entries are listed with Repeat this procedure until all desired fil...

Страница 84: ... USB sticks cannot be formatted at the printer Press the key to access the memory menu Press the key to call the File Explorer Select the drive which is to format with the navigation keys Press the key to call the context menu Select the function Format and press the key to confirm the selection Format memory card ...

Страница 85: ... the File Explorer Press the keys and to select the file Press the key to mark the files which are to be copied The marked entries are listed with Repeat this procedure until all desired files and or directories are marked for copying Press the key to call the context menu Select the function Copy and press the key to confirm the selection Select the target storage with the navigation keys and pre...

Страница 86: ...ected loaded In the first step the printer executes the firmware update After the necessary restart automatically the file data prn is loaded In this way the remaining components were updated is After a renewed restart the update procedure is finished 8 8 Filter For certain functions a filter mask or a file name of a file which is to be saved can be entered This input is indicated in the path line...

Страница 87: ...ut is adversely affected Clean the printhead see section 9 3 page 87 Each time the transfer ribbon is changed or when the printout is adversely affected Replace the printhead see section 9 4 page 89 In case of errors in printout NOTICE The handling instructions for the use of Isopropanol IPA must be observed In the case of skin or eye contact immediately wash off the fluid thoroughly with running ...

Страница 88: ...Printhead Printing can cause accumulation of dirt at printhead e g by colour particles of transfer ribbon and therefore it is necessary to clean the printhead in regular periods depending on operating hours environmental effects such as dust etc CAUTION Printhead can be damaged Do not use sharp or hard objects to clean the printhead Do not touch the protective glass layer of the printhead 1 Remove...

Страница 89: ...ntacts on the plug connections Do not touch the printhead with hard objects or your hands C D A E B Figure 19 1 Remove the cover 2 Move the printhead unit in an appropriate service position 3 Press the printhead support A slightly downwards until an Allen key can be inserted in the screws C 4 Unscrew the screws C and remove the printhead B with the printhead flat rod E 5 Remove connection at the r...

Страница 90: ...in the appropriate holes in the printhead support A 4 Hold the printhead holder A with a finger slightly on the pressure roll and check the correct position of the printhead B 5 Screw in the screw C and tighten it with an Allen key 6 Insert again the printhead cable 7 Insert the transfer ribbon see chapter 5 8 page 38 8 Enter the resistance value of the new printhead in the menu Service Functions ...

Страница 91: ...qual use Higher wastage of ribbon by faster ripping Only change the factory settings in exceptional cases 1 Loosen slightly the Allen head screws A 2 Move the adjusting part C to adjust the angle between the printhead and printhead support move downwards decrease angle move upwards increase angle 3 Tighten again the Allen head screws A 4 Start a print order with approx three layouts to check the c...

Страница 92: ...trast Increase the pressure Reduce the print speed Reduce the transfer ribbon speed Reduce the distance between printhead and print surface Change the combination of transfer ribbon and print medium Control the print surface hardness Change the printhead angle Partial inferior print quality on one side Align the surface parallel to printhead Set regular the transfer ribbon tension Set regular the ...

Страница 93: ...he effective print speed and it this way the clock cycle Generally increase the print speed Generally increase the back speed Increase acceleration and brake ramp Change the zero point of machine Avoid vertical installation position of the print mechanics Install the machine in horizontal position Ensure a short distance between the printhead and print surface Switch off the ribbon save function O...

Страница 94: ...Maintenance and Cleaning Flexicode 94 Operating Manual 11 19 ...

Страница 95: ... and a print order is only finished after the feed of the complete layout the smallest possible time between two start impulses depends also from the layout length In case the printable data is only at the beginning of the layout and the rest of the layout is empty then the time of start impulse by minimising the layout length not for data memory extended can be decreased As soon as the generation...

Страница 96: ...rect print module has no further action At receipt of the following layout the time of receipt is longer because the direct print module receives data and prints at the same time In mode data memory extended already received data is always generated after the start of a print order Before the current print order is finished the next one is already generated The signal output is therefore active an...

Страница 97: ...o print are the same and therefore it is only necessary to generate the layout once Because only 1 print order is send the direct print module has only to receive once As the print order consists of three layouts the print order output is active as long as all 3 layouts are printed In dispenser mode dynamic only the slope of the start impulse is recognised as valid print start signal However the i...

Страница 98: ...n dispenser mode static the level of the start impulse is recognised as valid start signal In case the level is activated then the print is continued immediately if the following layout is already generated After deleting the signal the machine prints until the end of the current layout and then the direct print module waits for the next start impulse Dispenser Mode Static Layout Print start print...

Страница 99: ...Flexicode Signal Diagrams 11 19 Operating Manual 99 10 2 Intermittent Mode Single item processing Continuous mode ...

Страница 100: ...Signal Diagrams Flexicode 100 Operating Manual 11 19 ...

Страница 101: ...vailable Check font 7 Vector font Selected font is not available Check font 8 Measuring label While measuring no label was found Set label length is too large Check label length and if labels are inserted correctly Restart measuring anew 9 No label found No label available Soiled label photocell Labels not inserted correctly Insert new label roll Check if labels are inserted correctly Clean the la...

Страница 102: ...ived check digit is wrong Calculate check digit anew Check code data 21 Invalid SC code Selected SC factor is invalid for EAN res UPC Check SC factor 22 Invalid number of digits Entered digits for EAN res UPC are invalid 12 13 Check number of digits 23 Type check digit Selected check digit calculation is not available in the bar code Check calculation of check digit Check bar code type 24 Invalid ...

Страница 103: ...en Close the printhead and start print order anew 36 BCD invalid format BCD error Invalid format for the calculation of Euro variable Check entered format 37 BCD overflow BCD error Invalid format for the calculation of Euro variable Check entered format 38 BCD division BCD error Invalid format for the calculation of Euro variable Check entered format 39 FLASH ERROR Flash component error Run a soft...

Страница 104: ...required files 54 File directory exists The selected file directory already exists Check name select a different name 55 File too large During copying procedure not enough memory space onto target drive available Use a larger target card 56 No update file Errors in update file of firmware Start update file anew 57 Invalid graphic file The selected file does not contain graphic data Check file name...

Страница 105: ...ge printhead 71 Invalid page As page number either 0 or a number 9 is selected Select a number between 1 and 9 72 Page selection A page which is not available is selected Check the defined pages 73 Undefined page The page is not defined Check the print definition 74 Format user guiding Wrong format for customized entry Check the format string 75 Format date time Wrong format for date time Check th...

Страница 106: ... use an offset 88 RFID verify Error while checking programmed data Faulty RFID label Check RFID definitions 89 RFID timeout Error at programming the RFID label Label positioning Faulty label 90 RFID data Faulty or incomplete definition of RFID data Check RFID data definitions 91 RFID tag type Definition of label data does not correspond with the used label Check storage partitioning of used label ...

Страница 107: ...nsor signal down is missing Check input signals compressed air supply 102 Vacuum plate empty Option applicator Sensor does not recognize a label at vacuum plate Check input signals compressed air supply 103 Start signal Print order is active but device not ready to process it Check start signal 104 No print data Print data outside the defined label Selection of wrong module type design software Ch...

Страница 108: ...s for cross traverse 116 Print position Option applicator The applicator is not in the print position when trying to print a label Check TOP and RIGHT final position switch for correct function and position Check pneumatics for function 117 XML parameter The parameters in the XML file are not correct Please contact your responsible distributor 118 Invalid variable Transferred variable is invalid w...

Страница 109: ...RFID programming faulty Run RFID initialising 127 Module not found RFID module not available Check the RFID module connection Please contact your responsible distributor 128 No release signal No print release by higher level control customer machine Activate release signal at the higher level control 129 Wrong firmware Firmware does not match the used printer type Use firmware that fits to the pri...

Страница 110: ...nt available No label data for reprinting available Send new label data to the printer 137 Printhead short circuit Electrical short at the printhead Check the used printhead Please contact your distributor 138 Too less ribbon Transfer ribbon ends Change transfer ribbon 139 Hardware error A hardware component could not be found Please contact your responsible distributor ...

Страница 111: ...x coordinate i e it has the largest distance to the printhead Press the key to access the function menu Press the key until the menu Layout is displayed Press the key to confirm the selection Press the key until the menu item Width Columns is displayed Press the keys and to set the layout width The Width is the width of one column e g 20 0 mm Press the keys and to move to the Column input field Pr...

Страница 112: ...ding directory of the CF card However the following conditions have to be fulfilled CF card inserted in drive A CF card not write protected Enough free storage space onto CF card An error message appears in case these conditions are not fulfilled At switching off the direct print module the state of the current print order is saved to the corresponding directory of the CF card However the followin...

Страница 113: ...e a customized entry was active during switching off the direct print module the window for the first customized variable is displayed As in the intended file only the start values of the counter are saved they are refreshed at a new start of the print order by means of the number of printed layouts Each counter is counted corresponding from its start value Afterwards the position of the current a...

Страница 114: ...Additional Information Flexicode 114 Operating Manual 11 19 ...

Страница 115: ...nen daher zukünftig an Carl Valentin GmbH zurückgegeben werden Die Altgeräte werden daraufhin fachgerecht entsorgt Die Carl Valentin GmbH nimmt dadurch alle Verpflichtungen im Rahmen der Altgeräteentsorgung rechtzeitig wahr und ermöglicht damit auch weiterhin den reibungslosen Vertrieb der Produkte Wir können nur frachtfrei zugesandte Geräte zurücknehmen Die Elektronikplatine des Drucksystems ist ...

Страница 116: ...Environmentally Friendly Disposal Flexicode 116 Operating Manual 11 19 ...

Страница 117: ...n 83 save layout 82 connecting 36 connections control unit 11 connections print mechanics 10 continuous mode material guiding 12 material speed 12 print principle 12 control inputs control outputs 21 22 23 24 25 26 27 28 29 D decommissioning dismantling 7 display during printing 76 E encoder pin assignment 30 environmentally friendly disposal 115 error messages error corrections 101 102 103 104 10...

Страница 118: ...ration 37 initial operation preparations 36 installation at machines 32 instructions 5 intended use 5 6 intermittent mode print position 13 print principle 13 K keyboard standard 41 text entry user guiding 42 43 M machine overview 9 maintenance cleaning angle adjustment 91 cycle optimisation 93 general cleaning 87 print quality optimisation 92 printhead cleaning 88 printhead replacing 89 90 ribbon...

Страница 119: ...ons 6 7 scope of delivery 31 signal diagrams continuous mode 95 96 97 98 intermittent mode 99 space cable outgoing 33 T technical data 19 20 transfer ribbon loading 38 U unpacking 31 USB stick change directory 81 copying 85 delete file 83 display structure 77 filter 86 firmware update 86 load file 82 load layout 80 navigation 78 save configuration 83 save layout 82 ...

Страница 120: ...Carl Valentin GmbH Neckarstraße 78 86 u 94 78056 Villingen Schwenningen Phone 49 7720 9712 0 Fax 49 7720 9712 9901 info carl valentin de www carl valentin de ...

Отзывы: