8200-M554-O1 Rev C 2XX-EIP Installation and Setup Manual
2
INSTALLATION
Mounting the 2XX-EIP Option Card
NOTE:
Should your indicator come with the 2XX-EIP option card already installed, the
following section describing mounting does not apply. Proceed to the
Node Address Setup
section.
CAUTION!
This board contains static sensitive components. Improper
handling can result in damage to or destruction of the components or board.
Such actual and/or consequential damage IS NOT covered under warranty.
1.
Make sure the power to the indicator is OFF. Unplug the AC power cord.
2.
Loosen the gland connectors where the AC power cord and any other cables enter the
indicator.
3.
Remove the rear panel on the indicator.
On the 205/210, remove the 12 acorn nuts securing the rear panel to the front housing.
On the 225, remove the 14 acorn nuts securing the rear panel to the front housing.
4.
Separate the rear panel from the front housing on the indicator.
5.
Lift the panel from the main housing, taking care not to stretch the cable and wires between
the panel and main housing. Lay the panel on the workbench next to the indicator.
6.
Referring to the illustrations on page 3, locate the threaded stand-off and the OPTION
BOARD connector on the indicator mainboard.
205/210 – The threaded stand-off is below P3 and the OPTION BOARD connector
is P10.
225 – The threaded stand-off is near P9 and the OPTION BOARD connector is P15.
7.
To install the option 2XX-EIP card, carefully align the connector P4 (pins on the bottom side
of the 2XX-EIP board) with connector P10 on the 205/210 or P15 on the 225 mainboard
and then apply even downward pressure to the end of the 2XX-EIP board (with P4 pins on
the bottom side).
8.
Align the hole in the 2XX-EIP board with the threaded stand-off on the indicator main board
and using the lock washer and screw supplied with the 2XX-EIP board, secure the 2XX-EIP
to the indicator mainboard.
9.
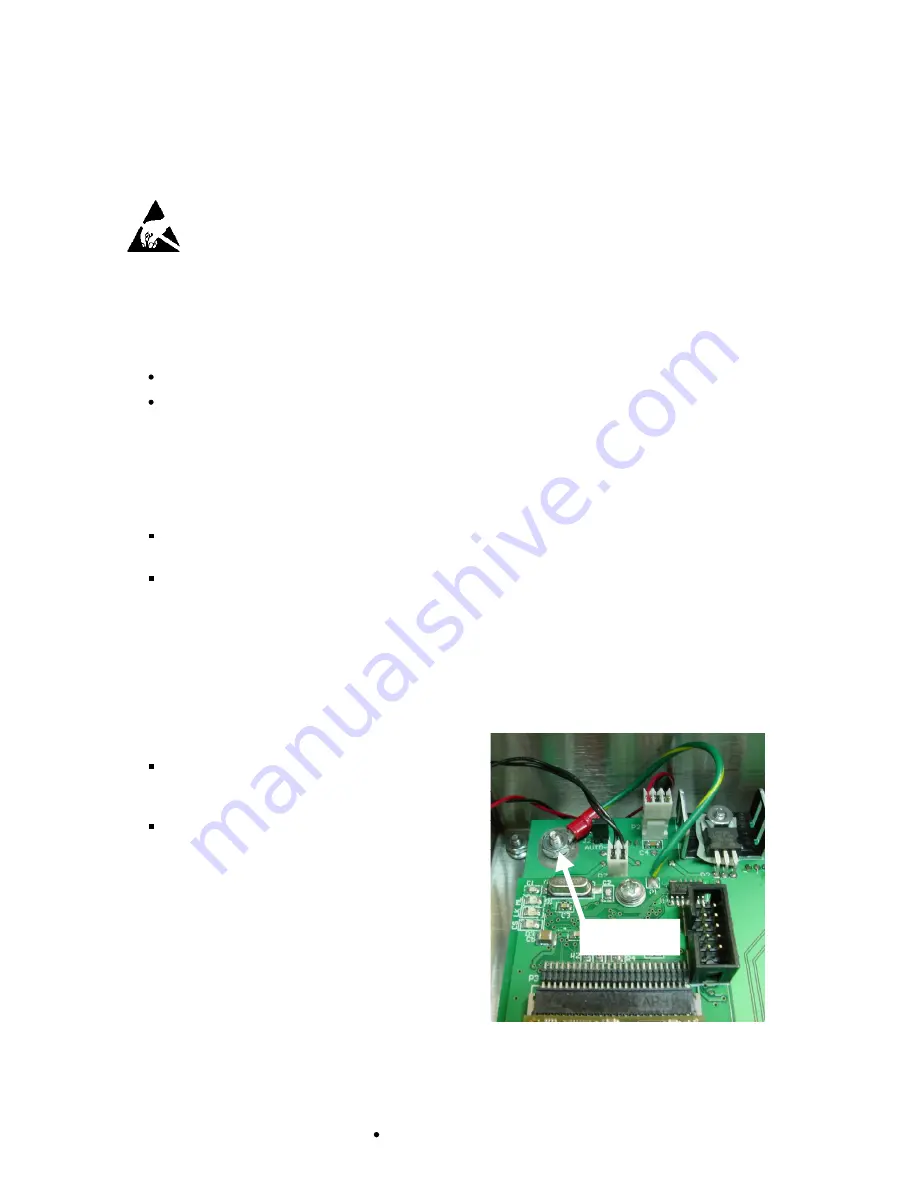
To attach the ground wire:
On the 205/210, remove a 6-32 nut and
washer from the threaded stud at the corner
of the indicator mainboard.
On the 225, remove a 6-32 nut and washer
from the threaded stud at the center of the
indicator mainboard.
10.
Connect the ground wire from the option card by
placing the ring terminal over the 6-32 threaded
stud.
11.
Reinstall the washer and 6-32 nut and tighten.
NOTE:
The ground wire attachment example
shown is on the 205/210 mainboard. The
attachment for the 225 is similar.
Attach
Ground Here


