4
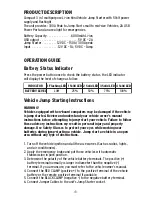
Compact 3 in 1 multipurpose Li-ion Mini Vehicle Jump Starter with 5Volt power
supply and flashlight.
The unit provides: 300A Peak to Jump Start small to mid-size Vehicles, 2A USB
Power Port and an area light for emergencies.
Press the power button once to check the battery status, the LED indicator
will display the level of charge as follow:
WARNING!
Vehicles equipped with on-board computers may be damaged if the vehicle
is jump started. Review and understand your vehicle owner’s manual
instructions before attempting to jump-start your vehicle. Failure to follow
these advisory instructions my result in personal injury and property
damage. Use Safety Glasses to protect your eyes while working near
batteries during jump-starting a vehicle. Jump start a vehicle in an open
area without any type of obstructions.
1. Turn off the vehicle ignition and all the accessories (Such as radios, lights,
and air conditioners).
2. Apply the emergency brake and put those vehicles with automatic
transmission in park position.
3. Determine the polarity of the vehicle battery terminals. The positive (+)
battery terminal normally is larger in diameter than the negative (-)
terminal. If you are unsure, you must refer to the vehicle owner’s manual.
4. Connect the RED CLAMP (po) to the positive terminal of the vehicle
battery or the remote positive terminal if available.
5. Connect the BLACK CLAMP (negative -) to the negative battery terminal.
6. Connect Jumper Cables to the unit’s Jump Starter socket.
Battery Capacity . . . . . . . . . . . . . . .6000mAh Li-ion
USB output . . . . . . . . . . . . . . . . . . . . . . . 5V DC – 2A
Jump Starter . . . . . . . . . 12V DC – 150A / 300A peak
Input . . . . . . . . . . . . . . . . 12V DC – 1A; 5V DC – 1Amp
Battery Status Indicator
Vehicle Jump Starting Instructions
PRODUCT DESCRIPTION
OPERATION GUIDE
INDICATOR
BATTERY LEVEL
1 Flashing LED
LOW
1 Solid LED
25%
2 Solid LED
50%
3 Solid LED
75%
4 Solid LED
100%


