Performing Operations and
S
ettings in the Admin Viewer
137
A
d
min Viewer/
V
B
V
iewer
6
(1) [Auto Control]
Select [Not used], [Day/Night Mode Switching], or
[Timer] for the auto control setting.
(2) [In Day Mode], [In Night Mode]
When [Day/Night Mode Switching] is selected in [Auto
Control], select the custom setting number used when
switching day mode and night mode or select [None]
for each item.
(3) [Timer 1] to [Timer 4]
When [Timer] is selected in [Auto Control], set the
time for switching the custom setting in [Time] in 24-
hour format and select the custom setting number in
[Custom Setting], or select [None].
(4) [Register]
Register the auto control settings.
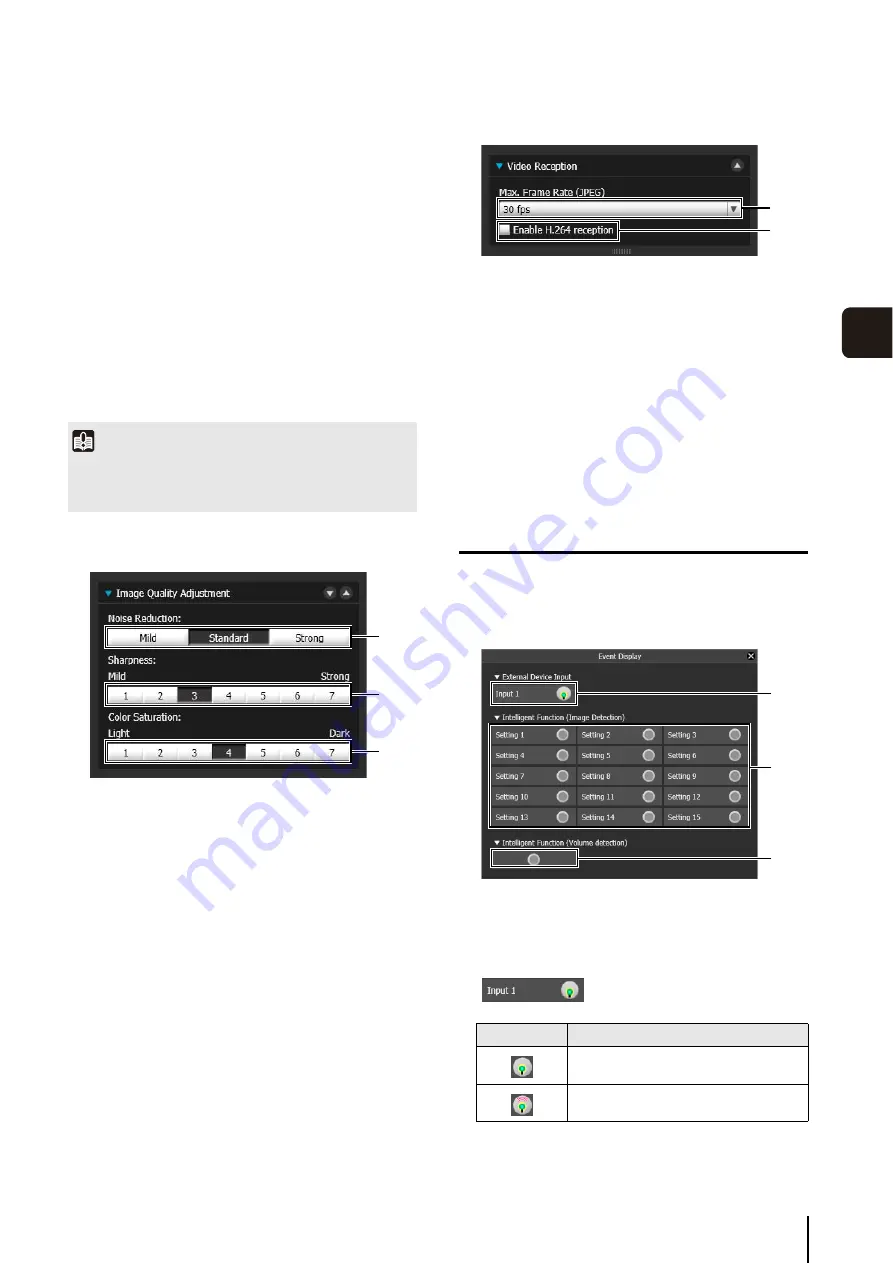
Adjusting Image Quality
(1) [Noise Reduction]
Select [Mild], [Standard], or [Strong] for the noise
reduction setting.
Principally, this setting is more effective in low-light
conditions. When set to [Strong], the noise reduction
effect is increased, but the afterimage of moving
subjects becomes easier to see. When set to [Mild],
the noise reduction effect is decreased and resolution
is increased, but the video file size becomes larger.
(2) [
S
harpness]
Select a level from [1] (Mild) to [7] (Strong) for the
sharpness setting.
When set to [Strong] the video becomes sharper, and
when set to [Mild] the video becomes softer. Also,
when set to [Strong] the video file size becomes
larger.
(3) [Color
S
aturation]
Select a level from [1] (Light) to [7] (Dark) for the color
saturation setting.
Enabling Video Reception
(1) [Max. Frame Rate (JPEG)]
You can select the maximum frame rate for JPEG
displayed video from one of twelve levels between [30
fps] to [0.2 fps]. The setting is not available when
displaying H.264 video in the video display area.
(2) [Enable H.264 reception] checkbox
Select to receive H.264 video. The Software Product
License Agreement dialog box appears. Click [Yes] to
accept the terms of the license agreement. The
decoder is downloaded from the camera, enabling
H.264 video reception.
Displaying Event Status
Clicking the [Event Display] button will show the event
display panel, which shows the input status of external
devices, as well as the status of video and volume
detection by the intelligent function.
(1) [External Device Input]
When a contact input signal is received from an
external device, input will be activated and an icon will
be displayed.
Important
If the same time is specified multiple times for [Timer 1] to
[Timer 4], [Register] will be disabled and the settings will not be
possible.
(1)
(2)
(3)
Icon
Meaning
Input inactive state
Input active state
(1)
(2)
(1)
(2)
(3)
Содержание VB-S30D MKII
Страница 13: ...Chapter 1 Before Use Camera Features Software Information Operating Environment and Precautions ...
Страница 22: ...22 ...
Страница 23: ...Chapter 2 Initial Settings Preparing the Camera for Use Initial Setting Tool Installation Initial Settings ...
Страница 30: ...30 ...
Страница 31: ...Chapter 3 Top Page of the Camera Accessing the Setting Page Admin Tools and Viewer ...
Страница 116: ...116 ...
Страница 171: ...Index 171 Appendix 7 Volume Detection 54 138 W Warning Message 154 White Balance 43 135 Z Zoom 72 126 133 ...
Страница 172: ...BIE 7001 000 CANON INC 2013 ...


