Canon PIXMA MX392 Скачать руководство пользователя страница 28

Note

You can add e-mail clients to use for attachments from the pull-down menu.
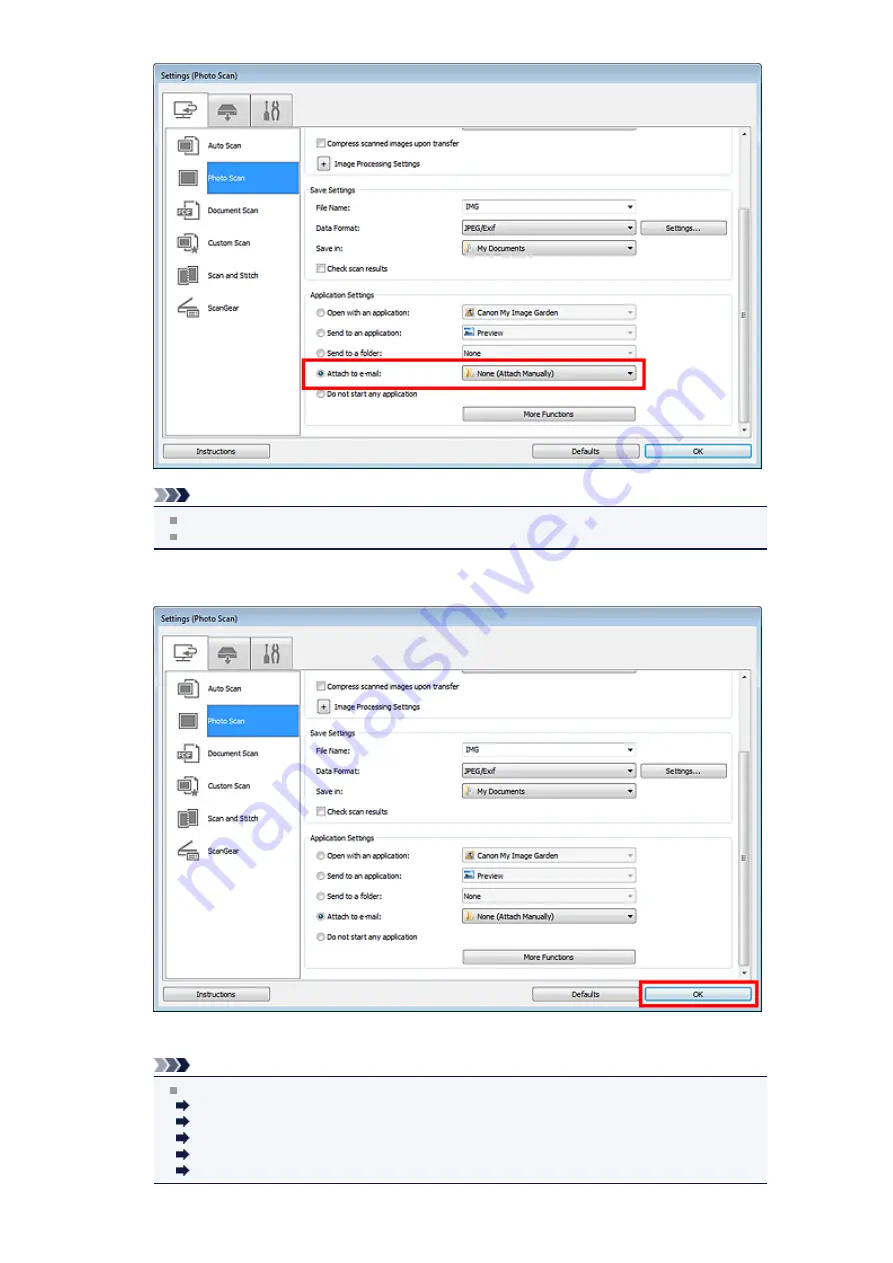
If 

None (Attach Manually)

 is selected, manually attach scanned and saved images to e-mail.

5.

Click 

OK

.

The IJ Scan Utility main screen appears.

Note

See the following pages for details on the setting items in the Settings dialog box.

Settings (Auto Scan) Dialog Box
Settings (Photo Scan) Dialog Box
Settings (Document Scan) Dialog Box
Settings (Custom Scan) Dialog Box
Settings (ScanGear) Dialog Box

Содержание PIXMA MX392

Страница 1: ...MX390 series Online Manual Scanning English...

Страница 2: ...on Scanning Other Scanning Methods Placing Items When Scanning from a Computer Scanning from the Operation Panel of the Machine Forwarding Scanned Data to the Computer Using the Operation Panel of the...

Страница 3: ...from a Computer Scanning with IJ Scan Utility Scanning with Application Software that You are Using ScanGear Useful Information on Scanning Other Scanning Methods Placing Items When Scanning from a C...

Страница 4: ...of the Machine Forwarding Scanned Data to the Computer Using the Operation Panel of the Machine Basic Setting Items on the Operation Panel of the Machine Selecting a Response to Commands from the Oper...

Страница 5: ...Scanning Documents Scanning with Favorite Settings Scanning Items Larger than the Platen Image Stitch Scanning Multiple Items at One Time Scanning Multiple Documents at One Time from the ADF Auto Doc...

Страница 6: ...magazine for better readability according to the item type or your purpose Note See IJ Scan Utility Main Screen for details on the IJ Scan Utility main screen Save Scanned Images Automatically Scanned...

Страница 7: ...Important Some functions are available only when My Image Garden is installed Note See Settings Dialog Box for how to set the applications to integrate with...

Страница 8: ...Starting IJ Scan Utility From the Start menu select All Programs Canon Utilities IJ Scan Utility IJ Scan Utility to start IJ Scan Utility...

Страница 9: ...ems on the platen or ADF of your scanner or printer Placing Items When Scanning from a Computer 3 Start IJ Scan Utility Starting IJ Scan Utility 4 Click Auto Scanning starts Note Click Cancel to cance...

Страница 10: ...ttings Photo Scan dialog box then set the paper size resolution etc as required Settings Photo Scan Dialog Box When setting is completed click OK 4 Click Photo Scanning starts Note Click Cancel to can...

Страница 11: ...Document Scan dialog box then set the paper size resolution etc as required Settings Document Scan Dialog Box When setting is completed click OK 4 Click Document Scanning starts Note Click Cancel to c...

Страница 12: ...resolution etc Settings Custom Scan Dialog Box When setting is completed click OK Note Once the settings are made you can scan with the same settings from the next time 3 Place the item on the platen...

Страница 13: ...scan from the item to be placed on the left side 1 Start IJ Scan Utility Starting IJ Scan Utility 2 Click Settings select the Settings Scan and Stitch dialog box then set the item type resolution etc...

Страница 14: ...side of the screen face down on the platen 7 Click Start Scanning Image 1 The first item is scanned and appears in 1 Note Click Cancel to cancel the scan 8 Place the item that is to be displayed on t...

Страница 15: ...Click Cancel to cancel the scan 10 Adjust the scanned images as required Use the Toolbar to rotate or zoom in out or drag the images to adjust their positions Note Select the Adjust cropping frames ch...

Страница 16: ...he selected image is deleted allowing you to scan the item again 11 Click Save The combined image is saved Note See Image Stitch Window for details on the Image Stitch window You can make advanced sca...

Страница 17: ...tems Refer to Scanning Multiple Documents at One Time with ScanGear Scanner Driver for your model from Home of the Online Manual for details Using Auto Scan Whether there are multiple items or not is...

Страница 18: ...5 Select Select Source according to the items to be scanned 6 Select Auto scan for Paper Size then click OK...

Страница 19: ...Box Settings Document Scan Dialog Box Settings Custom Scan Dialog Box 7 Click Custom Multiple items are scanned at one time Note Click Cancel to cancel the scan Scanned images are saved in the folder...

Страница 20: ...Home of the Online Manual for how to scan using ScanGear scanner driver Using Auto Scan The item type is detected automatically Click Auto and scan Easy Scanning with Auto Scan Not Using Auto Scan In...

Страница 21: ...document select Document ADF Manual Duplex 6 Set the color mode document size and scanning resolution as required Click Document Scan Orientation Settings to specify the orientation of the documents...

Страница 22: ...lick Cancel to cancel the scan When Document ADF Manual Duplex is selected for Select Source proceed to Step 8 8 Follow the on screen instructions to place the documents Note The screens for scanning...

Страница 23: ...changing the orientation of the output documents 9 Click OK Scanning starts Note Click Cancel to cancel the scan Scanned images are saved in the folder set for Save in in the corresponding Settings d...

Страница 24: ...before saving when scanned using Auto scan or the operation panel Note The screens for scanning photos are used as examples in the following descriptions 1 Start IJ Scan Utility Starting IJ Scan Utili...

Страница 25: ...gs ScanGear Dialog Box 5 Click Photo Scanning starts When scanning is completed the Save Settings dialog box appears Note Click Cancel to cancel the scan 6 Change the image order or file save options...

Страница 26: ...Scanned images are saved according to the settings...

Страница 27: ...s for scanning photos are used as examples in the following descriptions 1 Start IJ Scan Utility Starting IJ Scan Utility 2 Click Settings The Settings dialog box appears Settings Dialog Box 3 Click P...

Страница 28: ...scanned and saved images to e mail 5 Click OK The IJ Scan Utility main screen appears Note See the following pages for details on the setting items in the Settings dialog box Settings Auto Scan Dialog...

Страница 29: ...de in the Settings dialog box When the Check scan results checkbox is selected in the Settings dialog box the Save Settings dialog box appears After you set the save options and click OK the scanned i...

Страница 30: ...g via Document Custom or ScanGear The screens for scanning documents are used as examples in the following descriptions 1 Start IJ Scan Utility Starting IJ Scan Utility 2 Click Settings The Settings d...

Страница 31: ...d and appears in Notepad included with Windows 5 Click OK The IJ Scan Utility main screen appears Note See the following pages for details on the setting items in the Settings dialog box Settings Docu...

Страница 32: ...image of the following types of documents may not be detected correctly Documents containing text with font size outside the range of 8 points to 40 points at 300 dpi Slanted documents Documents place...

Страница 33: ...ument Scan Dialog Box Settings Custom Scan Dialog Box Settings Scan and Stitch Dialog Box Settings ScanGear Dialog Box Settings Save to PC Auto Dialog Box Settings Save to PC Photo Dialog Box Settings...

Страница 34: ...uter Scan save settings and the response after scanning can be specified in the Settings Document Scan dialog box Settings Document Scan Dialog Box Custom Scans items with your favorite settings and s...

Страница 35: ...My Image Garden Settings Auto Scan Dialog Box Settings Photo Scan Dialog Box Settings Document Scan Dialog Box Settings Custom Scan Dialog Box Settings Scan and Stitch Dialog Box Settings ScanGear Di...

Страница 36: ...l Settings Tab You can set the product to use file size restriction on e mail attachment language to detect text in images and folder in which to save images temporarily Settings General Settings Dial...

Страница 37: ...pecify the item type and size in the Settings Photo Scan dialog box Settings Document Scan dialog box or Settings Custom Scan dialog box then click Photo Document or Custom in the IJ Scan Utility main...

Страница 38: ...e Placing Items When Scanning from a Computer for details on how to place items Note You can change the data format from Settings Settings Click to display the Data Format Settings dialog box in which...

Страница 39: ...want to send e mails with the scanned images attached You can specify the e mail client you want to start from the pull down menu Do not start any application Saves to the folder specified in Save in...

Страница 40: ...Settings dialog box is displayed from My Image Garden the setting items for Application Settings do not appear 1 Scan Options Area Select Source Photo is selected Color Mode Select the color mode in...

Страница 41: ...the _20XX0101_0001 format Data Format Select the data format in which to save the scanned images You can select JPEG Exif TIFF or PNG Important You cannot select JPEG Exif when Color Mode is Black and...

Страница 42: ...down menu Send to a folder Select this when you also want to save the scanned images to a folder other than the one specified in Save in You can specify the folder from the pull down menu Attach to e...

Страница 43: ...Settings Area 3 Application Settings Area Important When the Settings dialog box is displayed from the Scan screen of My Image Garden the setting items for Application Settings do not appear 1 Scan Op...

Страница 44: ...ettings Resolution Select the resolution of the item to be scanned The higher the resolution value the more detail in your image Resolution Document Scan Orientation Settings This appears when you sel...

Страница 45: ...at appear between pages when scanning open booklets Important This function is available only when scanning from the platen Available only when the Compress scanned images upon transfer checkbox is no...

Страница 46: ...le Pages Important You cannot select JPEG Exif when Color Mode is Black and White When Start OCR is selected in Application Settings you cannot select PDF or PDF Multiple Pages Settings Click to displ...

Страница 47: ...s with the scanned images attached You can specify the e mail client you want to start from the pull down menu Start OCR Select this when you want to convert text in the image into text data using spe...

Страница 48: ...e setting items for Application Settings do not appear 1 Scan Options Area Select Source Select the type of item to be scanned When Auto is selected the item type is automatically detected Color Mode...

Страница 49: ...s scanned images upon transfer checkbox Note Only Color is available when Select Source is Auto Paper Size Select the size of the item to be scanned When you select Custom a screen in which you can sp...

Страница 50: ...t The color tone may differ from the source image due to corrections In that case deselect the checkbox and scan Note Scanning takes longer than usual when you enable this function When Select Source...

Страница 51: ...The following types of documents may not be corrected properly since the text cannot be detected correctly Documents in which the text lines are inclined more than 10 degrees or the angles vary by li...

Страница 52: ...ys the folder in which to save the scanned images To change the folder specify the destination folder in the Select Destination Folder dialog box displayed by selecting Add from the pull down menu The...

Страница 53: ...text data using specified OCR software You can specify the application from the pull down menu Do not start any application Saves to the folder specified in Save in Note Specify the application or fo...

Страница 54: ...ortant When the Settings dialog box is displayed from the Scan screen of My Image Garden the setting items for Application Settings do not appear 1 Scan Options Area Select Source Select the type of i...

Страница 55: ...ame in the _20XX0101_0001 format Data Format Select the data format in which to save the scanned images You can select JPEG Exif TIFF PNG PDF or PDF Multiple Pages Important You cannot select JPEG Exi...

Страница 56: ...ication from the pull down menu Send to a folder Select this when you also want to save the scanned images to a folder other than the one specified in Save in You can specify the folder from the pull...

Страница 57: ...the date and 4 digits are appended to the set file name in the _20XX0101_0001 format Data Format Select the data format in which to save the scanned images You can select JPEG Exif TIFF PNG PDF or PD...

Страница 58: ...ayed from My Image Garden this option does not appear 2 Application Settings Area Open with an application Select this when you want to enhance or correct the scanned images You can specify the applic...

Страница 59: ...You can restore the settings in the displayed screen to the default settings...

Страница 60: ...a computer after scanning them from the operation panel by automatically detecting the item type 1 Scan Options Area 2 Save Settings Area 3 Application Settings Area 1 Scan Options Area Paper Size Aut...

Страница 61: ...which you can set the quality of the images to be saved keyword search of PDF files and their compression type and the data format in which to save images scanned with Auto Scan Data Format Settings...

Страница 62: ...er in the Select Application or Select Destination Folder dialog box displayed by selecting Add from the pull down menu Instructions Opens this guide Defaults You can restore the settings in the displ...

Страница 63: ...a Paper Size Set from the operation panel Resolution Set from the operation panel Compress scanned images upon transfer Compresses scanned images when transferring them to a computer This is useful wh...

Страница 64: ...ith an application Select this when you want to enhance or correct the scanned images You can specify the application from the pull down menu Send to an application Select this when you want to use th...

Страница 65: ...when saving images to a computer as documents after scanning them from the operation panel 1 Scan Options Area 2 Save Settings Area 3 Application Settings Area 1 Scan Options Area Paper Size Set from...

Страница 66: ...fine dots are scanned Note Scanning takes longer than usual when you enable Reduce moire Reduce gutter shadow platen Reduces gutter shadows that appear between pages when scanning open booklets Import...

Страница 67: ...lder in which to save the scanned images To change the folder specify the destination folder in the Select Destination Folder dialog box displayed by selecting Add from the pull down menu The default...

Страница 68: ...ed product from the list E mail Attachment Size You can restrict the size of scanned images to be attached to an e mail You can select Small Suitable for 640 x 480 Windows Medium Suitable for 800 x 60...

Страница 69: ...is checkbox to convert text in images into text data and create PDF files that support keyword search PDF Compression Select the compression type for saving PDF files Standard It is recommended that y...

Страница 70: ...Left 90 Rotate Right 90 Rotates scanned images 90 degrees counter clockwise or clockwise Select the image you want to rotate then click Rotate Left 90 or Rotate Right 90 Important The preview operatio...

Страница 71: ...r dialog box You cannot select JPEG Exif when Color Mode is Black and White Settings Click to display the Data Format Settings dialog box in which you can set the quality of the images to be saved key...

Страница 72: ...s vary depending on the select source and view 1 Settings and Operation Buttons Select Output Size B4 B5 x 2 Scans the left and right halves of a B4 size item separately A3 A4 x 2 Scans the left and r...

Страница 73: ...ng frames You can adjust the scan area in preview If no area is specified the image of the size selected in Select Output Size will be saved If an area is specified only the image in the cropping fram...

Страница 74: ...es the preview image 90 degrees counter clockwise Invert Vertically Rotates the preview image 180 degrees Rotate Right Rotates the preview image 90 degrees clockwise Open Guide Opens this page 3 Thumb...

Страница 75: ...mage 1 The image is scanned in the direction specified in Scan Direction and 2 appears next to it After scanning the second item by clicking Start Scanning Image 2 The two scanned images appear Relate...

Страница 76: ...g in Basic Mode Scanning in Advanced Mode Scanning Multiple Documents from the ADF Auto Document Feeder in Advanced Mode Scanning Multiple Documents at One Time with ScanGear Scanner Driver Correcting...

Страница 77: ...iew scan results or set document type and output size etc when scanning documents It is useful when you want to scan in a specific color tone as it allows you to make various corrections and adjust br...

Страница 78: ......

Страница 79: ...e corrections and brightness color adjustments Scanning in Advanced Mode Scanning multiple documents placed on the ADF Auto Document Feeder after making advanced image corrections and brightness color...

Страница 80: ...Start My Image Garden For how to start My Image Garden refer to My Image Garden Guide 2 Click the ScanGear icon in the Scan screen of My Image Garden The ScanGear screen appears Starting from an Appl...

Страница 81: ...correctly Documents smaller than 1 2 inches 3 cm square Photos that have been cut to various shapes Note When using a model equipped with Auto Duplex ADF you can scan both sides of the documents autom...

Страница 82: ...se Output size options vary by the item selected in Destination 6 Adjust the cropping frames scan areas as required Adjust the size and position of the cropping frames on the preview image Adjusting C...

Страница 83: ...Related Topic Basic Mode Tab...

Страница 84: ...switch to whole image view and scan Photos that have a whitish background Documents printed on white paper hand written text business cards etc Thin documents Thick documents The following types of do...

Страница 85: ...Settings Color Adjustment Buttons 7 Click Scan Scanning starts Note Click Information to open a dialog box in which you can check the current scan settings document type etc A response of ScanGear af...

Страница 86: ...g Documents ADF Auto Document Feeder Starting ScanGear Scanner Driver 2 Click the Advanced Mode tab and select Document ADF Simplex or Document ADF Duplex for Select Source Note Settings are not retai...

Страница 87: ...ormation to open a dialog box in which you can check the current scan settings document type etc A response of ScanGear after scanning can be specified in Status of ScanGear dialog after scanning on t...

Страница 88: ...mage View The following types of documents may not be scanned correctly Documents smaller than 1 2 inches 3 cm square Photos that have been cut to various shapes Note You can also scan multiple docume...

Страница 89: ...scan in whole image view Scanning Multiple Documents in Whole Image View 7 Select the images you want to scan Select the checkboxes of the images you want to scan 8 Click Scan Scanning Multiple Docume...

Страница 90: ...and position of the cropping frames on the preview image You can also create two or more cropping frames If an area is not specified the document will be scanned at the document size Auto Crop If an...

Страница 91: ...Color Pattern Brightening colors that have faded with time or due to colorcast Adjusting Saturation and Color Balance Adjusting images that are too dark or bright or too flat due to lack of contrast...

Страница 92: ...ck Arrow of a function and select an item from the pull down menu Important Do not apply these functions to images without moire dust scratches or faded colors The color tone may be adversely affected...

Страница 93: ...and stripe patterns Set Descreen to ON OFF ON Note Printed photos and pictures are displayed as a collection of fine dots Moire is a phenomenon where uneven gradation or a stripe pattern appears when...

Страница 94: ...degree of fading or colorcast None Medium Reducing graininess Set Grain Correction to Low Medium or High according to the degree of graininess None Medium Correcting shadows that appear between pages...

Страница 95: ...er or ambient strong colors Click an arrow in Color Adjustment to emphasize the corresponding color Cyan red magenta green and yellow blue are complementary color pairs each pair produces a shade of g...

Страница 96: ...ames scan areas or the frame selected in thumbnail view You can select multiple frames or cropping frames by clicking them while pressing the Ctrl key You can also select a color tone from the color p...

Страница 97: ...n the image and to the right to increase the saturation brighten the image You can also enter a value 127 to 127 Saturation decreased Original image Saturation increased Note The natural color tone of...

Страница 98: ...color It is usually difficult to correct the image completely by adjusting only one color pair It is recommended that you find a portion in the image where it should be white and adjust all three col...

Страница 99: ...lts to reset all adjustments in the current window Channel Each dot of an image is a mixture of Red Green and Blue in various proportions gradation These colors can be adjusted individually as a chann...

Страница 100: ...between the brighter and darker parts of an image Increasing contrast will increase the difference thus sharpening the image Decreasing contrast will decrease the difference thus softening the image M...

Страница 101: ...olors can be adjusted individually as a channel Master Adjust the Red Green and Blue combined Red Adjust the Red channel Green Adjust the Green channel Blue Adjust the Blue channel Note Only Grayscale...

Страница 102: ...s set to anything but None the adjustments shown below are performed automatically Moving the Black point and White point Sliders Move the Black point Slider or White point Slider to adjust brightness...

Страница 103: ...darkest point You can also enter a value 0 to 245 The point clicked with Mid point Dropper will be the middle of the tonal range You can also enter a value 5 to 250 The point clicked with White point...

Страница 104: ...These colors can be adjusted individually as a channel Master Adjust the Red Green and Blue combined Red Adjust the Red channel Green Adjust the Green channel Blue Adjust the Blue channel Note Only G...

Страница 105: ...the output side resulting in a bright toned image when viewed on a monitor Underexposure Concave curve The midtone data of the input side is stretched toward the shadow of the output side resulting i...

Страница 106: ...Edit custom curve You can drag specific points on the Tone Curve to freely adjust the brightness of the corresponding areas...

Страница 107: ...d level you can sharpen text in a document or reduce show through in newspapers This function is available when Color Mode is Black and White In ScanGear scanner driver s Advanced Mode tab click Thres...

Страница 108: ...ear Scanner Driver Screens Basic Mode Tab Advanced Mode Tab Input Settings Output Settings Image Settings Color Adjustment Buttons Preferences Dialog Box Scanner Tab Preview Tab Scan Tab Color Setting...

Страница 109: ...or Scan color photos Magazine Color Scan color magazines Document Color Scan documents in color Document Grayscale Scan documents in black and white Document Color ADF Simplex Scan documents from the...

Страница 110: ...rts automatically Wait a while until the preview image appears Destination Select what you want to do with the scanned image Print Select this to print the scanned image on a printer Image display Sel...

Страница 111: ...Name Width and Height then click Add For Unit you can select inches or mm when Destination is Print but you can only select pixels when Destination is Image display The name of the added size appears...

Страница 112: ...that appear between pages when scanning open booklets Important For precautions on using this function see Gutter Shadow Correction Color Pattern Allows you to adjust the image s overall color You ca...

Страница 113: ...lable when two or more frames are displayed Deselects the checkboxes of the image in thumbnail view Select All Frames Available when two or more frames are displayed Selects the images in thumbnail vi...

Страница 114: ...ck a frame to zoom in on the image Click Frame Advance at the bottom of the screen to display the previous or next frame Double click the frame again to return the display to its non magnified state W...

Страница 115: ...te The displayed items vary by document type and view 1 Settings and Operation Buttons Favorite Settings You can name and save a group of settings Input Settings Output Settings Image Settings and Col...

Страница 116: ...ts to its highlight and shadow values histogram or balance tone curve Color Adjustment Buttons Zoom Zooms in on a frame or zooms in on the image in the area specified with a cropping frame scan area W...

Страница 117: ...if the total size of the scanned images exceeds a certain size In that case a warning message appears it is recommended that you reduce the total size To continue scan in whole image view Preferences...

Страница 118: ...s original state when you preview again Auto Crop Displays and adjusts the cropping frame automatically to the size of the document displayed in the Preview area The scan area is reduced every time yo...

Страница 119: ...n status Focus Frame thick blue outline The displayed settings will be applied Selected Frame thin blue outline The settings will be applied to the Focus Frame and Selected Frames simultaneously You c...

Страница 120: ...Related Topic Scanning in Advanced Mode Scanning Multiple Documents from the ADF Auto Document Feeder in Advanced Mode...

Страница 121: ...vailable in whole image view only When scanning both sides of the documents automatically from the ADF select A4 or Letter When you select a size the Preview area size changes accordingly Important So...

Страница 122: ...old Input Size In thumbnail view the cropped document size is displayed after preview In whole image view the Paper Size is displayed before preview and the cropping frame scan area size is displayed...

Страница 123: ...n select Document ADF Duplex when using a model equipped with Auto Duplex ADF Output Size Select an output size Select Flexible to set custom sizes or select a size for printing or displaying Select A...

Страница 124: ...es or mm when Destination is Print but you can only select pixels when Destination is Image display The name of the added size appears in Output Size List Click Save to save the items listed in Output...

Страница 125: ...optimized Images can be adjusted according to the automatically detected document type or the specified document type The result of the adjustment will be reflected in the entire image None Image Adju...

Страница 126: ...ge It is recommended that you normally select this setting Descreen Printed photos and pictures are displayed as a collection of fine dots Moire is a phenomenon where uneven gradation or a stripe patt...

Страница 127: ...s recommended that you normally select this setting High Select this when the photo is very grainy This can affect the gradation and sharpness of the image Important Correction may not be applied prop...

Страница 128: ...scan If the binding part is not even the shadow will not be corrected properly How to place the document depends on your model and the document to be scanned Note Cover the document with black cloth...

Страница 129: ...olor Balance Adjust the saturation vividness and color tone of the image Use this function to brighten colors that have faded with time or due to colorcast Colorcast is a phenomenon where a specific c...

Страница 130: ...white are divided By adjusting the threshold level you can sharpen text in a document or reduce show through in newspapers Setting Threshold Custom You can name and save a set of tone curve and thresh...

Страница 131: ...Reset all adjustments saturation color balance brightness contrast histogram and tone curve...

Страница 132: ...which to save images temporarily and music file to play during or at the end of a scan Scanner Tab Preview Tab Allows you to select what to do with Preview when ScanGear is started how to display crop...

Страница 133: ...operation panel of the machine or when printing scanning from a computer etc Scanning or printing may take longer than usual when this function is used Do not use quiet mode Select this option when y...

Страница 134: ...click Browse and specify a sound file You can specify the following files MIDI file mid rmi midi Audio file wav aif aiff MP3 file mp3 Calibration Settings When you set Execute at Every Scan to ON the...

Страница 135: ...artup Note Select None if you do not want to save the preview image Cropping Frame on Previewed Images Select how to display cropping frames after previewing images Execute Auto Cropping on Previewed...

Страница 136: ...e area displayed for the standard size Note When you change the Cropping Size for Thumbnail View setting the preview images will be refreshed and cropped to the new size As the preview images are refr...

Страница 137: ...reen and select what to do when scanning is completed Note Even if Do not close ScanGear automatically or Display the dialog to select next action is set some applications may not support it ADF Duple...

Страница 138: ...Output by page Outputs the scanned documents in the correct page order...

Страница 139: ...ge with optimum correction for monitor Defaults Returns to the default Color Matching settings None Select this to disable color correction provided by ScanGear scanner driver Note Color Matching is a...

Страница 140: ...ner at the arrow alignment mark of the platen Photos that have been cut to various shapes and items smaller than 1 2 inches 3 cm square cannot be cropped accurately when scanning Reflective disc label...

Страница 141: ...grees or less are corrected automatically Placing Documents ADF Auto Document Feeder Important Do not leave thick items on the platen when scanning from the ADF May result in paper jam Place and align...

Страница 142: ......

Страница 143: ...drag the cropping frame in the Preview area to specify the area Note You can change the auto crop setting in the Preferences dialog box See Cropping Frame on Previewed Images in Preview Tab for detail...

Страница 144: ...otate a cropping frame 90 degrees by clicking Switch Aspect Ratio However Switch Aspect Ratio is not available when Output Size is Flexible Creating Multiple Cropping Frames In thumbnail view You can...

Страница 145: ...ame it retains the settings of the latest cropping frame Note Create up to 12 cropping frames Scanning takes longer than usual when multiple cropping frames are selected Deleting Cropping Frames In th...

Страница 146: ...ecting to a network scanning takes longer than usual Make sure that you have adequate disk space available when scanning large images at high resolutions For example at least 300 MB of free space is r...

Страница 147: ...t high resolution your computer may not respond or the progress bar may remain at 0 depending on the application In that case cancel the action for example by clicking Cancel on the progress bar then...

Страница 148: ...Useful Information on Scanning Adjusting Cropping Frames IJ Scan Utility Resolution Data Formats Color Matching...

Страница 149: ...just cropping frames checkbox an active cropping frame is automatically specified around the image in the Preview area You can drag the cropping frame to specify the area When you perform a scan the i...

Страница 150: ...tion Settings Set the resolution according to the use of the scanned image Item Type Use Color Mode Appropriate Resolution Color photo Copying Printing Color 300 dpi Creating a postcard Color 300 dpi...

Страница 151: ...When you will be printing the scanned image by enlarging it scan by setting a higher resolution than the recommended one above...

Страница 152: ...de every time they are saved and cannot be returned to their original state JPEG is not available for black and white images TIFF Standard File Extension tif A data format featuring a relatively high...

Страница 153: ...ver Output Profile Target sRGB OS Application Application Printer Driver Monitor Printer The image s color space is converted from the scanner s color space to sRGB by ScanGear When displaying on a mo...

Страница 154: ...Other Scanning Methods Scanning with WIA Driver Scanning Using the Control Panel Windows XP Only...

Страница 155: ...sing Windows Fax and Scan 1 Place the item on the platen or ADF Placing Items When Scanning from a Computer 2 Select New on the File menu of Windows Fax and Scan then click Scan The scan setting scree...

Страница 156: ...00 Preview or scan images as separate files Select this checkbox to preview or scan multiple images as separate files 4 Click Preview to preview the image The preview image appears on the right 5 Clic...

Страница 157: ...ft will decrease the contrast of the image thus softening the image Moving it to the right will increase the contrast of the image thus sharpening the image You can also enter a value 127 to 127 Resol...

Страница 158: ...4 Select Picture type according to the item to be scanned To scan from the platen select Flatbed for Paper source To scan from the ADF Auto Document Feeder select Document Feeder Note To scan with the...

Страница 159: ...rpening the image You can also enter a value 127 to 127 Resolution DPI Enter the resolution Specify a value between 50 dpi and 600 dpi Resolution Picture type Select the type of scan you want for your...

Страница 160: ...ner at the arrow alignment mark of the platen Photos that have been cut to various shapes and items smaller than 1 2 inches 3 cm square cannot be cropped accurately when scanning Reflective disc label...

Страница 161: ...grees or less are corrected automatically Placing Documents ADF Auto Document Feeder Important Do not leave thick items on the platen when scanning from the ADF May result in paper jam Place and align...

Страница 162: ......

Страница 163: ...of the Machine Forwarding Scanned Data to the Computer Using the Operation Panel of the Machine Basic Setting Items on the Operation Panel of the Machine Selecting a Response to Commands from the Oper...

Страница 164: ...tings of Canon IJ Scan Utility Settings Dialog Box 1 Make sure that the machine is turned on Confirming that the Power Is On 2 Press the SCAN button If you forward the scanned data to a computer for t...

Страница 165: ...to select the data format then press the OK button 5 Make sure that Scan resolution is selected then press the OK button 6 Use the button to select the scan resolution then press the OK button The Sca...

Страница 166: ...ection screen may be displayed after pressing the Color or Black button for the first time In this case specify Canon IJ Scan Utility as the application software to use select Always use this program...

Страница 167: ...if the machine is turned off When you forward the scanned data to the computer you can specify the destination and file name using Canon IJ Scan Utility Settings Dialog Box If you scan originals from...

Страница 168: ...when performing Auto Scan from the operation panel are used as examples in the following descriptions 1 Start IJ Scan Utility Starting IJ Scan Utility 2 Click Settings The Settings dialog box appears...

Страница 169: ...4 Specify image corrections in Scan Options 5 Specify the file name and other settings in Save Settings 6 Select the application you want to start after scanning in Application Settings...

Страница 170: ...7 Click OK The responses will be executed according to the specified settings when you start scanning from the operation panel...

Отзывы: