Connecting to a Computer
Ex
ternal
Connecti
ons
E
83
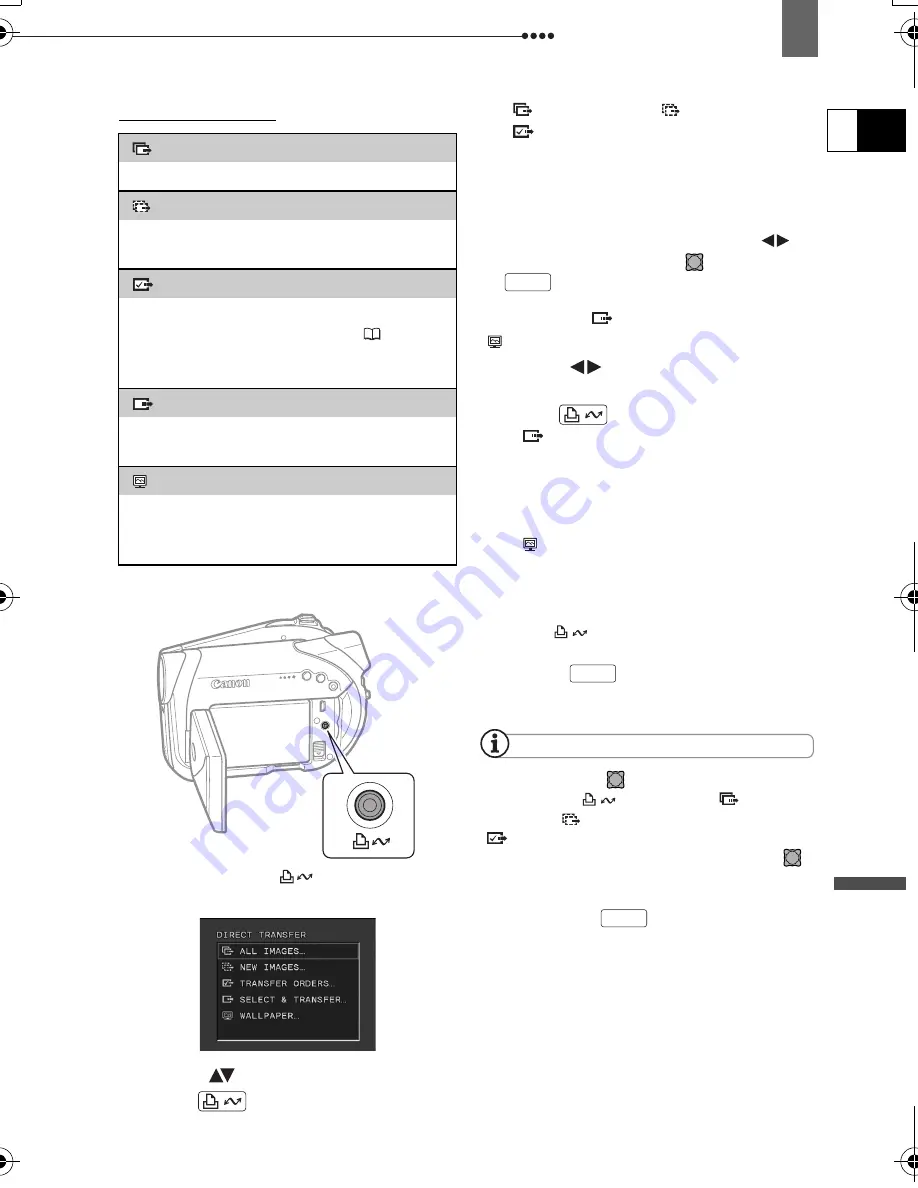
Transferring Images
1
Select (
) a transfer option.
2
Press .
[
ALL IMAGES] [
NEW IMAGES]
[
TRANSFER ORDERS]:
• The images are transferred and
displayed on the computer.
• The camcorder returns to the transfer
menu once the transfer is complete.
• To cancel the transfer, select (
)
[CANCEL] and press (
) or press
.
I
F
YOU
SELECT
[ SELECT & TRANSFER]
OR
[ WALLPAPER]
3
Select (
) the image you wish to
transfer.
4
Press .
• [
SELECT & TRANSFER]: The
selected image is transferred and
displayed on the computer. To
continue transferring, select another
image.
• [ WALLPAPER]: The selected
image is transferred to the computer
and displayed as the desktop’s
background.
• The
button will flash while the
images are being transferred.
• Press
to return to the transfer
menu.
NOTES
You can press (
) to transfer the images,
instead of the
button. With [
ALL
IMAGES], [
NEW IMAGES] or
[
TRANSFER ORDERS], a confirmation
message appears. Select [OK] and press (
).
When the camcorder is connected to the
computer and the image selection screen is
displayed, press
to return to the transfer
menu.
Even when still images recorded on the disc
are correctly transferred to the computer, they
will still be marked as images not yet
transferred (“NEW IMAGES”).
[
ALL IMAGES...]
Transfers all images to the computer.
[
NEW IMAGES...]
Transfers only those images that have not
yet been transferred to the computer.
[
TRANSFER ORDERS...]
Transfers images with transfer orders to
the computer. Transfer orders (
84) are
only available for images recorded on the
memory card.
[
SELECT & TRANSFER...]
Allows you to select the still image you
want to transfer to the computer.
[
WALLPAPER...]
Allows you to select the still image you
want to transfer and set it as your
computer’s desktop background.
Open the LCD panel
(print/share) button
MENU
MENU
MENU
D115_NTSC-E.book Page 83 Friday, June 9, 2006 5:29 PM


