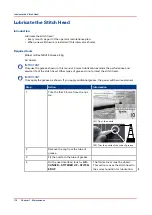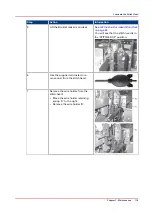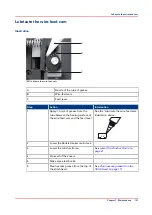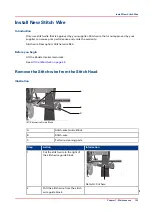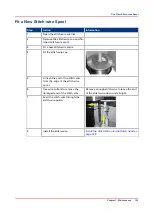
Fit a New Stitch-wire Spool
Step
Action
Information
1
Open the stitch-wire cabinet
2
Remove the stitch-wire cap and fin-
ished stitch-wire spool.
3
Fit a new stitch-wire spool.
4
Fit the stitch-wire cap
5
Loosen the end of the stitch-wire
from the edge of the stitch-wire
spool.
6
Use wire-cutters to remove the
damaged end of the stitch-wire.
Remove enough stitch-wire to leave the end
of the stitch-wire clean and straight.
7
Feed the stitch-wire through the
stitch-wire guide.
8
Install the stitch-wire.
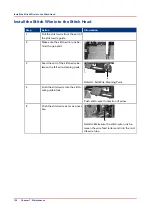
Install the Stitch Wire into the Stitch Head on
page 126
Fit a New Stitch-wire Spool
Chapter 7 - Maintenance
125
Содержание Oce BLM550+
Страница 1: ...Operation guide Océ BLM550 ...
Страница 5: ...Chapter 1 Preface ...
Страница 8: ...Notes for the reader 8 Chapter 1 Preface ...
Страница 9: ...Chapter 2 Introduction to the Booklet maker ...
Страница 16: ...The mains input panel of the optional Book Stacker 16 Chapter 2 Introduction to the Booklet maker ...
Страница 17: ...Chapter 3 How to run the Booklet maker ...
Страница 26: ...Run the job 26 Chapter 3 How to run the Booklet maker ...
Страница 27: ...Chapter 4 The User Interface ...
Страница 40: ...The MENU Window 40 Chapter 4 The User Interface ...
Страница 41: ...Chapter 5 Standard Tasks ...
Страница 59: ...Chapter 6 Error Conditions Problems and Solutions ...
Страница 108: ...Change the fuses of the optional Book Stacker 108 Chapter 6 Error Conditions Problems and Solutions ...
Страница 109: ...Chapter 7 Maintenance ...
Страница 131: ...Appendix A Specifications ...
Страница 134: ...Specifications 134 Appendix A Specifications ...
Страница 135: ...Appendix B Declaration of Conformity ...
Страница 137: ......


