


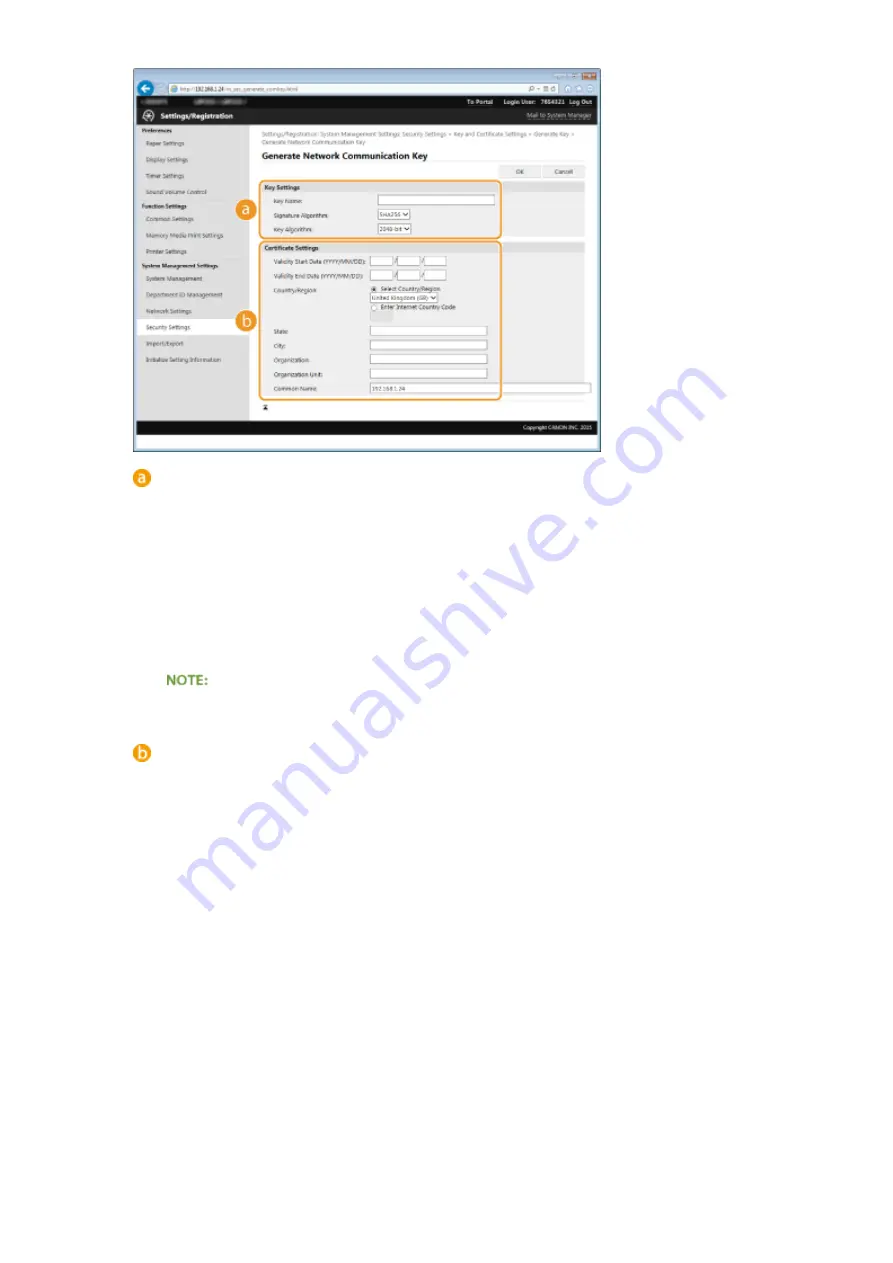
[Key Settings]
[Key Name]
Enter up to 24 alphanumeric characters for naming the key pair. Set a name that will be easy for you to
find later in a list.
[Signature Algorithm]
Select the signature algorithm from the drop-down list.
[Key Algorithm]
RSA is used for generating a key pair. Select the key length from the drop-down list. The larger the
number for the key length, the slower the communication. However, the security is tighter.
[512-bit] cannot be selected for the key length, if [SHA384] or [SHA512] is selected for [Signature
Algorithm].
[Certificate Settings]
[Validity Start Date (YYYY/MM/DD)]
Enter the validity start date of the certificate in the range between 01/01/2000 and31/12/2037, in the
order of: year, month, day.
[Validity End Date (YYYY/MM/DD)]
Enter the validity end date of the certificate in the range between 01/01/2000 and31/12/2037, in the
order of: year, month, day. A date earlier than [Validity Start Date (YYYY/MM/DD)] cannot be set.
[Country/Region]
Click the [Select Country/Region] radio button and select the country/region from the drop-down list.
You can also click the [Enter Internet Country Code] radio button and enter a country code, such as "US"
for the United States.
[State]/[City]
Enter up to 24 alphanumeric characters for the location as necessary.
[Organization]/[Organization Unit]
Enter up to 24 alphanumeric characters for the organization name as necessary.
[Common Name]
Enter up to 48 alphanumeric characters for the common name of the certificate as necessary. "Common
Name" is often abbreviated as "CN."
7
Click [OK].
Security
256
Содержание LBP251
Страница 1: ...LBP252dw LBP251dw User s Guide USRMA 0786 00 2016 06 en Copyright CANON INC 2015 ...
Страница 35: ...LINKS Using the Operation Panel P 30 Basic Operations 29 ...
Страница 69: ...Exiting Sleep Mode Press any key on the operation panel Basic Operations 63 ...
Страница 75: ...Printing 69 ...
Страница 83: ...LINKS Basic Printing Operations P 70 Checking the Printing Status and Log P 78 Printing 77 ...
Страница 101: ...LINKS Basic Printing Operations P 70 Printing Borders P 93 Printing Watermarks P 96 Printing 95 ...
Страница 117: ...LINKS Printing via Secure Print P 112 Printing 111 ...
Страница 122: ...Checking the Printing Status and Log P 78 Printing 116 ...
Страница 127: ...LINKS Basic Printing Operations P 70 Registering Combinations of Frequently Used Print Settings P 118 Printing 121 ...
Страница 164: ...4 Click Edit in IPv6 Settings 5 Select the Use IPv6 check box and configure the required settings Network 158 ...
Страница 178: ...3 Click OK 4 Click Close LINKS Setting Up Print Server P 173 Network 172 ...
Страница 233: ...LINKS Configuring Printer Ports P 168 Security 227 ...
Страница 316: ...0 Auto Shutdown is disabled 1 to 4 to 8 hr Setting Menu List 310 ...
Страница 355: ...Troubleshooting 349 ...
Страница 405: ...4 Install the toner cartridge Fully push it in until it cannot go any further 5 Close the front cover Maintenance 399 ...
Страница 469: ...4 Click Next Uninstall begins Wait a moment This process may take some time 5 Click Exit 6 Click Back Exit Appendix 463 ...
Страница 470: ...Appendix 464 ...
Страница 478: ...Manual Display Settings 0W20 08J Appendix 472 ...


