


Registering the Required Sender Information
1-14
Bef
ore
Y
ou Use the F
ax Functions
1
3
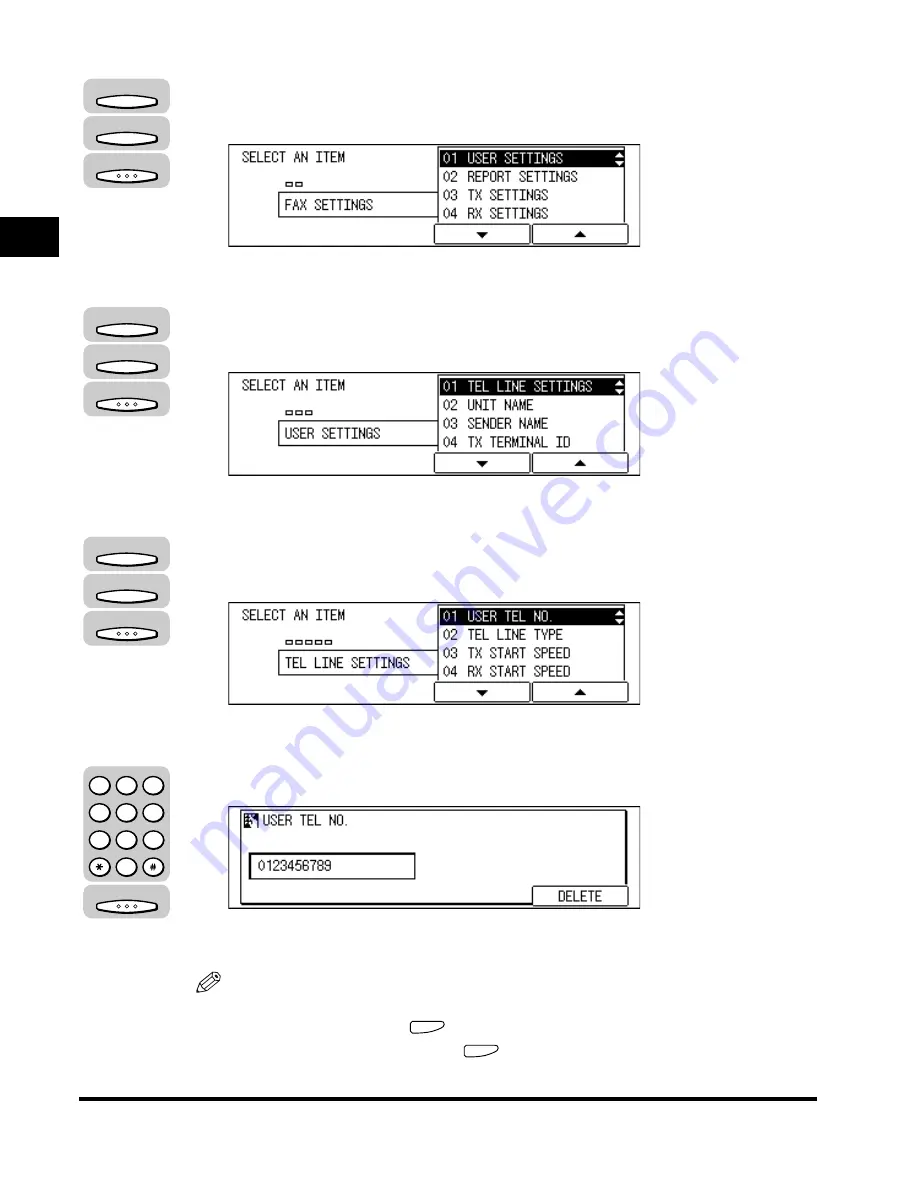
Press [F3] (
▼
) or [F4] (
▲
) to highlight <01 USER SETTINGS>
➞
press [OK].
The USER SETTINGS menu appears.
4
Press [F3] (
▼
) or [F4] (
▲
) to highlight <01 TEL LINE
SETTINGS>
➞
press [OK].
The TEL LINE SETTINGS menu appears.
5
Press [F3] (
▼
) or [F4] (
▲
) to highlight <01 USER TEL NO.>
➞
press [OK].
The USER TEL NO. menu appears.
6
Use the numeric keys to enter your fax number
➞
press [OK].
Your fax number is registered, and the display returns to the TEL LINE SETTINGS
menu.
NOTE
•
If you entered a wrong number, use the cursor keys to go back to the position you
want to correct
➞
press
(Delete)
➞
enter the correct number.
•
To delete the entire entry, press
(Clear).
F3
F4
OK
F3
F4
OK
F3
F4
OK
OK
1
2
3
4
5
6
7
8
9
0
@.
GHI
PRS
ABC
JKL
TUV
DEF
MNO
WXY
OPER
SYMBOLS
Содержание IMAGERUNNER 2010F
Страница 2: ...imageRUNNER 2010F Facsimile Guide ...
Страница 83: ...Using Speed Dialing 2 38 Speed Dialing 2 ...
Страница 123: ...Checking Transaction Results 3 40 Basic Sending 3 ...
Страница 185: ...Transferring Documents 5 32 Receiving Documents 5 ...
Страница 207: ...Using a Memory Box 6 22 Memory Features 6 ...
Страница 282: ...Polling Sending 9 31 Using Polling 9 7 Press Reset to return to the Fax Basic Features screen Reset ...
Страница 305: ...Changing the Fax Default Settings 10 22 Special Fax Features 10 ...
Страница 321: ...Receiving a Fax on Line 2 11 16 Dual Line Functions Optional 11 ...
Страница 358: ...Report Samples 15 3 Appendix 15 ...