CHAPTER 3 DISASSEMBLY & REASSEMBLY
7. Flapper
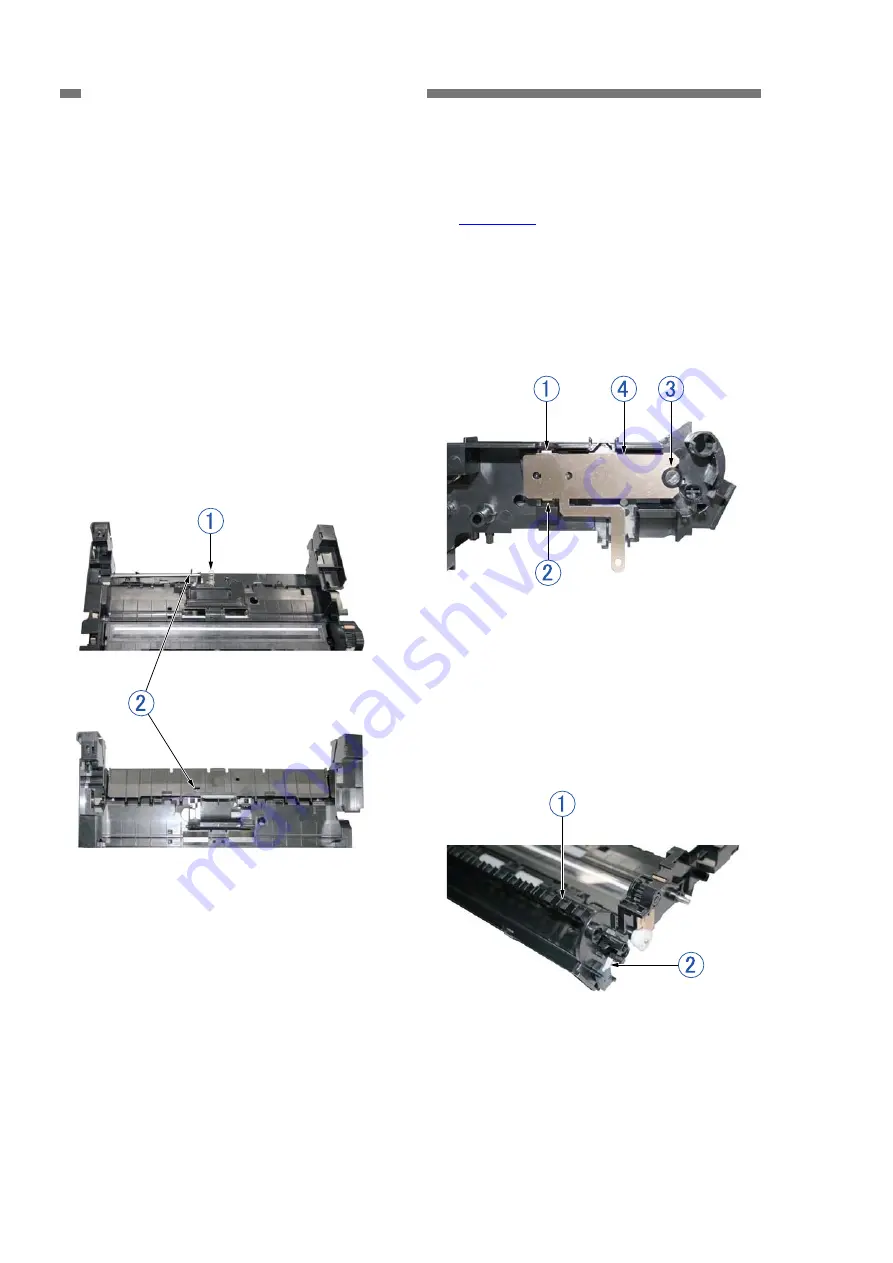
Notes on assembling
1) Remove the front unit.
Install the coil spring
{
1
before
attaching the document pressure plate.
Attach the fitting part on the left side with
the pin
{
2
on the drive shaft standing
up, and attach the fitting part on the right
side while rotating the pulley on the feed
motor side and slightly tilting the pin so
that the pin is above the protruding part
of the document pressure plate. Take
care to avoid the coil spring shooting off.
After assembling, check that the
document pressure plate works properly
by rotating the pulley right and left.
2) Press down on the fitting part
{
1
of the
stop plate from above and unhook it from
the hole in the base. Then, unhook the
fitting part
{
2
on the opposite side and
the fitting parts
{
3
while moving the stop
plate slightly to remove the stop plate
{
4
.
Figure 3-311
3) Slide and rotate the flapper
{
1
to
release it from the holes on both sides,
and then remove it from the base.
Note:
Take care to avoid damaging the
flapper detection switch lever
{
2
on
the right side panel.
Figure 3-310
Figure 3-312
Notes on assembling
Insert the fitting parts on the stop plate
are securely into the holes in the base.
3-12
COPYRIGHT
©
CANON ELECTRONICS INC. 2011 CANON DR-C125 FIRST EDITION


