2
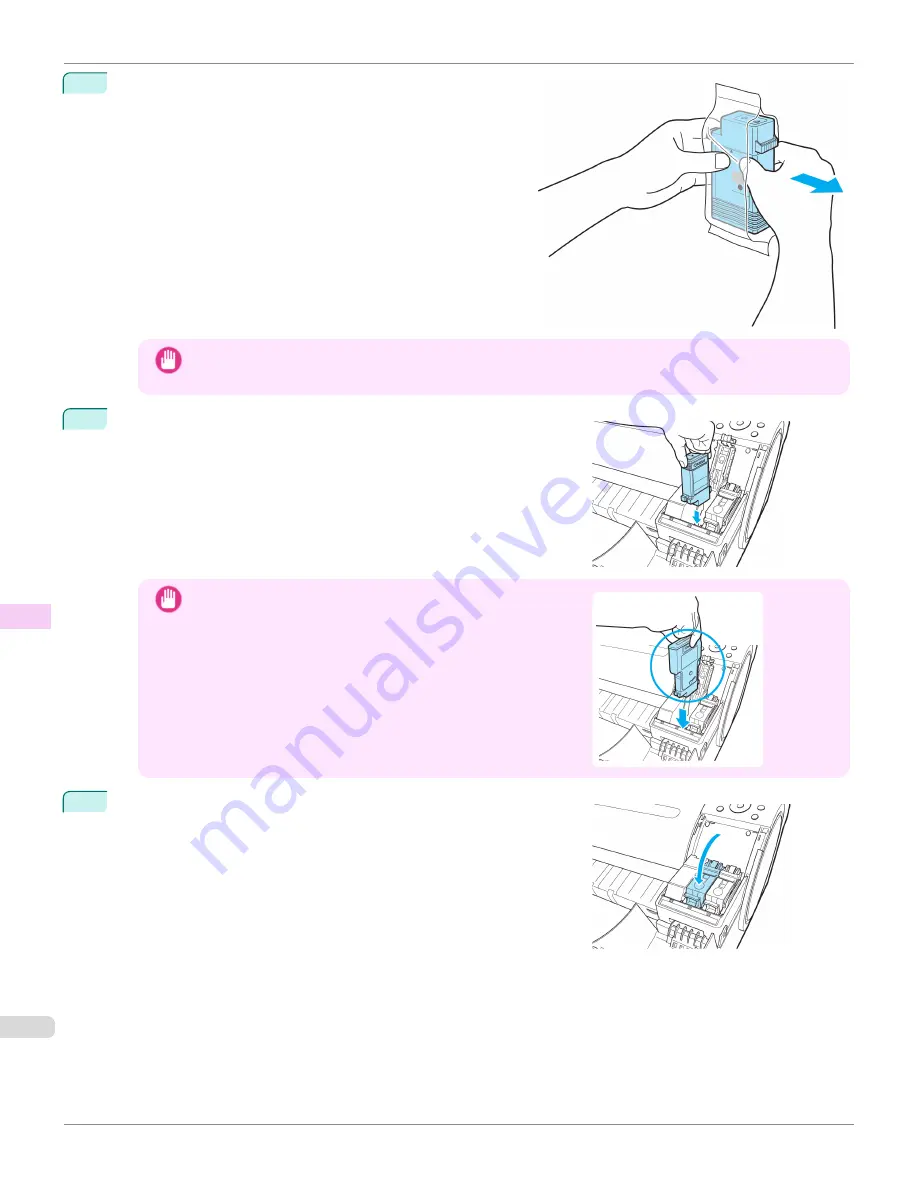
Open the pouch and remove the Ink Tank.
Important
•
Never touch the ink holes or electrical contacts. This may cause stains, damage the Ink Tank, and affect
printing quality.
3
Press the
OK
button and install the Ink Tank into the holder as
shown, with the ink holes facing down.
Important
•
Ink tanks cannot be installed in the holder if the color or orienta-
tion is incorrect.
If the Ink Tank does not fit in the holder, do not force it in. Check
the Ink Tank serial number, the Ink Color Label, the color of the
Ink Tank, and the orientation of the Ink Tank before reinstalling
it.
Forcing the Ink Tank into the holder may damage the printer.
4
Push the Ink Tank Lock Lever closed until it clicks into place.
Replacing Ink Tanks
iPF780
Maintenance and Consumables
Ink T
542
Содержание image Prograf iPF780 Series
Страница 14: ...14 ...
Страница 30: ...iPF780 User s Guide 30 ...
Страница 156: ...iPF780 User s Guide 156 ...
Страница 358: ...iPF780 User s Guide 358 ...
Страница 470: ...iPF780 User s Guide 470 ...
Страница 480: ...iPF780 User s Guide 480 ...
Страница 520: ...iPF780 User s Guide 520 ...
Страница 574: ...iPF780 User s Guide 574 ...
Страница 626: ...iPF780 User s Guide 626 ...
Страница 648: ...iPF780 User s Guide ENG CANON INC 2014 ...


