


2. Installation Manual
3-2) Checking the firmware and PLD code
(1)
Connect the keyboard and mouse.
(2)
Start up the CXDI system.
(3)
Close the CXDI host software if it starts up.
(4)
Connect Telnet by referring to “CXDI-50G Telnet Connection” in the Tool Software
Operation Manual for CXDI-50G.
(5)
Check the versions of the firmware and PLD code on the screen displayed after the
login.
login: canon
Password: ********
CXDI-50G firmware Ver.1.01.00
build as Jul 2 2003 16:13:45
normal boot
HUB50 Ver.5010 product code:0701
pcb-50di>
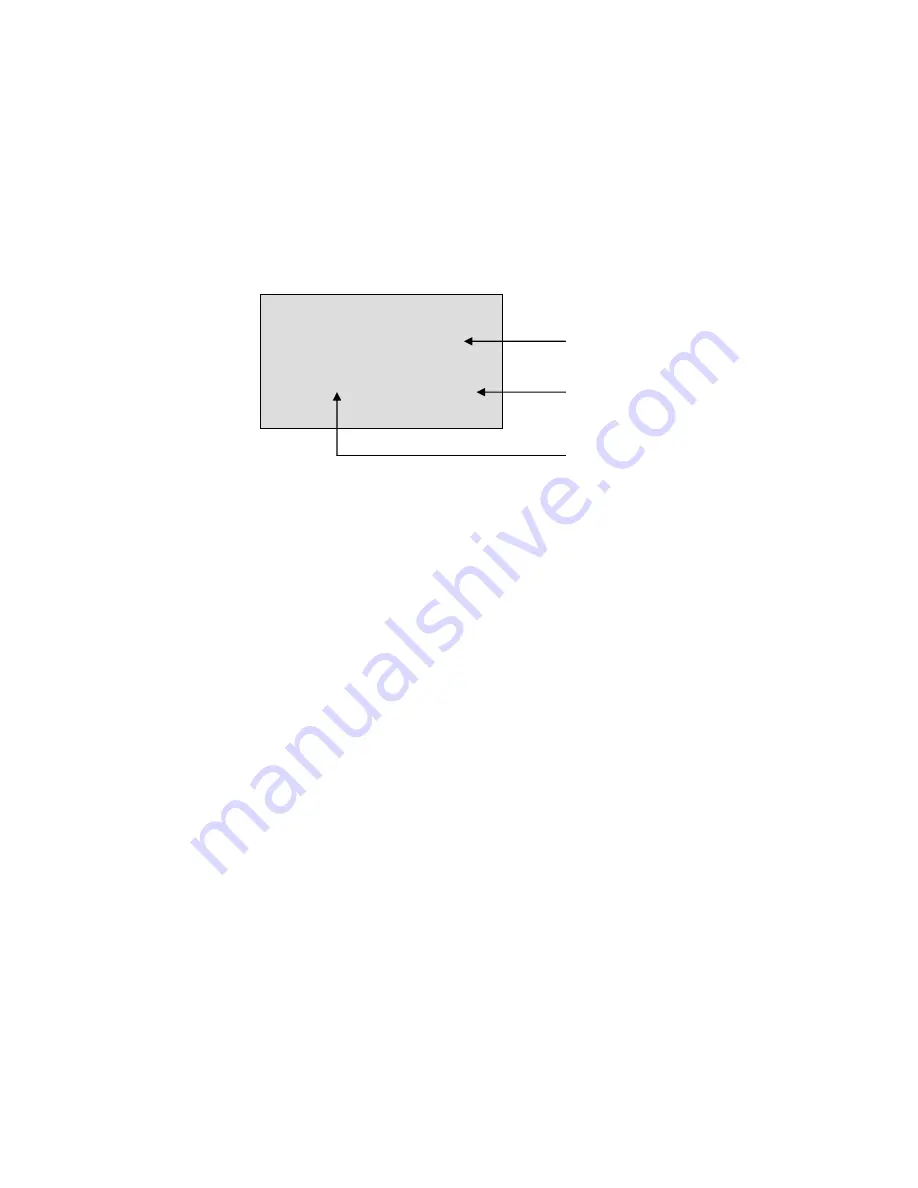
Firmware version
PLD code version
Hardware version
(6)
After you finish checking, close HyperTerminal.
- 31 -
Содержание CXDI-50G
Страница 8: ...1 General 2 2 2 S Sy ys st te em m D Di ia ag gr ra am m 2 1 Standalone System 2 2 Total System ...
Страница 20: ...2 Installation Manual 3 CXDI 50G Power Box assemble package 4 Grid optional 6 ...
Страница 32: ...2 Installation Manual When normal imaging When timeout due to RX_REQ not negating 18 ...
Страница 58: ...2 Installation Manual 44 Input parameters Fig 3 ...
Страница 104: ...2 Installation Manual 90 2 Power Box Unit mm Mass 4 2Kg ...
Страница 105: ...2 Installation Manual 91 3 Remote Switch Unit mm Mass 0 5Kg 4 Grid Optional 508 27 452 Unit mm Mass 0 9Kg Frame ...
Страница 135: ...CXDI SYSTEM CXDI 50G 1 2 Rev 02 Key No 5 Key No 6 Key No 7 Key No 8 Key No 9 Key No 10 Key No 11 Canon Inc ...
Страница 139: ...CXDI 50G IMAGING UNIT 2 4 Rev 02 16 21 19 18 22 20 17 2 4 3 8 10 12 13 9 11 15 1 5 6 14 7 Canon Inc ...
Страница 150: ...Content 1 Gathering Information about Problems 1 2 How to back up and recover the system 3 CXDI V6 00 Error code ...


