


0ALJ-00W
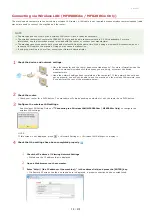
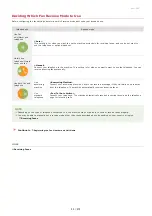
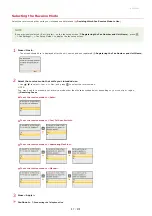
Selecting the Receive Mode
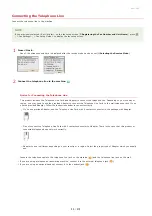
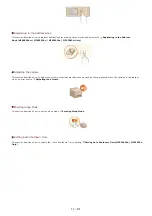
Select the receive mode that suits your intended use beforehand (
Deciding Which Fax Receive Mode to Use
).
NOTE
If you previously selected <Set Up Later> on the fax setup screen (
Registering the Fax Number and Unit Name
), press
<Fax Settings> <Fax Setup Guide> to display the fax setup screen.
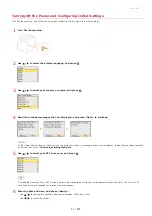
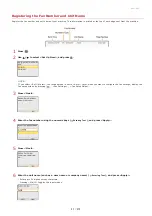
Press <Next>.
The screen shown here is displayed after the unit name has been registered (
Registering the Fax Number and Unit Name
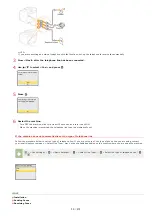
Select the receive mode that suits your intended use.
Use
/
to select <Yes> or <No>, and press
to select the receive mode.
NOTE:
You may be able to manually set a receive mode other than those described below, depending on your country or region.
To set the receive mode to <Auto>
To set the receive mode to <Fax/Tel Auto Switch>
To set the receive mode to <Answering Machine>
To set the receive mode to <Manual>
Press <Apply>.
Continue to
1
2
3
»
㻠㻣㻌㻛㻌㻢㻣㻢
Содержание Color imageCLASS MF8580Cdw
Страница 1: ......
Страница 19: ...Step 9 Configuring Initial Settings for Fax Functions MF8580Cdw MF8550Cdn MF8280Cw Only...
Страница 46: ...Continue to Selecting the Receive Mode LINKS Sending Faxes...
Страница 48: ...LINKS Receiving Faxes...
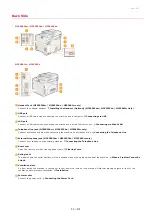
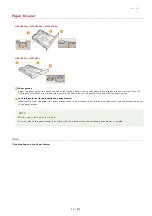
Страница 76: ...Paper...
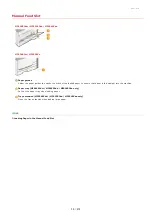
Страница 87: ...Select the paper type and press LINKS Loading Paper in the Manual Feed Slot Paper 2...
Страница 106: ...the hook...
Страница 113: ...LINKS Basic Copy Operations...
Страница 118: ...LINKS Basic Copy Operations Adjusting Color Balance Adjusting Sharpness...
Страница 148: ...LINKS Sending Faxes Sending Faxes to Multiple Destinations Simultaneously Sequential Broadcast...
Страница 162: ...LINKS Receiving Faxes Checking Status and Log for Sent and Received Documents...
Страница 169: ...LINKS Receiving Faxes...
Страница 174: ...Attach a cover sheet to the document as necessary Attaching Cover Sheets to PC Faxes Click OK to send the document 4 5...
Страница 183: ...To specify multiple destinations repeat steps 3 and 4...
Страница 188: ......
Страница 199: ...LINKS Printing a Document...
Страница 201: ...LINKS Printing a Document Printing Multiple Pages onto One Sheet Printing Booklet MF8580Cdw MF8550Cdn MF8540Cdn Only...
Страница 206: ...Gutter check box and specify the margin width in Booklet Gutter LINKS Printing a Document...
Страница 210: ...LINKS Printing a Document Printing Borders Printing Dates and Page Numbers...
Страница 212: ...LINKS Printing a Document NOTE For more information click Help on the printer driver screen...
Страница 242: ...Follow the on screen instructions to register the machine LINKS Printing with Google Cloud Print 6...
Страница 269: ...Configuring Scan Settings in ScanGear MF...
Страница 283: ...LINKS Configuring Scan Settings in Simple Mode Scanning Using MF Toolbox Scanning Using an Application...
Страница 287: ......
Страница 332: ...LINKS Connecting to a Wireless LAN MF8580Cdw MF8280Cw Only...
Страница 341: ...LINKS Setting IPv6 Addresses Viewing Network Settings Configuring WINS...
Страница 353: ...LINKS Setting Up Print Server...
Страница 372: ...LINKS Changing the Maximum Transmission Unit Setting a Wait Time for Connecting to a Network...
Страница 378: ...LINKS Setting IPv4 Address Setting IPv6 Addresses Viewing Network Settings...
Страница 413: ...LINKS Specifying IP Addresses for Firewall Rules...
Страница 455: ......
Страница 471: ...Turn OFF the machine wait for at least 10 seconds and turn it back on LINKS Remote UI Screens Setting Menu List...
Страница 495: ...Yellow 17 Levels Magenta 17 Levels Cyan 17 Levels Black 17 Levels...
Страница 651: ...The installation begins Wait a moment This process may take some time Click Exit Click Next Exit 6 7...
Страница 655: ...Click Uninstall Uninstall begins Wait a moment This process may take some time Click Exit Click Back Exit 4 5 6...
Страница 656: ......
Страница 669: ......
Страница 677: ......
Страница 687: ...5 Read the License Agreement and click Yes 6 Click Next...
Страница 705: ...4 Read the License Agreement and click Continue 5 Click Agree 6 When the following screen appears click Continue...
Страница 717: ...8 Check that this machine is added to the Printer Fax or Print Scan dialog box 9 Close the dialog box...
Страница 726: ...The icon is added to the printer folder...
Страница 731: ......
Страница 733: ......
Страница 735: ...When User Account Control appears Click Yes or Continue 4 Click Delete 5 Click Yes 6 Click Exit...


