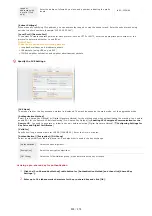
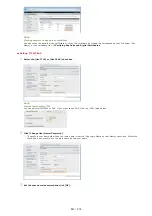


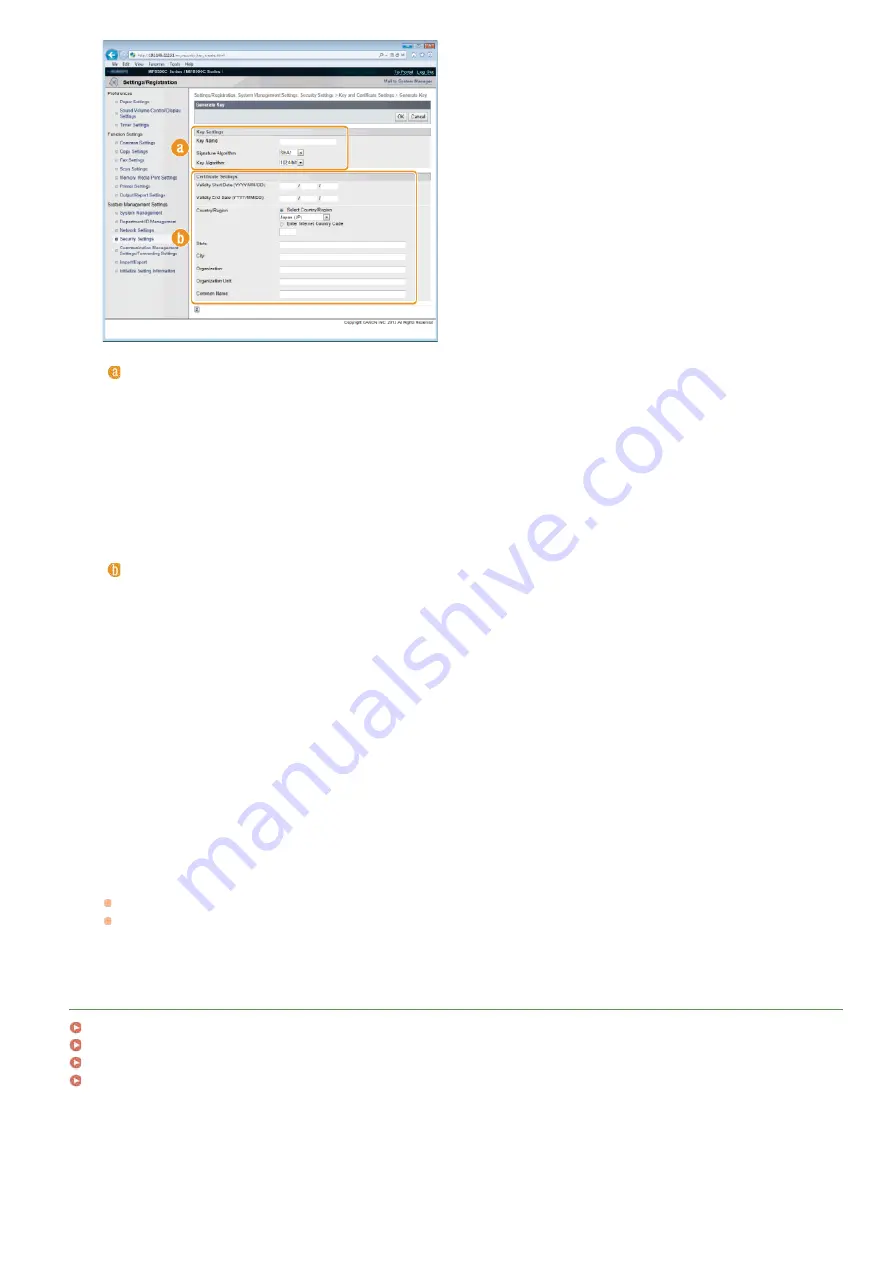
[Key Settings]
[Key Name]
Enter up to 24 alphanumeric characters for naming the key pair. Set a name that will be easy for you to find later in a list.
[Signature Algorithm]
Select the signature algorithm from the drop-down list.
[Key Algorithm]
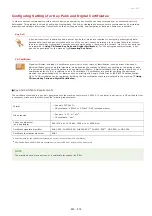
RSA is used for generating a key pair. Select the key length from the drop-down list. The larger the number for the key
length, the slower the communication. However, the security is tighter.
NOTE:
[512bit] cannot be selected for the key length, if [SHA384] or [SHA512] is selected for [Signature Algorithm].
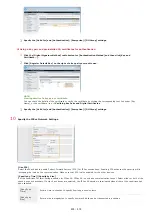
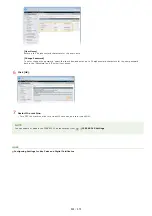
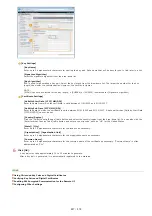
[Certificate Settings]
[Validity Start Date (YYYY/MM/DD)]
Enter the date from which the certificate is valid between 01/01/2000 and 31/12/2037.
[Validity End Date (YYYY/MM/DD)]
Enter the date to which the certificate is valid between 01/01/2000 and 31/12/2037. A date earlier than [Validity Start Date
(YYYY/MM/DD)] cannot be set.
[Country/Region]
Click the [Select Country/Region] radio button and select the country/region from the drop-down list. You can also click the
[Enter Internet Country Code] radio button and enter a country code, such as "US" for the United States.
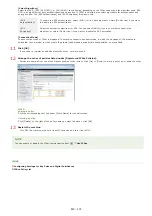
[State]/[City]
Enter up to 24 alphanumeric characters for the location as necessary.
[Organization]/[Organization Unit]
Enter up to 24 alphanumeric characters for the organization name as necessary.
[Common Name]
Enter up to 48 alphanumeric characters for the common name of the certificate as necessary. "Common Name" is often
abbreviated as "CN."
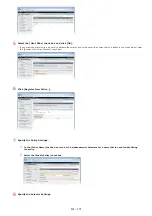
Click [OK].
A key pair may take approximately 10 to 15 minutes to generate.
After a key pair is generated, it is automatically registered to the machine.
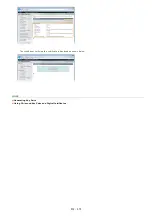
LINKS
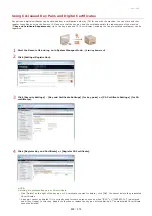
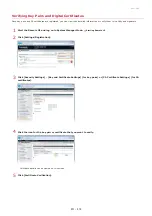
Using CA-issued Key Pairs and Digital Certificates
Verifying Key Pairs and Digital Certificates
Enabling SSL Encrypted Communication for the Remote UI
6
㻠㻠㻣㻌㻛㻌㻢㻣㻢
Содержание Color imageCLASS MF8580Cdw
Страница 1: ......
Страница 19: ...Step 9 Configuring Initial Settings for Fax Functions MF8580Cdw MF8550Cdn MF8280Cw Only...
Страница 46: ...Continue to Selecting the Receive Mode LINKS Sending Faxes...
Страница 48: ...LINKS Receiving Faxes...
Страница 76: ...Paper...
Страница 87: ...Select the paper type and press LINKS Loading Paper in the Manual Feed Slot Paper 2...
Страница 106: ...the hook...
Страница 113: ...LINKS Basic Copy Operations...
Страница 118: ...LINKS Basic Copy Operations Adjusting Color Balance Adjusting Sharpness...
Страница 148: ...LINKS Sending Faxes Sending Faxes to Multiple Destinations Simultaneously Sequential Broadcast...
Страница 162: ...LINKS Receiving Faxes Checking Status and Log for Sent and Received Documents...
Страница 169: ...LINKS Receiving Faxes...
Страница 174: ...Attach a cover sheet to the document as necessary Attaching Cover Sheets to PC Faxes Click OK to send the document 4 5...
Страница 183: ...To specify multiple destinations repeat steps 3 and 4...
Страница 188: ......
Страница 199: ...LINKS Printing a Document...
Страница 201: ...LINKS Printing a Document Printing Multiple Pages onto One Sheet Printing Booklet MF8580Cdw MF8550Cdn MF8540Cdn Only...
Страница 206: ...Gutter check box and specify the margin width in Booklet Gutter LINKS Printing a Document...
Страница 210: ...LINKS Printing a Document Printing Borders Printing Dates and Page Numbers...
Страница 212: ...LINKS Printing a Document NOTE For more information click Help on the printer driver screen...
Страница 242: ...Follow the on screen instructions to register the machine LINKS Printing with Google Cloud Print 6...
Страница 269: ...Configuring Scan Settings in ScanGear MF...
Страница 283: ...LINKS Configuring Scan Settings in Simple Mode Scanning Using MF Toolbox Scanning Using an Application...
Страница 287: ......
Страница 332: ...LINKS Connecting to a Wireless LAN MF8580Cdw MF8280Cw Only...
Страница 341: ...LINKS Setting IPv6 Addresses Viewing Network Settings Configuring WINS...
Страница 353: ...LINKS Setting Up Print Server...
Страница 372: ...LINKS Changing the Maximum Transmission Unit Setting a Wait Time for Connecting to a Network...
Страница 378: ...LINKS Setting IPv4 Address Setting IPv6 Addresses Viewing Network Settings...
Страница 413: ...LINKS Specifying IP Addresses for Firewall Rules...
Страница 455: ......
Страница 471: ...Turn OFF the machine wait for at least 10 seconds and turn it back on LINKS Remote UI Screens Setting Menu List...
Страница 495: ...Yellow 17 Levels Magenta 17 Levels Cyan 17 Levels Black 17 Levels...
Страница 651: ...The installation begins Wait a moment This process may take some time Click Exit Click Next Exit 6 7...
Страница 655: ...Click Uninstall Uninstall begins Wait a moment This process may take some time Click Exit Click Back Exit 4 5 6...
Страница 656: ......
Страница 669: ......
Страница 677: ......
Страница 687: ...5 Read the License Agreement and click Yes 6 Click Next...
Страница 705: ...4 Read the License Agreement and click Continue 5 Click Agree 6 When the following screen appears click Continue...
Страница 717: ...8 Check that this machine is added to the Printer Fax or Print Scan dialog box 9 Close the dialog box...
Страница 726: ...The icon is added to the printer folder...
Страница 731: ......
Страница 733: ......
Страница 735: ...When User Account Control appears Click Yes or Continue 4 Click Delete 5 Click Yes 6 Click Exit...


