


0ALJ-03R
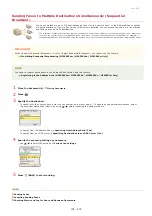
Sending Faxes to Multiple Destinations Simultaneously (Sequential
Broadcast)
You can send faxes to up to 210 destinations at once. Use the numeric keys or the Address Book to specify
multiple destinations. If your office has an LDAP server installed, you can access the server via the machine,
and then specify up to 10 destinations.
The maximum number of destinations that you can specify when using an LDAP server or the numeric keys is 10 respectively.
If you use the numeric keys in combination with an LDAP server, a total of 10 destinations can be specified. For example, if
seven destinations have been specified using the numeric keys, up to three destinations can be specified using an LDAP server.
IMPORTANT
When <Restrict Sequential Broadcast> is set to <Reject Sequential Broadcast>, you cannot use this feature.
Prohibiting Sequential Broadcasting (MF8580Cdw / MF8550Cdn / MF8280Cw Only)
NOTE
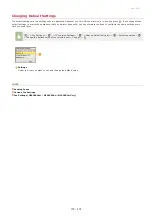
You need to register destinations in the Address Book before using this feature.
Registering in the Address Book (MF8580Cdw / MF8550Cdn / MF8540Cdn / MF8280Cw Only)
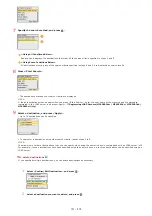
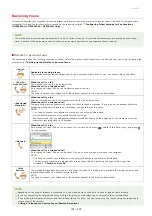
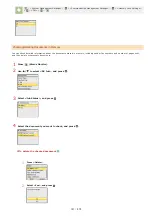
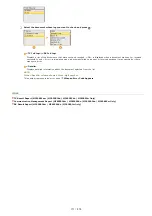
Place the document(s).
Press .
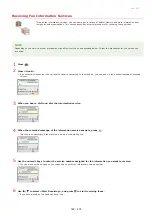
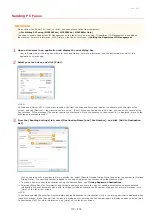
Specify the destination.
To specify with the numeric keys, enter the fax number, and press <Apply>. To specify any additional destinations, select
<Specify Next Destination (New)> by using
/
before repeating the same procedure.
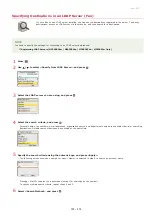
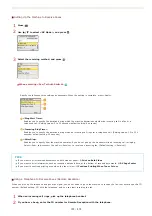
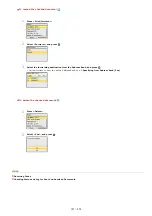
To specify from the Address Book
Specifying from Address Book (Fax)
To specify from an LDAP server
Specifying Destinations in an LDAP Server (Fax)
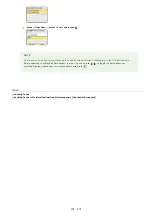
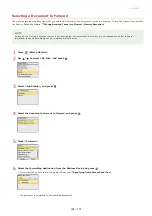
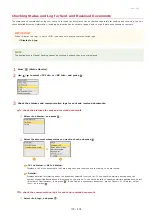
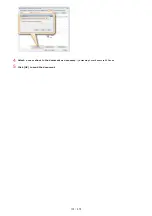
Specify the scanning settings as necessary.
Use
/
to select the settings.
Press
(B&W) to start sending.
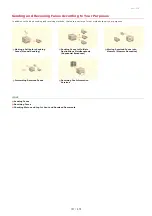
LINKS
Checking Status and Log for Sent and Received Documents
*
*
*
1
2
3
4
5
㻝㻡㻥㻌㻛㻌㻢㻣㻢
Содержание Color imageCLASS MF8580Cdw
Страница 1: ......
Страница 19: ...Step 9 Configuring Initial Settings for Fax Functions MF8580Cdw MF8550Cdn MF8280Cw Only...
Страница 46: ...Continue to Selecting the Receive Mode LINKS Sending Faxes...
Страница 48: ...LINKS Receiving Faxes...
Страница 76: ...Paper...
Страница 87: ...Select the paper type and press LINKS Loading Paper in the Manual Feed Slot Paper 2...
Страница 106: ...the hook...
Страница 113: ...LINKS Basic Copy Operations...
Страница 118: ...LINKS Basic Copy Operations Adjusting Color Balance Adjusting Sharpness...
Страница 148: ...LINKS Sending Faxes Sending Faxes to Multiple Destinations Simultaneously Sequential Broadcast...
Страница 162: ...LINKS Receiving Faxes Checking Status and Log for Sent and Received Documents...
Страница 169: ...LINKS Receiving Faxes...
Страница 174: ...Attach a cover sheet to the document as necessary Attaching Cover Sheets to PC Faxes Click OK to send the document 4 5...
Страница 183: ...To specify multiple destinations repeat steps 3 and 4...
Страница 188: ......
Страница 199: ...LINKS Printing a Document...
Страница 201: ...LINKS Printing a Document Printing Multiple Pages onto One Sheet Printing Booklet MF8580Cdw MF8550Cdn MF8540Cdn Only...
Страница 206: ...Gutter check box and specify the margin width in Booklet Gutter LINKS Printing a Document...
Страница 210: ...LINKS Printing a Document Printing Borders Printing Dates and Page Numbers...
Страница 212: ...LINKS Printing a Document NOTE For more information click Help on the printer driver screen...
Страница 242: ...Follow the on screen instructions to register the machine LINKS Printing with Google Cloud Print 6...
Страница 269: ...Configuring Scan Settings in ScanGear MF...
Страница 283: ...LINKS Configuring Scan Settings in Simple Mode Scanning Using MF Toolbox Scanning Using an Application...
Страница 287: ......
Страница 332: ...LINKS Connecting to a Wireless LAN MF8580Cdw MF8280Cw Only...
Страница 341: ...LINKS Setting IPv6 Addresses Viewing Network Settings Configuring WINS...
Страница 353: ...LINKS Setting Up Print Server...
Страница 372: ...LINKS Changing the Maximum Transmission Unit Setting a Wait Time for Connecting to a Network...
Страница 378: ...LINKS Setting IPv4 Address Setting IPv6 Addresses Viewing Network Settings...
Страница 413: ...LINKS Specifying IP Addresses for Firewall Rules...
Страница 455: ......
Страница 471: ...Turn OFF the machine wait for at least 10 seconds and turn it back on LINKS Remote UI Screens Setting Menu List...
Страница 495: ...Yellow 17 Levels Magenta 17 Levels Cyan 17 Levels Black 17 Levels...
Страница 651: ...The installation begins Wait a moment This process may take some time Click Exit Click Next Exit 6 7...
Страница 655: ...Click Uninstall Uninstall begins Wait a moment This process may take some time Click Exit Click Back Exit 4 5 6...
Страница 656: ......
Страница 669: ......
Страница 677: ......
Страница 687: ...5 Read the License Agreement and click Yes 6 Click Next...
Страница 705: ...4 Read the License Agreement and click Continue 5 Click Agree 6 When the following screen appears click Continue...
Страница 717: ...8 Check that this machine is added to the Printer Fax or Print Scan dialog box 9 Close the dialog box...
Страница 726: ...The icon is added to the printer folder...
Страница 731: ......
Страница 733: ......
Страница 735: ...When User Account Control appears Click Yes or Continue 4 Click Delete 5 Click Yes 6 Click Exit...


