4.
Click Red-Eye Correction.
5.
Click OK.
Red eyes are corrected and the
(Correction/Enhancement) mark appears on the upper left of
the image.
Important
Areas other than the eyes may be corrected depending on the image.
Note
Click
(Compare) to display the images before and after the correction side by side so that
you can compare and check the result.
Click Reset Selected Image to undo the correction operation.
If you want to apply the correction to all the selected images at once, select the Apply to all
images checkbox.
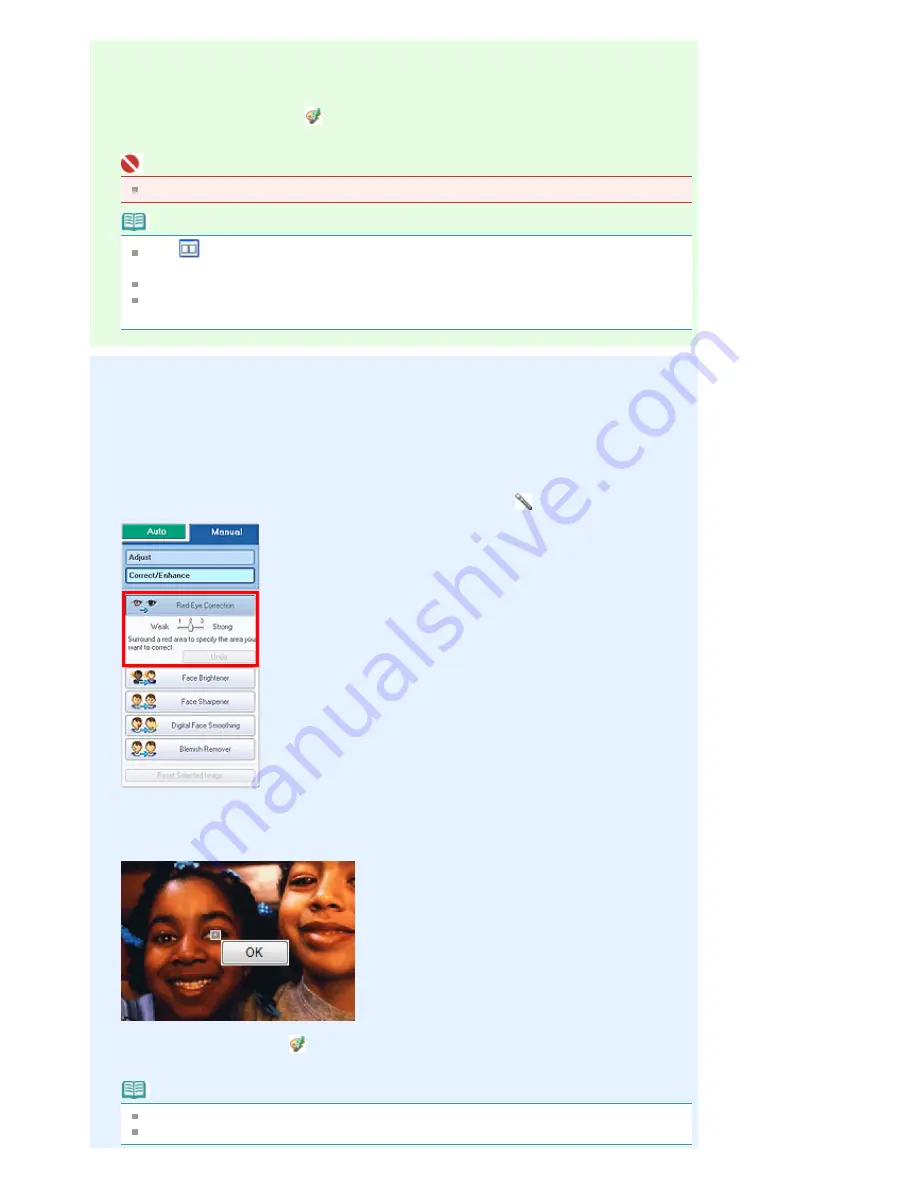
Manual Correction
3.
Click Manual, then click Correct/Enhance.
4.
Click Red-Eye Correction.
Move the cursor over the image. The shape of the cursor changes to
(Paintbrush).
5.
Drag to select the red area you want to correct, then click OK that appears over the
image.
Red eye is corrected and the
(Correction/Enhancement) mark appears on the upper left of the
image.
Note
Effect levels can be changed using the slider below Red-Eye Correction.
Click Undo to undo the preceding correction operation.
Page 202 of 853 pages
Using the Red-Eye Correction Function
Содержание 3300B002
Страница 12: ...Page top Page 12 of 853 pages Main Components ...
Страница 27: ...Page top Page 27 of 853 pages Entering the Date and Time ...
Страница 79: ...Page top Page 79 of 853 pages Using Useful Fax Functions ...
Страница 85: ...Page top Page 85 of 853 pages Printing Photos Directly from Your Digital Camera or Mobile Phone ...
Страница 96: ...Page top Page 96 of 853 pages Loading Envelopes ...
Страница 105: ...Page top Page 105 of 853 pages Loading a Document in the ADF ...
Страница 111: ...Page top Page 111 of 853 pages Printing the Nozzle Check Pattern ...
Страница 113: ...Page top Page 113 of 853 pages Examining the Nozzle Check Pattern ...
Страница 120: ...Page top Page 120 of 853 pages Aligning the Print Head ...
Страница 127: ...Page top Page 127 of 853 pages Cleaning the Paper Feed Roller ...
Страница 142: ...About Solution Menu Page 142 of 853 pages MX330 series Advanced Guide ...
Страница 170: ...See Help for details on the Select Images screen Page top Page 170 of 853 pages Selecting a Photo ...
Страница 172: ...Note See Help for details on the Edit screen Page top Page 172 of 853 pages Editing ...
Страница 174: ...Page top Page 174 of 853 pages Printing ...
Страница 178: ...Page top Page 178 of 853 pages Selecting the Paper and Layout ...
Страница 181: ...Page top Page 181 of 853 pages Editing ...
Страница 183: ...Page top Page 183 of 853 pages Printing ...
Страница 190: ...Page top Page 190 of 853 pages Printing ...
Страница 197: ...Page top Page 197 of 853 pages Printing ...
Страница 230: ...Page top Page 230 of 853 pages Cropping Photos Photo Print ...
Страница 252: ...Note See Help for details on comments Page top Page 252 of 853 pages Attaching Comments to Photos ...
Страница 285: ...Page top Page 285 of 853 pages Stamp Background Printing ...
Страница 325: ...Page top Page 325 of 853 pages Reducing Photo Noise ...
Страница 381: ...7 Save the scanned images Saving Saving as PDF Files Page top Page 381 of 853 pages Scanning Photos and Documents ...
Страница 573: ...None No cropping frame will be displayed after previewing Page top Page 573 of 853 pages Preview Tab ...
Страница 645: ...Page top Page 645 of 853 pages Creating an Address Book ...
Страница 704: ...Text LCD Page top Page 704 of 853 pages Bluetooth Settings Screen ...
Страница 751: ...Colors Are Uneven or Streaked Page top Page 751 of 853 pages Print Results Not Satisfactory ...
Страница 757: ...Page top Page 757 of 853 pages Colors Are Unclear ...
Страница 768: ...Page top Page 768 of 853 pages Printing Does Not Start ...
Страница 774: ...Page top Page 774 of 853 pages Paper Does Not Feed Properly ...


