


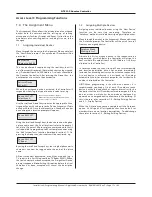


2.10 Setting Up the Auto Night Mode Function
This function allows Quantec's automatic night mode
function to be enabled or disabled and for preset entry and
exit times to be programmed into the Controller. On
selecting the 'Auto Night Mode' prompt, one of the
following options will appear:
Use the scroll keys to select the required option and press
Accept. Accepting YES enables the auto night mode function
and allows you to enter the time you want the system to
automatically enter night mode:
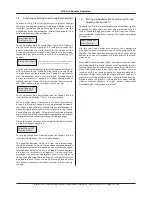
Use the scroll and Accept keys to select the relevant hour,
minute and am or pm. When the am/pm field has been
accepted the Controller prompts you to select an exit time
at which the system will automatically return to day mode:
Use the scroll and Accept keys to select the relevant hour,
minute and am or pm. When the am/pm field has been
accepted the Controller automatically returns you to the
System Setup Menu.
Notes
:
1. If the Auto Night Mode function is disabled it is still possible
to manually switch night mode on/off at Access Level 2.
2. When HTM08-03 mode is active, Auto Night Mode is
disabled.
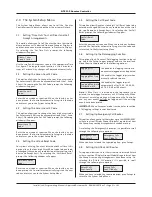
2.11 Monitoring a Network Device
This function allows any ID address to be polled from the
Controller. When polling the address, the relevant device's
confidence LED will flash, or in the case of an addressable
sounder, its beeper will sound at the STANDARD call rate.
First, select the ‘Monitor Point’ prompt from the System Setup
Menu. A window similar to the one below will appear:
Use the scroll keys to select the device ID number you wish to
monitor (do not press Accept as this will perform a network
reset).
If the state field = '1 OK' : the device has been found by the
Controller and its confidence LED will be lit, or in the case of
an addressable overdoor light or sounder, its beeper will be
sounding at the STANDARD call rate.
If the state field = '0 OK' : the device has been found by the
Controller but it does not have a confidence LED or sounder
that can be switched on, i.e. the device is probably a Display.
If the state field is replaced by a message reading "No
Response": the Controller cannot find a device with the ID
number you have selected.
Pressing Escape or Accept at any time will perform a network
reset and return you to the System Setup Menu.
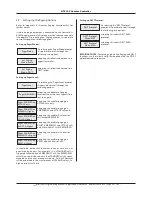
2.12 Determining the Location of Devices which are
Doubly Addressed
Any doubly addressed devices on the system are automatically
flagged on the right hand side of the Controller's display, i.e:
The bracketed number (in this example '2') is the ID number
of the doubly addressed device (if there are more than one set
of doubly addressed devices these will be flagged too).
To ascertain the exact location of the doubly addressed
devices, select the 'Double Address' option from the System
Setup Menu. A window similar to the one below will appear:
All devices with the ID address shown will be polled from the
Controller and their confidence LEDs will flash, or in the case
of addressable overdoor lights and sounders, their beepers will
sound at the STANDARD call rate.
Pressing the scroll keys will move you onto the next set of
doubly addressed devices (if there are any) and their
confidence LEDs and sounders will activate instead.
Pressing Accept performs a network reset and returns you to
the System Setup Menu.
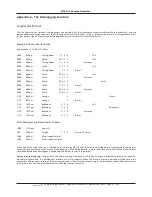
Auto Night Mode
Enabled? : NO
Auto Night Mode
Enabled? : YES
Entry time
07:30 pm
Exit time
07:00 am
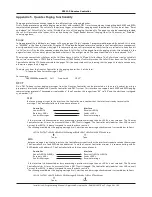
Device 002 CLPT
State=1 OK
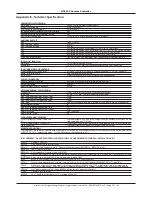
DISABLED WC ( 2)
Double Addressed
Device 002 CLPT
State=1 OK
QT601-2 Quantec Controller
Installation & Programming Manual • Approved Document No. DNU6012001 Rev 5 • Page 23 of 42


