background image

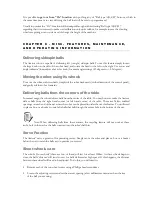
Ball "Place" button 

The ball place button can select three different ball positioning modes: 

Pr. (Program), Separ. (Separate), and Rnd (Random), indicated by the 3 yellows lights on the control 
panel. 

24.


In Program mode - "Pr." light is on - Ball A is sent to left-right position A, Ball B is sent to 
L-R position B, Ball C is sent to L-R position C, and Ball D is sent to L-R position D. [These 
four Left-Right positions are determined by the four horizontal levers on the right side of the 
control panel] 

25.


In  Separate  mode  -  "Separ."  light is  on  - the  1st ball  of  a  given  pattern  is  sent  to  the  L-R 
position A, the 2nd ball to the L-R position B, 3rd to C, and 4th to D, repeating with the 5th 
ball to L-R position A, etc.  

26.


In Random mode - "Rnd." light is on - the Amicus will randomly deliver balls, selecting from 
the L-R positions you have chosen.  

Ball "Place" mode examples


An example of the 'Program Mode' was used at the beginning of this chapter ... if you remember - Ball A 
(two balls) was sent to position A, and Ball B (three balls) was sent to position B. Lets now move on to 
examples of the 'Separate Mode' and 'Random Mode'. 

Separate Mode  example:  Using the  same setup  as before ...ball  A (two  balls) and  ball B  (three balls),  try 
this  ... select  the  'Separate Mode'  by  pressing  the  'Place  button',  (the  yellow  light below  "Separ"  should 
now be on). Then press the remote on/off button to play the pattern. You should notice that the: 

27.


1st ball (A) is sent to position A  

28.


the 2nd ball  (A) is sent to position B  

29.


the 3rd ball (B) is sent to position A  

30.


the 4th ball (B) is sent to position B 

31.


and the 5th ball (B) is sent to position A  

In the above  example,  balls are  delivered  to  two separate L-R positions. To select additional  positions - 
use the up and down arrow keys, as you do this a yellow light will turn on next to the position(s) you have 
selected. Balls would then be sent in this order: 

32.


1st Ball - Position A 

33.


2nd Ball - Position B 

34.


3rd Ball - Position C 

35.


4th Ball - Position D  

36.


5th Ball - Position A 

Содержание Amicus 3000 Plus

Страница 1: ...Amicus3000Plus UsersManual...

Страница 2: ...d in closed dry rooms Do not touch rotating wheels while machine is running This can cause injury If you have problems assembling or using your robot please contact Tamasu Butterfly Europa GmbH Am Sch...

Страница 3: ......

Страница 4: ...memory positions The save button allows saving of a pattern into memory These buttons are used together to clear patterns from memory Left Right position 5 to 5 controls for A B C D Horizontal levers...

Страница 5: ...ples Ball Type button Ball Type mode examples Chapter 5 Using the additional control panel features Using the pattern memory feature To clear a pattern from memory The play pause feature Changing ball...

Страница 6: ...spin ball then move to the side and smash ball 3 against a lob The Amicus is unique in its ability to deliver up to four different types of balls each with its own speed spin distance and position set...

Страница 7: ...rubber rings for collecting net A S S E M B L Y P R O C E D U R E 2 Fasten the ball container to the robot base using a Philips head screw driver and the recessed head screws supplied Fig 1a 1b Ensur...

Страница 8: ...figure 5a Make sure the head slides down as far as it can go Tighten the lower screw of the clip with the hex wrench supplied as shown in Figure 5b Do not tighten or loosen the upper screw for any re...

Страница 9: ...extension tubes onto the tube sections Fig 10 Place the six plugs sewn onto the net into the end of the extension tubes Fig 11 or into the tube section at the corner sections Ensure that the net cuto...

Страница 10: ...starts calibration function and CA appears in the display see CA calibration function Push Ball A button in order to leave the calibration and start defining your first ball TIP If the Amicus begins t...

Страница 11: ...on a ball of this type is delivered Up to four balls of each type can be delivered before delivering balls of another type Once the end of a pattern is reached the Amicus automatically repeats the pat...

Страница 12: ...mple two balls for A and three balls for B use the step button to move to each of the balls in this pattern Note that after moving from the 3rd B ball the pattern returns to the 1st A ball Now set the...

Страница 13: ...as used at the beginning of this chapter if you remember Ball A two balls was sent to position A and Ball B three balls was sent to position B Lets now move on to examples of the Separate Mode and Ran...

Страница 14: ...e on Now play the pattern You will notice that the Amicus is delivering the different ball types in no particular order perhaps 1 fast ball 1 slow 2 medium etc Insummary of understanding the PLACE and...

Страница 15: ...ion 1 Using the step button move to memory position 1 which should be blinking if it is free Next press and hold the save button until the red blinking light turns solid You have just saved you first...

Страница 16: ...eration that the previously projected ball was fast or slow backspin or topspin Depending on that simulating a real game shoots the next ball faster or slower for the real time experience Toaccess thi...

Страница 17: ...from the corners of the table In normal usage the robot delivers balls from the center of the table You may however make the Amicus deliver balls from the right hand corner or left hand corner of the...

Страница 18: ...oing through the opening underneath the machine see picture below Stop Pin Maintenance The stop pin necessary for ball delivery requires 1 2 drops of oil every 4 6 months The stop pin is located just...

Страница 19: ...APP EN DIX I...

Страница 20: ...B C D 1 2 3 4 1 2 3 4 1 2 3 4 1 2 3 4 Balls minute A B C D Place Ball Type Spd Spin Dist Spd Spin Dist Spd Spin Dist Spd Spin Dist Play Pause A B C D 1 2 3 4 1 2 3 4 1 2 3 4 1 2 3 4 Balls minute A B C...

Страница 21: ...APP EN DIX II...

Страница 22: ...refers to the balls of the TT ball machine Amicus 3000 Plus The designations below the graphics dashed arrows refer to the balls and placing alternatives of the player 1 Getting used to the ball Count...

Страница 23: ...14 14 Spin 3 4 4 Long Short 1 5 5 Left Right 0 Right 3 5 Left 3 5 Ball min 35 Cycle Play 40 s pause 20 s Place Pr Separ Rnd Ball type Pr Rnd 3 Technique Service Backspin Amicus 3000 Chop flip Topspin...

Страница 24: ...he rally Ball A Ball B Ball C Ball D Ball 1 2 3 4 1 2 3 4 Speed 2 6 Spin 1 2 Long Short 1 4 Left Right Left 1 Right 4 Ball min 25 Cycle Play 40 s pause 20 s Place Pr Separ Rnd Ball type Pr Rnd 5 Rando...

Страница 25: ...Left Right Left 3 0 Left 2 Right 2 Ball min 35 Cycle Play 40 s pause 20 s Place Pr Separ Rnd Ball type Pr Rnd 7 Kong Linghui Service Counter ball Counter ball Counter ball Topspin Amicus 3000 Chop For...

Страница 26: ...2 5 Ball min 35 Cycle Play 40 s pause 20 s Place Pr Separ Rnd Ball type Pr Rnd 9 Timo Boll Service Backspin Counter ball Topspin Amicus 3000 Flip Backhand topspin Backhand topspin Forehand topspin Pla...

Страница 27: ...4 1 2 3 4 1 2 3 4 Speed 2 6 12 2 Spin 2 2 3 5 4 5 Long Short 1 4 4 10 Left Right Left 3 Right 3 5 Left 2 5 0 Ball min 35 Cycle Place Pr Separ Rnd Ball type Pr Rnd 11 Matsushita Service Topspin Topspin...

Страница 28: ...e assessment of side spin balls is trained After a service by Amicus 3000 Plus and the return by the player side spin balls are played onto the forehand With topspins alternating between diagonal and...

Страница 29: ...APP EN DIX III...

Страница 30: ...Casing for robot foot 53 3000 122 Shell tube 54 3000 124 Motor casing 2 off 55 3000 126 Ball container 56 30001 28 Collecting net 57 3000 130 Net supporting frame 58 3000 132 Extension cable for remo...

Отзывы: