


EN
Page 44 of 96
INSTRUCTION, USE AND
MAINTENANCE MANUAL
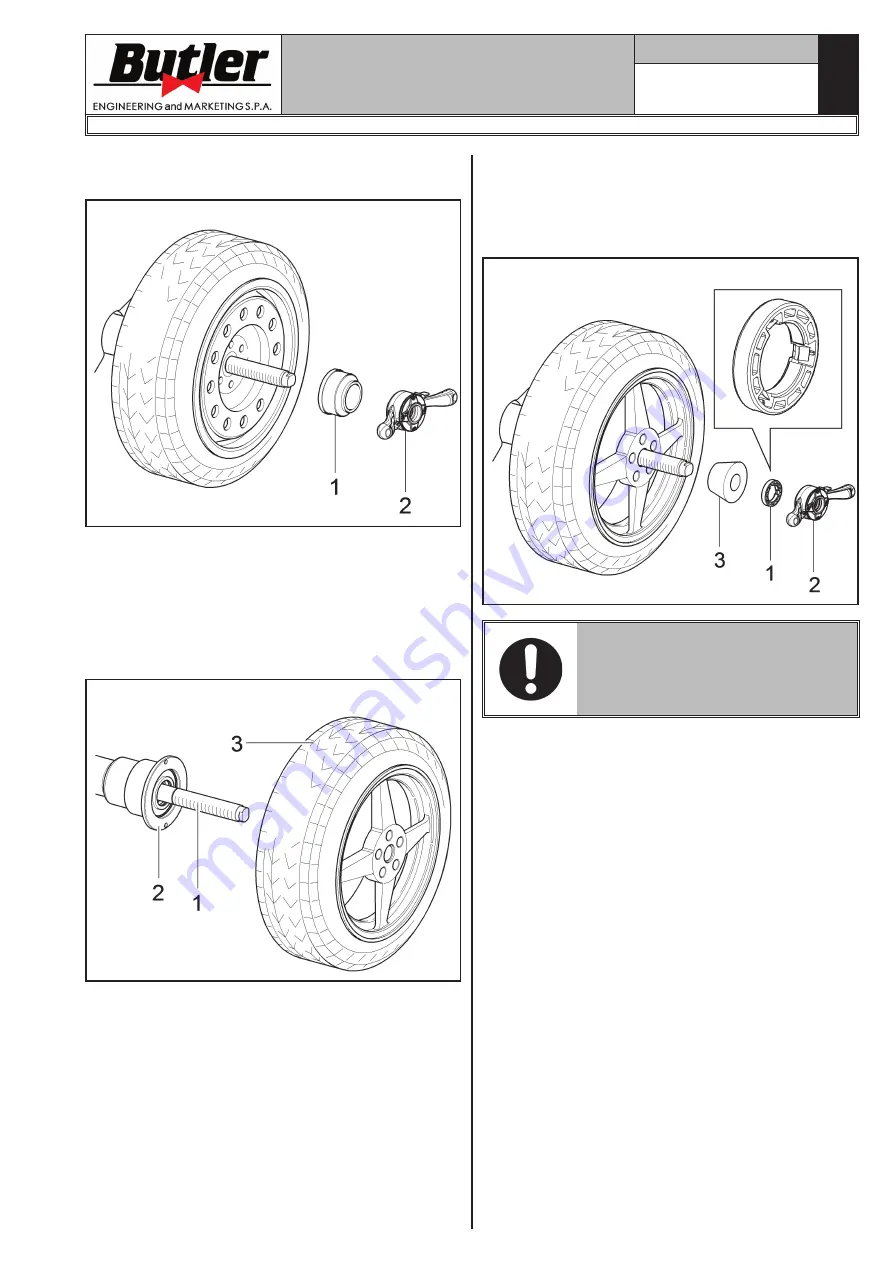
4. Fit the protection cap (
Fig. 30 ref. 1
) in the locknut
(
Fig. 30 ref. 2
) and fasten against the wheel.
Fig. 30
Some aluminium wheels, with very high centring, must
be fitted with the cone outside the wheel.
5. Clean the chuck (
Fig. 31 ref. 1
) before fitting the
wheel.
6. Fit the wheel (
Fig. 31 ref. 3
) with the inside of the
rim towards the wheel balancer, until the wheel is
up against the support flange (
Fig. 31 ref. 2
).
Fig. 31
7. Fit the cone (
Fig. 32 ref. 3
) with the narrowest part
turned towards the wheel.
8. Fit the pressure ring (
Fig. 32 ref. 1
) in the nut
(
Fig. 32 ref. 2
) and fasten the cone (
Fig. 32
ref. 3
).
Fig. 32
THE PRESSURE RING (FIG. 32
REF. 1) MUST BE , MOUNTED
WITH THE TEETH , OR DIS -
CHARGE SIDE TOWARDS THE
RING-NUT (FIG. 32 REF. 2).
1301-M001-02
LIBRAK360S - LIBRAK360PS - LIBRAK360WS - LIBRAK360PWS - LIBRAK360WSON - LIBRAK360PWSON - LIBRAK360PWSPRO - LIBRAK360PWS-MC - LIBRAK360PWS-OPEL


