Product description
6.
5
Calibration
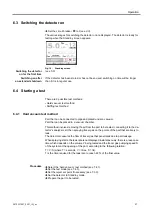
Calibration helps ensure that the leak detector is correctly adjusted to detect the tracer gas
selected and display the correct leak rate. A calibrated leak is used to calibrate the leak detector.
Depending on the test method, different types of calibration can be performed.
(*) in this case, the flow of the sniffer probe is not included in the leak detector calibration process.
Test method
Hard Vacuum
Sniffing
With the internal calibrated leak
yes
yes (*)
With an external calibrated leak
yes
yes
With the ambient air (ambient air not contaminated by the tracer
gas)
no
yes
6.5.1 Calibration with the internal calibrated leak
Procedure
The internal calibrated leak is specifically designed for the leak detector. It is composed
of:
● a Helium 4 reservoir (no internal calibration with the other tracer gases),
● a temperature sensor (to take into account the effect of temperature on the leak rate),
● an integrated diaphragm (to calibrate the leak rate),
● an identification label (identical to the identification label of an external calibrated
leak).
The calibrated leak is supplied with a calibration certificate.
Use a calibrated leak in the range ≈ 10
-8
Pa.m
3
/s (≈ 10
-7
mbar·l/s).
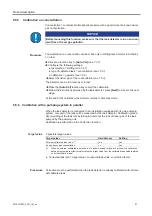
When switching the leak detector on, calibration with the internal calibrated leak is auto-
matically initiated if the calibration parameter is set on ’Start-up’ and if the type of cali-
brated leak is set on ’Internal’.
The calibration can be launched when the detector is :
– in test mode for leak test
– in test or in Stand-by mode for sniffing test.
Î
Check the leak settings (corrected leak rate to take temperature and time into account
if necessary)
(see
7.5.3)
.
Î
Press
[Auto cal]
key to launch a calibration.
In the case of intensive use of the detector, a spare internal calibrated leak is recom-
mended. If this is not possible, the detector can still be used and calibrated using an ex-
ternal calibrated leak.
NOTICE
Detector calibration
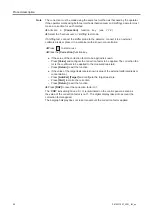
When switched on, the detector suggests that the operator carry out an auto-calibration
(if calibration parameter = ’operator’). For the optimal use of the detector,
this auto-
cal-ibration must be performed.
In all situations, a
calib
ration must be performed:
● at least once a day
● to optimise the measurement reliability for high sensitivity tests
● if it is uncertain whether the detector is working properly
● during intense and continuous operation: start an internal calibration at the beginning
of each work session (e.g. work in teams, every 8 hours).
29
0870231897_0001_IM_en

