CHAPTER 6 TROUBLESHOOTING
6-18
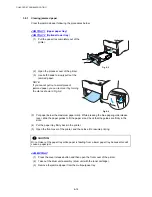
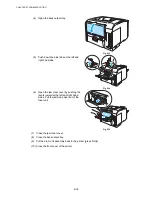
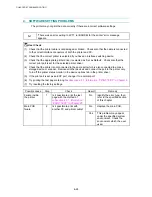
(4) Open the back output tray.
Fig.6-13
(5) Push down the blue tabs at the left and
right had sides.
Fig.6-14
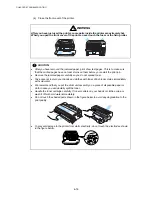
(6) Open the jam clear cover by pushing the
levers inward at the left and right hand
sides. Pull the jammed paper out of the
fuser unit.
Fig.6-15
(7) Close the jam clear cover.
(8) Close the back output tray.
(9) Put the drum unit assembly back in the printer (press firmly).
(10) Close the front cover of the printer.
Содержание HL-6050DN
Страница 188: ...HL 6050 6050D 6050DN SERVICE MANUAL 5 15 5 Put the paper tray into the printer Fig 5 29 Paper tray ...
Страница 190: ...HL 6050 6050D 6050DN SERVICE MANUAL 5 17 5 Remove the separation plate ASSY Fig 5 32 Separation plate ASSY ...
Страница 303: ...APPENDIX A 7 A 7 APPENDIX 7 BLOCK DIAGRAM HL 6050 CODE NAME LJ9586001 BLOCK DIAGRAM ...
Страница 304: ...APPENDIX A 8 A 8 APPENDIX 8 LOW VOLTAGE POWER SUPPLY CIRCUIT DIAGRAM 100V HL 6050 NAME Low voltage PS Circuit 100V ...
Страница 305: ...APPENDIX A 9 A 9 APPENDIX 9 LOW VOLTAGE POWER SUPPLY CIRCUIT DIAGRAM 200V HL 6050 NAME Low voltage PS Circuit 200V ...
Страница 306: ...APPENDIX A 10 A 10 APPENDIX 10 HIGH VOLTAGE POWER SUPPLY CIRCUIT DIAGRAM HL 6050 NAME High voltage PS Circuit ...

