background image

ACS 561 Service Manual

Robert Bosch GmbH

SP00D00517

2018-07-11

13

Introduction

Filter Change

The filter is designed to trap acid and particu-

lates, and to remove water from refrigerant. 

To meet the mandate for adequate moisture 

and contaminant removal, the filter must be 

replaced after 150 kg (331 lbs.) of refrigerant 

has been filtered.
The machine gives a warning when 125 kg 

(276 lbs.) of the filter capacity has been used; 

the machine locks down when the 150 kg 

(331 lb.) filter capacity has been reached and 

will no longer function. 

Check Remaining Filter Capacity

1.  Select FILTER CHANGE from the Setup 

Menu or when the machine prompts. The 

machine displays

FILTER LIFE TIME: X.XX KG

REPLACE FILTER?

  The machine displays amount of filter capac-

ity remaining until the machine locks down.

2.  Select F1 to change the filter; F2 to resume 

using the machine.

Replace the Filters  

and Sample Hose Assembly

1.  If F1 was selected to change the filter, the 

machine clears the filter, then prompts for 

the new filter code to be entered.

WAITING FOR FILTER TO BE CLEARED 

FILTER SERIAL # 

  Use the keypad to enter the serial number 

that appears on the new filter and select F1.

2.  The machine displays

TURN UNIT OFF 

REMOVE SHROUD AND REPLACE FILTER, 

IDENTIFIER FILTER, AND  

IDENTIFIER SAMPLE HOSE

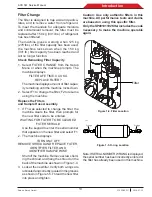
  Shut off the machine. Remove screws hold-

ing the shroud, and hang the shroud on the 

back of the machine as shown in Figure 1-4.

3.  Look at the new filter. Verify both o-rings are 

lubricated and correctly located in the grooves 

as shown in Figure 1-5. Thread the new filter 

into place and tighten.

Caution: Use only authentic filters in this 

machine. All performance tests and claims 

are based on using this specific filter.
Only the SP00101192 filter includes the code 

necessary to make the machine operable 

again.

Note: If SERIAL NUMBER WRONG is displayed, 

the serial number has been incorrectly entered or 

the filter has already been used in this machine.

Figure 1-4. Filter Location

Figure 1-5. O-ring Location

O-rings

O-rings

ss00722

Filter

Содержание ACS 561

Страница 1: ...ACS 561 en Repair instruction A C Service Unit ...

Страница 2: ...ACS 561 Service Manual Robert Bosch GmbH SP00D00517 2018 07 11 2 Robert Bosch GmbH BOSCH Robert Bosch GmbH Postfach 1119D 73201 Plochingen Direct any discrepancies or corrections to the address above ...

Страница 3: ...9 Service Center Menu Options 20 Troubleshooting 31 Error Messages 43 Electrical Operation and Troubleshooting 46 Electrical System Operation 47 Replacement Power Board 53 Replacement Control Board 54 Replacement High Pressure Cut Out Switch 55 Replacement Scale Assembly Magnet 56 Plumbing and Mechanical 61 Plumbing and Mechanical System Operation 62 Component Application Chart 72 Flow Diagrams 73...

Страница 4: ...an imminently hazardous situation which if not avoided will result in death or serious injury WARNING Indicates a potentially hazardous situation which if not avoided could result in death or serious injury CAUTION Indicates a potentially hazardous situation which if not avoided may result in minor or moderate injury CAUTION Used without the safety alert symbol indicates a potentially hazardous si...

Страница 5: ...leted before disconnecting the machine to prevent the release of refrigeration to the atmosphere DO NOT BREATHE REFRIGERANT AND LUBRICANT VAPOR OR MIST Refrigerant reduces the oxygen available for breathing resulting in drowsiness and dizziness Exposure to high concentrations of refrigerant causes asphyxiation injury to the eyes nose throat and lungs and can affect the central nervous system Use t...

Страница 6: ... may cause personal injury Disconnect the power before servicing the machine NEVER LEAVE THE MACHINE LIVE IF AN IMMEDIATE USE IS NOT SCHEDULED Disconnect the electrical supply before a long period of inactivity or before internal maintenance is performed To ensure that unauthorized personnel cannot run the machine use the Lockout Tag Out feature DO NOT MODIFY THE PRESSURE RELIEF VALVE OR CHANGE TH...

Страница 7: ...ual Robert Bosch GmbH SP00D00517 2018 07 11 7 Introduction I n troducti o n Introduction 8 Control Panel Functions 9 Glossary 9 Setup Menu Functions 10 General Maintenance 12 Unit Specifications 16 Maintenance Schedule 17 ...

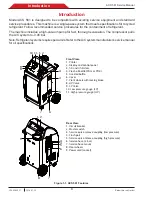
Страница 8: ...em to 0 45 bar Note Refrigerant systems require special oils Refer to theA C system manufacturer s service manual for oil specifications Figure 1 1 ACS 561 Features 1 2 3 4 5 6 7 8 9 10 11 Front View 1 Printer 2 Display and control panel 3 SD and USB slots 4 Fresh oil bottle PAG or POE 5 Used oil bottle 6 Cover 7 Front wheels with locking brake 8 HP Valve 9 LP Valve 10 Low pressure gauge LP 11 Hig...

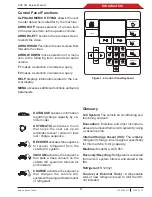
Страница 9: ...bles are removed from anA C system by using a vacuum pump Internal Storage Vessel ISV The refillable refrigerant storage tank designed specifically for this machine 8 9 kg capacity Machine Model No ACS 561 Recovery Recycling Refrigerant is recovered from an A C system filtered and stored in the ISV Refrigerant R1234yf Source or External Tank A disposable tank of new refrigerant used to refill the ...

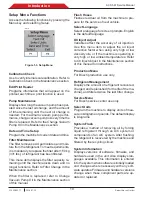
Страница 10: ...up Flush Hoses Flushes residual oil from the machine to pre pare for the service of next vehicle Select Language Select a language for screen prompts English is the default language Oil Inject Adjust Variables affect the accuracy of oil injection Use this menu item to adjust the oil inject correction factor when using very high or low viscosity oils or if the machine is operating in very high or l...

Страница 11: ... as amount of refrigerant recovered and charged for every vehicle Export data to SD It allows user to extract the report with recovered and charged refrigerant amount in the vehicle Data extraction via SD card recommended size 2 GB and FAT format s u p p o r t i s n o t p a r t o f s c o p e delivery Data are transferred as csv file Pre requisite is to create a folder in the support with name U Er...

Страница 12: ...valves 3 Press F1 to perform the leak test To perform a manual leak test 1 Turn OFF the main power switch and dis connect the power cord from the outlet 2 Remove panels as necessary to use a leak detector to probe all connections for refrigerant leaks Tighten fittings if a leak is indicated 3 Reassemble body panels Tank Fill This menu item is used to transfer refrigerant from a source tank to the ...

Страница 13: ... F1 was selected to change the filter the machine clears the filter then prompts for the new filter code to be entered WAITING FOR FILTER TO BE CLEARED FILTER SERIAL Use the keypad to enter the serial number that appears on the new filter and select F1 2 The machine displays TURN UNIT OFF REMOVE SHROUD AND REPLACE FILTER IDENTIFIER FILTER AND IDENTIFIER SAMPLE HOSE Shut off the machine Remove scre...

Страница 14: ...USED PUMP OIL AT THE END ADD ABOUT 150 ML OF NEW OIL PRESS F1 TO CONFIRM Remove the oil drain fitting cap and drain the oil into a suitable container for disposal Replace the cap 5 Slowly add 150 ml of vacuum pump oil to the pump through the oil fill port and press F1 6 The display shows POUR OIL IN THE PUMP UP TO THE CORRECT LEVEL PRESS F1 TO TERMINATE Slowly add vacuum pump oil to the pump throu...

Страница 15: ...n weight that is pro vided with the machine 1 Select CALIBRATION CHECK in the Setup menu The machine displays PLACE SAMPLE WEIGHT ON SCALE START EXIT 2 Refer to Figure 1 7 and verify the magnet on the bottom of the machine is clean 3 Attach the calibration weight to the magnet on the bottom of the machine Select F1 If the display shows PROCEDURE COMPLETED the scale is in calibration Select F1 If t...

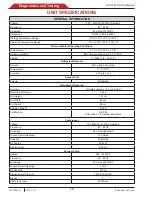
Страница 16: ...nt Removal Amount 95 within 30 minutes Temperature 21 C 70 F Accuracy 30 g 1 oz Vacuum Pull Volume 40 Microns Refrigerant Recharge Accuracy Full rated charge 15 g 0 50 oz Recycling Filter Type 260 g Unit Height 127 cm Unit Width 69 cm Unit Depth 66 cm Shipping Weight 80 kg Certification UL1963 SAE J 2843 CE marked and others Compressor Voltage 187 253VAC 230VAC Nominal Frequency 50 60 Hz Amperage ...

Страница 17: ... is replaced Refer to Change Vacuum Pump Oil in the Maintenance section of this manual Check casters and wheels for ease of operation Monthly Check internal scale calibration Monthly Refer to Calibration Check in the Maintenance section of this manual Check machine for leaks Monthly Check hoses and connections for leakage Disconnect power remove the shroud and use an electronic leak detector to ch...

Страница 18: ...ut Test 27 Keypad Test 28 Set Serial Number 28 Set Mfg Manufacturing Date 28 Configuration 29 Set Boot Mode 29 Select Model 30 Reset Board 30 Reset All 30 Troubleshooting 31 Grounding Noise and Power Issues 31 Will Not Power Up No Display 32 Will Not Fill Tank 33 Will Not Perform Clearing 33 Will Not Recover 34 Will Not Drain Oil 35 Will Not Air Purge 35 Will Not Evacuate Vacuum 35 Fails Leak Test...

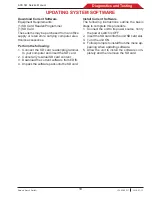
Страница 19: ...grammer to your computer and insert the SD card 2 Cancel any residual SD card content 3 Download the current software from EDIS 4 Unpack the software pack onto the SD card Install Current Software The following instructions outline the basic steps to complete this procedure 1 Connect the unit to its power source Verify the power switch is OFF 2 Insert the SD card into the unit SD card slot 3 Turn ...

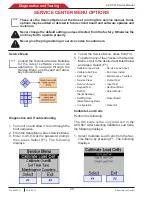
Страница 20: ...urn unit on and allow it to run through the boot sequence 2 From the Setup Menu press Service Menu 3 Enter 4 3 5 0 6 at the password prompt then press Select F1 The following displays Calibrate Load Cells The ISV scale is the only load cell in the ACS 561 After selecting Calibrate Load Cells the following displays 1 Select Calibrate Load Cells from the Ser vice Menu by pressing F1 The following di...

Страница 21: ...ded using the keypad When finished press Continue F1 to save the entered weight value The following will be displayed After 5 seconds 5 If the calibration is accepted the offset and slope will be calculated If either calculation fails a fail screen for the offset or slope will be displayed Offset Failure Slope Failure The operator is given the opportunity to retry the calculation or to exit the ca...

Страница 22: ...the unit plastic enclosures must e onto the unit and properly attached This is because the enclosure affects the calibration itself The unit then must be in standard operating conditions 1 Scroll to CalibrateAir Flow and press Select F1 The following is displayed 7 If the calibration is not accepted a Calibra tion Failed screen is displayed If accepted the accepted screen displays Failed 8 Pressin...

Страница 23: ... F1 to attempt another airflow calibration or press Exit F2 to return to the Service Menu 3 If the airflow calibration is accepted the fol lowing displays Press Exit F2 to return to the Service Menu Confirm by pressing Save F1 Service Clear Performing a Service Clear allows the unit to perform a 1st Stage Recover This is an auto matic process When complete the unit returns to the Service Menu Serv...

Страница 24: ...d press Start F1 to begin the vacuum The following displays The inlet pressure should stay below 0 35 bar throughout the Service Vacuum The outputs Vacuum Charge Liquid Oil Re turn and Recover solenoids will turn ON 4 When the vacuum Time Remaining falls to 00 00 the outputs will turn OFF and the following displays 5 Press Exit F2 to return to the Service Menu 6 If the Inlet pressure rises above 0...

Страница 25: ... liquid solenoid turns OFF and displays If the Inlet pressure stays above 0 35 bar the only alternative is to press Cancel F2 The following displays End User Install The End User Install accesses the production functions arrested at the end of producing the unit prior to shipment These functions can be accessed to customize the unit for the end user and to re establish the customization when a com...

Страница 26: ...omp XXXXXXXXs Filtered Refrigerant Filtd XXXXX Filter Change Cycles Filt Cyc XXXXX Vacuum Cycles Vac Cyc XXXXX Vacuum Pump Run Time Pump XXXXXXXXs Vacuum Pump Oil Change Cycles Oil Cyc XXXXX Vacuum Pump Oil Time VP Oil XXXXXXXXs Charge Cycles Chg Cyc XXXXX Charged Refrigerant Lifetime Chgd XXXXX XYY Hose Flush Cycles HF Cyc XXXXX Replenished Refrigerant Lifetime Repld XXXXX XYY 4 To reset an amoun...

Страница 27: ...ed S11 Unused OUTPUT TEST FAN Fan PUMP Vacuum Pump COMP Compressor Beacon Unused Beeper Beeper 3 As the tests are highlighted press On Off The state will change from 0 to 1 There should be a click heard as the solenoids are energized the motors of the fan vacu um pump and compressor should start the beacon if installed will flash once and the beeper will sound 4 When the test is complete press Exi...

Страница 28: ...to Keypad Test 2 Press Selcet F1 the following displays Set Serial Number Setting the serial number is usually done at the factory but may be performed or checked when maintenance is performed on the unit This function is accessed through the Production Menu or the Production Line Test 1 From the Production or Production Test Menu scroll to Set Serial Number 2 Press Select F1 The following display...

Страница 29: ...t settings are listed in the table ITEM OPTIONS DEFAULT Refrigerant R1234yf R134a R1234yf Inject Enabled Yes No Yes Inject Load Cell Yes No No Drain Load Cell Yes No No HS Transducer Yes No No LS Transducer Yes No Yes ISV Transducer Yes No No Acc Transducer Yes No Yes ISV Temp Yes No No Charge Leak Test Yes No Yes Air Flow Sensor Yes No Yes 3 After the options have been entered press Exit F2 to re...

Страница 30: ...ss Select F1 The following displays 3 Press Select F1 or press Exit F2 to return to the Service Menu 3 Press Yes F1 to reset the board or No F2 to return to the Service Menu Reset All Unless absolutely necessary resetting the board is not recommended Resetting the con trol board with ResetAll will completely erase the internal memory and factory defaults To use the unit again it will be necessary ...

Страница 31: ...ct varies with the type and intensity of the noise Power Issues The power applied to the unit must be from a stable low impedance source Long term stabil ity must be within 5 or 10 of the nominal voltage For a 230 Volt line the limits are 207V to 241V The unit will operate above and below the voltage limits However problems in op eration may appear if the voltage drops sags below or rises above su...

Страница 32: ...t the plug end 4 Connect the unit to a proper AC power source and place the unit power switch on The display should illuminate If the unit is still inoperative perform the following volt age checks a Measure the voltage at the output of the power supply from PSJ2 pin 2 to pin 3 Voltage should be 12VDC If 12Vis not present go to step 5 If 12V is present replace control board 5 Connect the unit to a...

Страница 33: ...or suction and dis charge performance Refer to Compressor Testing procedure in this section 10 Remove the filter and inspect all fittings and gaskets to verify that no obstructions exist Replace repair gaskets as needed and reinstall filter 11 Verify that the scale is calibrated and free to move Will Not Perform Clearing The compressor should be running during this test If it does not run refer to...

Страница 34: ... replace the charge solenoid S3 Run all tests again Inspect the Check Valves 1 Close all tank valves 2 Relieve pressure on the vapor hose at the tank Will Not Recover The compressor should be running during this test If it does not run refer to compressor troubleshooting in the Compressor section of this manual 1 Verify there is pressure reading on the gauges If pressure is present the service hos...

Страница 35: ...the solenoid replace the power board If the unit continually drains oil until Oil Drain Error 2 displays the ac cumulator may be filled with oil that must be manually drained Manually drain accumulator until empty Will Not Air Purge If the air doesn t purge check the air purge pressure relief valve If the air purge pressure relief valve is locked open it manually Will Not Evacuate Vacuum The vacuu...

Страница 36: ... and evacuation of the system be performed During the recovery process cold spots can develop in the automotive system Pockets of refrigerant in desiccant and in system oil will continue to vaporize as the A C system temperature equal izes toward ambient As this occurs A C system pressure will increase which may be interpreted by the unit as a leak This will vary somewhat with ambient temperature ...

Страница 37: ...not charge 1 Verify the service hoses are properly attached to the unit without any restrictions and coupler valves are open 2 Verify a deep vacuum has been pulled on the system being charged 3 Check that all ISV hoses are properly installed and ball valve liquid is open 4 INSUFFICIENT REFRIG AVAILABLE will be displayed if the weight entered leaves less than 1 8kg 3 97 lbs of refrigerant in the in...

Страница 38: ...Install the new roll of paper with the end of the paper at the top of the roll unrolling from the back 4 Feed the paper out the top of the opening and close the cover Slow Charge When there is a slow charge error Try again will be displayed if the charge slows and fails after three 3 attempts 1 Check and ensure there is a good vacuum in the vehicle being tested 2 Verify sufficient pressure in the ...

Страница 39: ... at the low side pressure transducer Verify all connec tions before continuing If the pressure is at 0 use the vacuum function to clear system LS Pressure Error H The low side pressure transducer is reading low side pressure greater than 9 8 bar 140 psi LS Pressure Error L The low side pressure transducer is reading low side pressure less than 77 5 cm Hg 30 54 in Hg of vacuum Increase vacuum Out o...

Страница 40: ...No power to any components A solenoid won t open Compressor and fan won t start Vacuum pump won t start A function does not start or finish a pro cess 2 Do not replace the power board for these issues Display has lines missing characters etc Repeated read errors Repeated communication errors Display is blank at power up and contrast can t be adjusted and power has been verified The best way to tro...

Страница 41: ... board and the compres sor start components Repair as needed If voltage is not present replace the relay board 6 Perform functional check Compressor Testing Procedure 1 Remove shrouding from the unit 2 Close tank valve and depressurize the unit in accordance to the service manual 3 Remove all 3 lines attached to the compres sor The discharge line will be under pres sure 4 Cap off the compressor oi...

Страница 42: ...er and electrical connectors for dam age or corrosion Replace or repair as required 2 Connect the unit power cable directly to the power source Do not use an extension cord 3 Check for 230 Volts at the vacuum pump connector pins 2 and 3 If voltage is present replace vacuum pump assembly If voltage is not present continue to next step When checking voltage to the vacuum pump it is normal to read lo...

Страница 43: ...n to the service menu Insufficient vacuum for charge Charge System vacuum to low to draw in enough refrigerant Press Vacuum F1 or Exit F2 Insufficient refrigerant available for charge Charge Refrigerant in ISV too low Press Retry F1 or Exit F2 May require tank fill Leak test failed Charge Leak Test Check for leaks and retest Press Exit F2 Oil drain halted Pressure error Drain Oil Pressure insuffic...

Страница 44: ...try Must be between XXYY and XXYY Set Tank Tare Tank tare range is either too low or too high Press Retry F1 to re enter tank tare value or or Exit F2 Charge stalled Check connections and valves XX XXXYY of XX XXXYY charged Slow Charge Check panel valve position and couplers Press Retry F1 or Exit F2 System Fault RTC Fault Startup System missing date time information Press Continue F2 to run RTC r...

Страница 45: ...R WARNING PROCEDURE DESCRIPTION OF ERROR WARNING Oil life remaining XX XXX Change oil now Oil Change The display shows how long the vacuum pump has operated since the last oil change IOE Communication failed All procedure Failed communication with relay board Reset the relay board by pressing F2 ...

Страница 46: ...8 Sensors and Transducers 49 Memory Expansion 49 Replacement Power Board 53 Instructions 53 Remove the Existing Power Board 53 Install the Replacement Power Board 53 Replacement Control Board 54 Instructions 54 Remove the Existing Control Board 54 Install the Replacement Control Board 54 Replacement High Pressure Cut Out Switch 55 Replacement Instructions 55 Replacement Scale Assembly Magnet 56 In...

Страница 47: ... Control Board P19 P3 AC Input P4 Power Supply J1 P5 Fan P6 Vacuum Pump Compressor P7 High Pressure Switch P8 Solenoids The Power Board PB receives AC voltage at PBP3 from the power switch through the circuit Figure 3 1 Power Board breaker to PBP3 pins Pin 1 Unit ground on center divider Pin 2 AC low Pin 3 AC high The input voltage is immediately applied to the Power Supply PS through PBP4 and the...

Страница 48: ...is required 3 Contains Programming Normally if a unit runs at all the program and the control board are okay Reflash ing does nothing unless a valid upgrade program is available 4 Communicates with SD Card and other memory expansion ports This occurs during a software updates 5 Contains calibration and other stored vari ables Normally if a variable is corrupt an error will appear Never replace the...

Страница 49: ...r ant added to the system and how much refrigerant is available in the ISV for use Transducers include 1 Low side Pressure LST measures the pressure in the low side of the vehicle A C system 2 Accumulator Pressure AT measures the pressure in the oil separator to ensure proper oil separation from the refrigerant Memory Expansion Two types of memory expansion are available 1 SDIO An SD expansion car...

Страница 50: ...IRCUIT BREAKER POWER 230VAC Input Power BRN BLU GRN YEL BRN BLU BRN BRN ES3 ES2 ES4 ES1 O SWITCH O GND1 GND1 GRN YEL 6 1 V ADJ 12V POWER SUPPLY J1 J2 P8 P4 P3 P2 P1 P5 K1 K2 F1 P7 P6 POWER BOARD P2 P3 P2 P6 P5 P1 P4 1 1 P15 J3 P18 P3 J1 P8 P10 P9 P2 BT1 P19 LS1 P17 P12 J2 P16 P13 P4 P5 P6 P14 P1 _ JTAG P11 P7 CONTROL BOARD J1 ...

Страница 51: ...ions Sheet 2 of 3 LOW SIDE PRESSURE TRANSDUCER LST ACCUMULATOR AT PRESSURE TRANSDUCER P4 AIRFLOW SENSOR AF P5 PRINTER ASSEMBLY P2 1 1 P15 J3 P18 P3 J1 P8 P10 P9 P2 BT1 P19 LS1 P17 P12 J2 P16 P13 P4 P5 P6 P14 P1 _ JTAG P11 P7 CONTROL BOARD P3 P1 P1 ASSEMBLY SCALE P3 P1 P2 P4 Component Lead Wire Braid O GND2 ...

Страница 52: ...ASSEMBLY S1 Recover S2 Vacuum S3 Charge ISV ORG S4 ISV Liquid OIL INJECT BULKHEAD BLOCK S5 Oil Inject RED VIO BLUE OIL SEPARATOR ASSEMBLY S6 System Oil Separator S7 Compressor Oil Separator WHT High Pressure Switch FAN COMPRESSOR VACUUM PUMP P1 P8 P7 FAN GND1 P6 COMP GND F FAN 64 66 76 P2 P8 P4 P3 P2 P1 P5 K1 K2 F1 P7 P6 POWER BOARD PUMP FAN P2 P3 P1 ...

Страница 53: ...rby Instructions These instructions outline the basic steps to replace the power board Follow the prompts on the control panel to move through the pro cedure correctly Figure 3 5 Power Board Connector Identification Remove the Existing Power Board 1 Disconnect unit from the power source 2 Remove shroud 3 Disconnect all wires from power board 4 Remove screws securing power board in place and remove...

Страница 54: ... unit Figure 3 6 Control Board Connector Identification 4 Disconnect all wires from control board in cluding keypad and display ribbon cables 5 Remove screws securing control board in place and remove control board Install the Replacement Control Board 1 Assemble the display to the replacement control board and attach the display ribbon cable to the control board 2 Connect wires as shown in Figure...

Страница 55: ...e the shroud to access the manifold block 4 Disconnect the wires from the faulty high pressure cut out switch 5 Carefully remove the faulty cut out switch 6 Clean the fitting by wiping away dirt grease and oil DO NOT apply thread sealant to any internal threads Apply thread sealant to only the external pipe threads of the fittings Thread sealant contains ADHHM 128 anaerobic adhesive and methacryli...

Страница 56: ...4 Depressurize the unit 5 Disconnect the liquid hose and vapor hose from the tank 6 Disconnect the wires from the air purge solenoid liquid solenoid tank temperature sensor and pressure transducer 7 Remove the two 2 bolts securing the tank to the scale 8 Remove the tank from the scale 9 Remove the four 4 bolts holding the scale in place 10 Remove the ground wire connected to the center divider of ...

Страница 57: ...points throughout the ACS 561 See figure 3 9 sheets 1 through 4 Figure 3 9 Component Connections Sheet 1 of 4 ASSEMBLY WIRING GROUNDS Note Take note of the wire harness positions before disturbing a harness location and routing to the components in this unit Use new cable ties snapped into the holes provided on the various panels when securing harnesses after a component replacement or troubleshoo...

Страница 58: ...et 2 of 4 PANEL MANIFOLD ASSEMBLY OIL INJECT MANIFOLD ASSEMBLY S5 66 64 76 SCREW BRN BLU GRN YEL CAPACITOR LEADS COMPRESSOR ASSEMBLY SCALE ASSEMBLY ISV ASSEMBLY TOP VIEW S6 S7 AT HPS OIL SEPARATOR ASSEMBLY LST S1 S2 S3 S4 CBP8 GND2 RECOVER SOLENOID BROWN CABLE VACUUM SOLENOID RED CABLE CHARGE SOLENOID WHITE CABLE ...

Страница 59: ...l Robert Bosch GmbH SP00D00517 2018 07 11 59 Electrical Figure 3 9 Component Connections Sheet 3 of 4 FAN FAN GNDF PSJ1 PSJ2 POWER SUPPLY POWER SWITCH ES3 ES4 ES2 ES1 AIRFLOW SENSOR AF CIRCUIT BREAKER CB1 CB2 PRNTR PRINTER ...

Страница 60: ...0517 2018 07 11 60 Electrical Figure 3 9 Component Connections Sheet 4 of 4 POWER BOARD PBJ1 PBP1 P5 P2 P1 P7 J1 P6 P8 P4 P3 PBP7 PBP4 PBP8 PBP3 PBP6 PBP5 PBP2 CONTROL BOARD CBP19 CBP6 CBP5 CBP1 CBP8 CBP18 CBJ1 CBP15 J1 P1 P6 P5 P18 P19 P15 P8 P2 P3 ...

Страница 61: ...Oil Inject Block Assembly 62 Oil Drain Bottle 63 High and Low Side Gauges 63 High red and Low blue Side Service Hoses 63 Replacement Compressor 64 Replacement Vacuum Pump 66 Replacement Manifold Block 67 Bulkhead Oil Inject Block Repair 69 Replacement Manifold Solenoid 70 Replacement Manifold Check Valve 71 Component Application Chart 72 Flow Diagrams 73 Tank Fill 73 Clear 74 Recover 75 Vacuum 76 ...

Страница 62: ...ent reliable operation of the unit Unlike other units this assembly does not have the oil separator and filter dryer attached to it This manifold assembly is not interchange able with any other manifold assemblies Repair or replacement of the manifold should be per formed under clean conditions so particulates do not enter the assembly from any open ports Particulates can clog the small chambers a...

Страница 63: ...o so by the control panel Operators could drain this bottle prior to each use of the unit to make sure unit operation is not interrupted High and Low Side Gauges These gauges monitor the high and low side pressures when the unit is operating High red and Low blue Side Service Hoses These hoses connect the unit to the vehicle A C system Refer to Chapter 2 Diagnostics and Testing for operation instr...

Страница 64: ...ct the three 3 copper lines from the compressor There may be pressure in the copper line 5 Remove two compressor front anchor screws and slide the compressor away from the rear retainer 6 Disconnect the COMP connector from the pump fan and compressor harness 7 Remove the compressor from the unit To prevent personal injury use caution when removing the compressor Capaci tor wires may still be energ...

Страница 65: ...MP SEE NOTE 3 SEE NOTE 3 7 FILTER OIL SEPARATOR DRYER 1010mm 3mm SEE NOTE 2 5 SEE NOTE 3 6 7 SEE NOTE 1 3 6 7 A HPS 570mm 3mm SEE NOTE 2 5 NOTES 1 Adjust the position of hoses A and B Hoses must pass through the center divider slot Check all hoses for stress and verify scale operation 3 Apply Loctite 222 or equivalent to threads except Rilsan hoses and connection to check valve 4 Torque hose fitti...

Страница 66: ...connector from the main harness 5 Loosen the four screws of the pump as sembly pump plus anti vibration plates on the unit base 6 Remove the vacuum pump assembly from the unit by sliding and pulling it upwards Installing the Replacement Vacuum Pump 1 Assemble anti vibration plates onto the new pump and place the assembly into the unit 2 Place the vacuum pump into the unit 3 Secure the vacuum pump ...

Страница 67: ...hoses solenoids and check valves replace the o rings and use thread seal ant where necessary Removing the Manifold Block 1 Disconnect the unit from the power source 2 Remove the shroud 3 Close the tank valve 4 Depressurize the unit 5 Close the tank liquid valve and remove the wires from the Tank Fill Liquid solenoid S4 6 If the entire manifold block must be re moved remove the knobs from the front...

Страница 68: ...R SYSTEM OIL SEPARATOR FILTER DRYER HPS HIGH PRESSURE SWITCH HPS ACCUMULATOR TRANSDUCER AT OIL DRAIN SOLENOID BLUE CABLE COMPRESSOR OIL RETURN SOLENOID VIOLET CABLE PANEL MANIFOLD ASSEMBLY S1 S2 S3 HIGH SIDE GAUGE SCHRADER CORE VALVE RECOVER SOLENOID BROWN CABLE CHARGE CHECK VALVE LOW SIDE TRANSDUCER LST RECOVER CHECK VALVE CHARGE SOLENOID WHITE CABLE LOW SIDE GAUGE VACUUM SOLENOID RED CABLE BULKH...

Страница 69: ...epressurize the unit 5 Remove the red and blue service hoses from the left side of the unit 6 Remove two 2 upper screws from the control panel and rotate the control panel towards the front of the unit 7 Remove two 2 rivets from the left side of the unit securing the injector block 8 Remove wiring from the injector block 9 Remove the injector block 10 Remove the inside black high and low side line...

Страница 70: ... the unit 4 Disconnect the two wires connected to the solenoid being replaced 5 Remove the fastener holding the coil on the solenoid and remove the coil 6 Remove the solenoid assembly from the manifold block 7 Check the manifold block for any debris before installing a new solenoid Installing a Replacement Manifold Sole noid 1 Lubricate the o rings and threads on the new solenoid assembly 2 Instal...

Страница 71: ...away from you and anyone nearby Instructions These instructions outline the steps to replace panel manifold flush port manifold and injector block check valves Removing the Check Valve 1 Disconnect the unit from the power source 2 Remove the shroud 3 Close the tank valve 4 Depressurize the unit 5 Remove the faulty check valve Installing the Replacement Check Valve 1 Lubricate the o rings on the ne...

Страница 72: ...seconds and reactivated every ten minutes thereafter depending on the length of the recovery process COMPONENT APPLICATION CHART Manifold Component Application Chart ACS 561 Tank Fill Clear Recovery Vacuum Oil Inject Charge Leak Test Hose Flush Oil Drain S1 Recovery Solenoid I I S2 Vacuum Solenoid ON S3 Charge Solenoid I I S4 Tank Liquid Solenoid ON ON S5 Oil Inject Solenoid ON S6 Oil Drain Soleno...

Страница 73: ...er Dryer Compressor COMP Compressor Oil Separator Oil Return Solenoid S7 Oil Drain Solenoid S6 Accumulator Transducer FRONT PANEL MANIFOLD HOSE FLUSH MANIFOLD BULKHEAD INJECTION MANIFOLD Charge Solenoid S3 Charge Check Valve Low Side Ball Valve High Side Ball Valve Recover Check Valve Recover Solenoid S1 Low Side Transducer Oil Drain Bottle High Side Gauge Low Side Gauge Vacuum Solenoid S2 High Pr...

Страница 74: ...NIFOLD HOSE FLUSH MANIFOLD BULKHEAD INJECTION MANIFOLD Charge Solenoid S3 Charge Check Valve Low Side Ball Valve High Side Ball Valve Recover Check Valve Recover Solenoid S1 Low Side Transducer Oil Drain Bottle High Side Gauge Low Side Gauge Vacuum Solenoid S2 High Pressure Switch Vacuum Pump PUMP High Side Service Hose Low Side Service Hose HS Bulkhead LS Bulkhead Hose Flush Check Valve Pressure ...

Страница 75: ...Solenoid S6 Accumulator Transducer FRONT PANEL MANIFOLD HOSE FLUSH MANIFOLD BULKHEAD INJECTION MANIFOLD Charge Solenoid S3 Charge Check Valve Low Side Ball Valve High Side Ball Valve Recover Check Valve Recover Solenoid S1 Low Side Transducer Oil Drain Bottle High Side Gauge Low Side Gauge Vacuum Solenoid S2 High Pressure Switch Vacuum Pump PUMP High Side Service Hose Low Side Service Hose HS Bulk...

Страница 76: ...in Solenoid S6 Accumulator Transducer FRONT PANEL MANIFOLD HOSE FLUSH MANIFOLD BULKHEAD INJECTION MANIFOLD Charge Solenoid S3 Charge Check Valve Low Side Ball Valve High Side Ball Valve Recover Check Valve Recover Solenoid S1 Low Side Transducer Oil Drain Bottle High Side Gauge Low Side Gauge Vacuum Solenoid S2 High Pressure Switch Vacuum Pump PUMP High Side Service Hose Low Side Service Hose HS B...

Страница 77: ...ONT PANEL MANIFOLD HOSE FLUSH MANIFOLD BULKHEAD INJECTION MANIFOLD Charge Solenoid S3 Charge Check Valve Low Side Ball Valve High Side Ball Valve Recover Check Valve Recover Solenoid S1 Low Side Transducer Oil Drain Bottle High Side Gauge Low Side Gauge Vacuum Solenoid S2 High Pressure Switch Vacuum Pump PUMP High Side Service Hose Low Side Service Hose HS Bulkhead LS Bulkhead Hose Flush Check Val...

Страница 78: ...ccumulator Transducer FRONT PANEL MANIFOLD HOSE FLUSH MANIFOLD BULKHEAD INJECTION MANIFOLD Charge Solenoid S3 Charge Check Valve Low Side Ball Valve High Side Ball Valve Recover Check Valve Recover Solenoid S1 Low Side Transducer Oil Drain Bottle High Side Gauge Low Side Gauge Vacuum Solenoid S2 High Pressure Switch Vacuum Pump PUMP High Side Service Hose Low Side Service Hose HS Bulkhead LS Bulkh...

Страница 79: ...ucer FRONT PANEL MANIFOLD HOSE FLUSH MANIFOLD BULKHEAD INJECTION MANIFOLD Charge Solenoid S3 Charge Check Valve Low Side Ball Valve High Side Ball Valve Recover Check Valve Recover Solenoid S1 Low Side Transducer Oil Drain Bottle High Side Gauge Low Side Gauge Vacuum Solenoid S2 High Pressure Switch Vacuum Pump PUMP High Side Service Hose Low Side Service Hose HS Bulkhead LS Bulkhead Hose Flush Ch...

Страница 80: ... Compressor Oil Separator Oil Return Solenoid S7 Oil Drain Solenoid S6 Accumulator Transducer FRONT PANEL MANIFOLD HOSE FLUSH MANIFOLD BULKHEAD INJECTION MANIFOLD Charge Solenoid S3 Charge Check Valve Low Side Ball Valve High Side Ball Valve Recover Check Valve Recover Solenoid S1 Low Side Transducer Oil Drain Bottle High Side Gauge Low Side Gauge Vacuum Solenoid S2 High Pressure Switch Vacuum Pum...

Страница 81: ...parator Oil Return Solenoid S7 Oil Drain Solenoid S6 Accumulator Transducer FRONT PANEL MANIFOLD HOSE FLUSH MANIFOLD BULKHEAD INJECTION MANIFOLD Charge Solenoid S3 Charge Check Valve Low Side Ball Valve High Side Ball Valve Recover Check Valve Recover Solenoid S1 Low Side Transducer Oil Drain Bottle High Side Gauge Low Side Gauge Vacuum Solenoid S2 High Pressure Switch Vacuum Pump PUMP High Side S...

Страница 82: ...ACS 561 Service Manual Robert Bosch GmbH SP00D00517 2018 07 11 82 Service Bulletins S e r v ic e B u l l e ti n s Place all service bulletins for the ACS 561 in this section ...

Страница 83: ...arness 86 12VDC Power Harness 87 Printer Power and Communication Harness 88 AT and LST Transducer Harness 89 Compressor Fan Vacuum Pump and Air Flow Sensor Harness Sheet 1 90 Compressor Fan Vacuum Pump and Air Flow Sensor Harness Sheet 2 91 Solenoid Control Harness 92 High Pressure Switch Harness 93 Compressor Pigtail Harness 94 Appendix 83 ...

Страница 84: ...D00517 2018 07 11 Appendix 84 Figure A 1 Main Power Cable View from A A YEL GRN BLU BRN GND1 ES2 ES3 CONNECTOR NO CONNECTS TO ES2 Power Switch ES2 ES3 Power Switch ES3 GND1 Lower Ground Stud on Center Divider MAIN POWER HARNESS Main Power Harness ...

Страница 85: ...put Harness AC Power Input Harness 2 PBP3 1 Noise and Surge Suppresor BRN BRN BLU GRN YEL GND1 ES1 CB2 CB1 ES4 P1 CONNECTOR NO CONNECTS TO P1 Power Board PBP3 P1 Pin 1 Ground Stud on center divider GND1 P1 Pin 2 Power Switch ES1 P1 Pin 3 Circuit Breaker CB2 ES4 Circuit Breaker CB1 AC POWER INPUT HARNESS ...

Страница 86: ...0517 2018 07 11 Board to Board Cable 2X RJ45 MALE PLUGS WIRED TO T 568B RJ45 WIRING STANDARD C ON N EC TOR N O C ON N EC TS TO J1 C ontrol Board J1 Pow er Board BOARD TO BOARD CABLE Bidirectional C able Appendix 86 Figure A 3 Board to Board Harness ...

Страница 87: ... PSJ2 PBP1 P1 P5 P4 P2 PBP2 3 2 1 P6 BLK RED BLU BRN BLK RED Note Harness not to scale Pin 1 Pin 1 Pin 1 Pin 1 Pin 1 12 VDC Power Harness C ON N EC TOR N O C ON N EC TS TO P1 Pow er Board PBP2 P2 Pow er Board PBP1 P3 Pow er Board PBP4 P4 C ontrol Board C BP19 P5 Pow er Supply PSJ2 P6 Pow er Supply PSJ1 12 VOLT POW ER HARNESS ...

Страница 88: ...rness C ON N EC TOR N O C ON N EC TS TO PR N TR 2X Printer C BP15 P15 C ontrol Board C BP18 P18 C ontrol Board PRINTER POW ER COM M UNICATION HARNESS Pin 1 RED BLU GRY YEL P1 P3 PRNTR Pin 1 CBP18 Pin 1 CBP15 YEL BLK BLK P4 P2 PRNTR Pin 1 Appendix 88 Figure A 5 Printer and Communication Harness ...

Страница 89: ...IL A REAR VIEW Accumulator and Low Side Pressure Transducer Harness BLK RED ORG WHT BLK RED CONNECTOR NO CONNECTS TO P1 Control Board CBP5 P2 Low Side Pressure Transducer LST P3 Control Board CBP6 P4 Accumulator Pressure Transducer AT LST and AT TRANSDUCER HARNESS Appendix 89 Figure A 6 AT and LST Transducer Harness ...

Страница 90: ...Harness Sheet 1 P7 P5 P6 P1 GRN YEL GRN YEL GRN YEL C ON N EC TOR N O C ON N EC TS TO P6 COMP C OMP on pigtail P5 AF Airflow Sens or FAN 2X Fan Term inals GN D1 Ground Stud on C enter D ivider P7 GN D F Fan Ground P1 PU MP Vacuum Pum p Pigtail P2 C ontrol Board CBP1 P3 Pow er Board PBP5 P4 Pow er Board PBP6 COM PRESSOR FAN a nd VACUUM PUM P HARNESS PUMP COMP AF GNDF FAN To B on Sheet 2 A ...

Страница 91: ...ppendix 91 Figure A 7 Compressor Fan Vacuum Pump and Air Flow Sensor Harness Sheet 2 CABLE TIE 23X P2 WHT LT BLU BRN BRN BLU BRN BLU CBP1 PBP5 PBP6 BLK GND1 Compressor Fan Vacuum Pump and Air Flow Harness Sheet 2 P4 P3 B To A on sheet 1 RED Noise and Surge Suppresor ...

Страница 92: ...BLU VIO BLU PNK CONNECTOR NO CONNECTS TO P1 Power Board PBP8 P1 Pins 1 13 Recover Solenoid S1 P1 Pins 2 14 Vacuum Solenoid S2 P1 Pins 3 15 Charge Solenoid S3 P1 Pins 4 16 ISV Liquid Solenoid S4 P1 Pins 5 17 Oil Inject Solenoid S5 P1 Pins 6 18 System Oil Separator Solenoid S6 P1 Pins 8 20 Oil Return Solenoid S7 P1 Pins 9 21 Dye Inject Solenoid S8 P1 Pins 10 22 Air Purge Solenoid S9 SOLENOID CONTROL...

Страница 93: ...sch GmbH SP00D00517 2018 07 11 Appendix 93 Figure A 9 High Pressure Switch Harness P1 PBP7 HPS High Pressure Switch Harness CONNECTOR NO CONNECTS TO HPS 2X High Pressure Switch P1 Power Board PBP7 HIGH PRESSURE SWITCH HARNESS WHT WHT ...

Страница 94: ... 10 Compressor Pigtail Harness Compressor Pigtail Harness 64 66 76 COMP BLU BRN YEL GRN Noise Suppressor P1 CONNECTOR NO CONNECTS TO P1 COMP on Compressor Fan and Vacuum Pump Harness 64 Compressor Start Relay 66 Compressor Thermal Switch 76 Compressor Ground COMPRESSOR PIGTAIL HARNESS ...

Страница 95: ......
Страница 96: ...Robert Bosch GmbH Franz Oechsle Straße 4 73207 DEUTSCHLAND www bosch com bosch prueftechnik bosch com S P00 D00 517 2018 07 11 ...

Отзывы: