


16
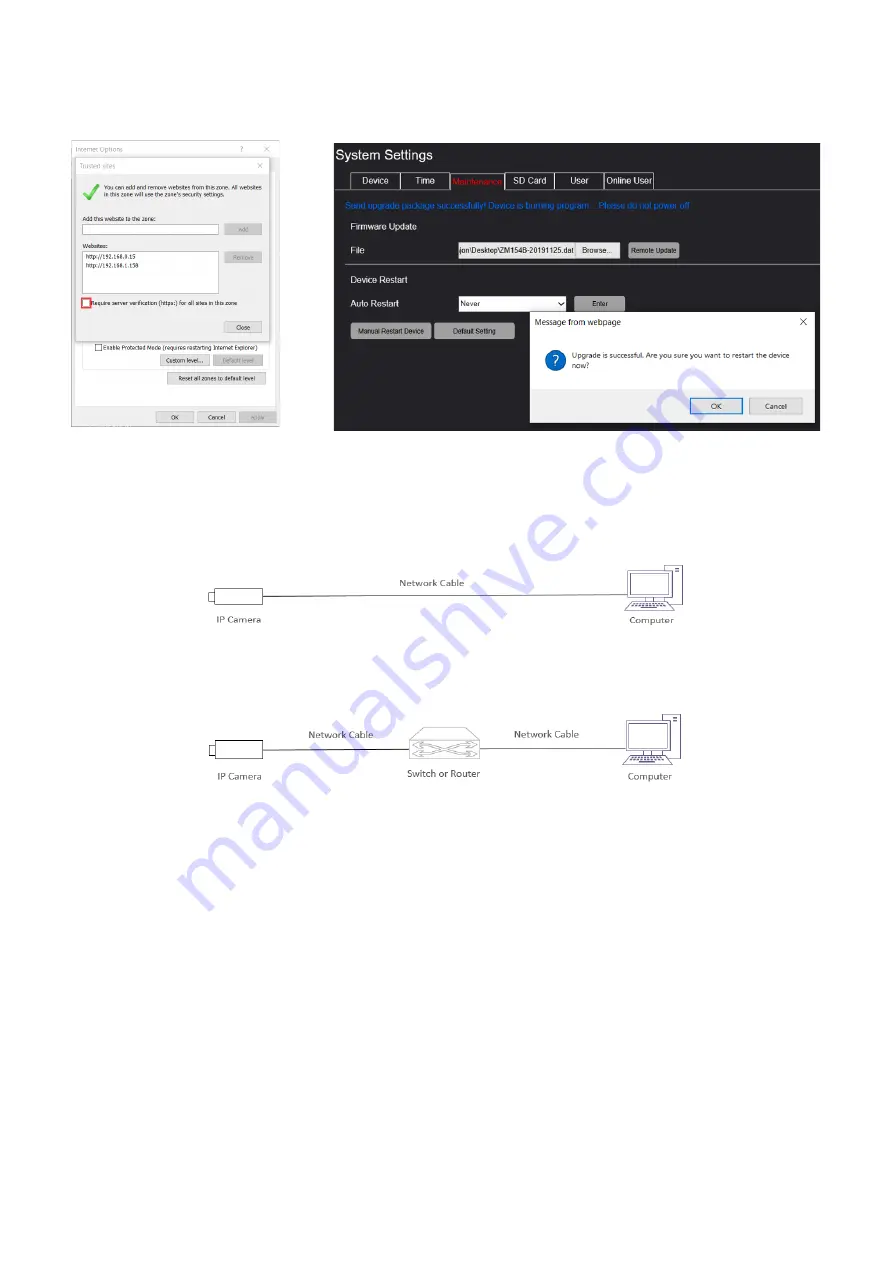
updating process takes about 3 minutes. After the update is successful, the page will prompt “Upgrade is successful…”,
please click OK button to reboot the camera.
•
Please don’t power off or reboot the camera during the whole updating process, until the page prompt “Upgrade is
successful…”
Network Connection
Before accessing a network camera (also known as IP Camera or IPC) from a PC, you need to connect the
network camera to the PC directly with a network cable or via a switch or router.
Use a Shielded Twisted Pair (STP) cable to connect the network interfaces of the network camera and the PC.
Use Shielded Twisted Pair (STP) cables to connect the network interfaces of the camera and the switch or router.
Login Preparation
After you have completed the installation in accordance with the quick guide, connect the camera to power to boot
it. After the camera is booted, you can access the camera from a PC client using Internet Explorer or a Video
Management System (VMS).
The following uses Internet Explorer 11 on a Microsoft Windows 10 operating system as an example.
Check before login
⚫
The camera is powered on and connected to the network switch
⚫
The camera’s IP address is located within the same subnet as the PC
⚫
The PC is connected to the network switch
⚫
The PC’s IP address is located within the same subnet as the camera
⚫
The PC is installed with Internet Explorer 8.0 or higher (Internet Explorer 11 recommended)
⚫
Use default video format setting or set the camera video format to 1080P30 or 1080P25 using RS485
keyboard (Refer to camera setting menu).


