


1 and 2 buttons
– Press these buttons to increase or decrease numeric setting values,
or to move up or down through menu settings.
Set
– After changing a setting using the 1 and 2 buttons, press the ‘set’ button to
confirm your setting.
Menu
– Press to enter the settings menu for your Blackmagic MultiView 4. You
can also press the menu button to step back through menu items all the way to the
home screen.
Video and Audio Buttons
– These buttons are specific to Teranex Mini converters and
are not used with Blackmagic MultiView 4.
Rotary Knob
– Turn the rotary knob clockwise or counter clockwise to navigate
through the menu settings and adjust numeric setting values.
Changing Settings using Teranex Mini Smart Panel
Changing settings using the Teranex Mini Smart Panel is more convenient and you can
immediately confirm your settings visually on the LCD.
To enter your Blackmagic MultiView 4’s setup menu, press the ‘menu’ soft button on the
Teranex Mini Smart Panel. Here you can access the following settings.
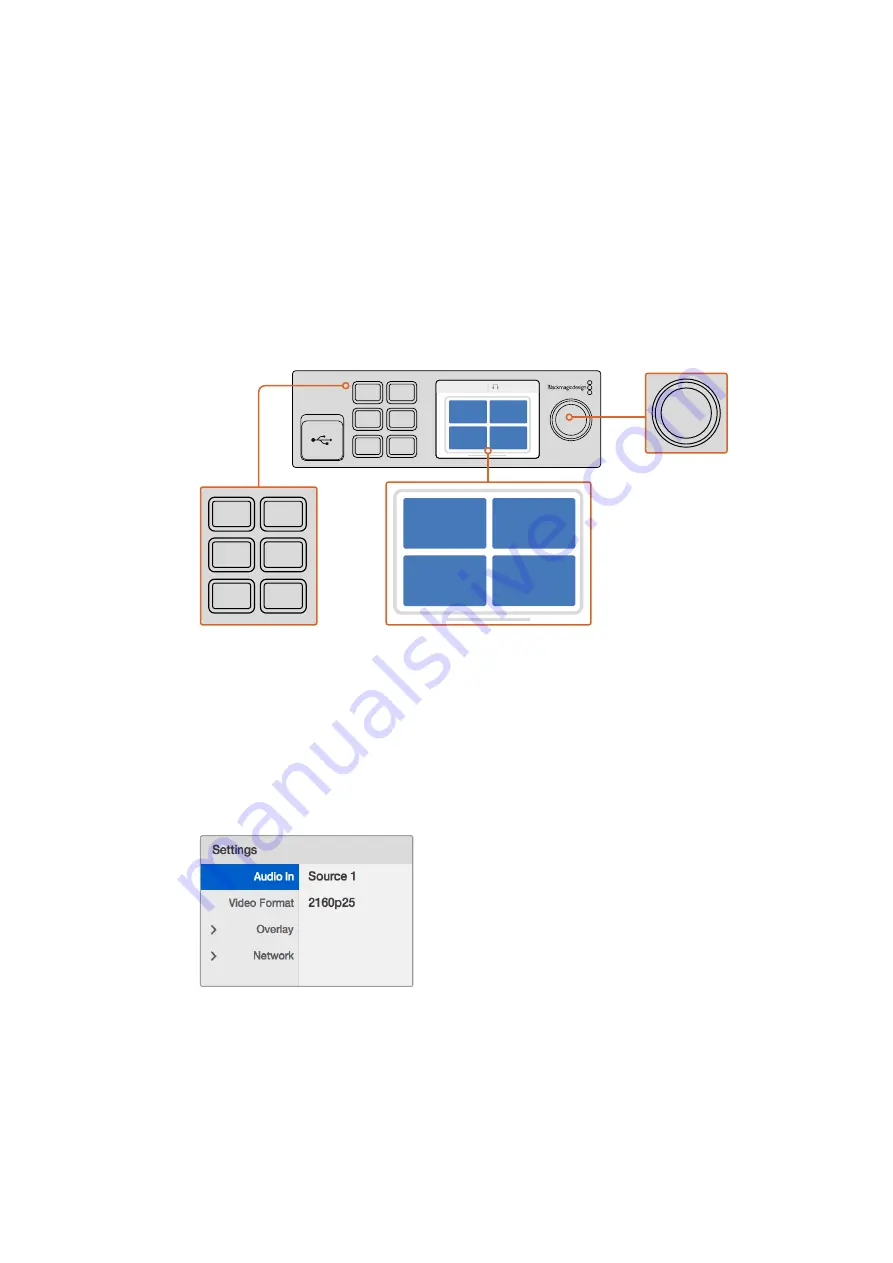
Highlight the menu item you wish to adjust
and press “set” to select it. Scroll through the
settings using the rotary knob
Audio In
This setting is used to select the SDI input from which audio will be taken and embedded into
the multi view outputs.
Video monitor – displays the home screen
and is used when changing settings
Control Buttons
1
MENU
2
VIDEO
SET
AUDIO
2160p 29.97
Input 3
1
3
2
4
Rotary Knob
1
MENU
2
VIDEO
SET
AUDIO
2160p 29.97
Input 3
1
3
2
4
1
MENU
2
VIDEO
SET
AUDIO
2160p 29.97
Input 3
1
3
2
4
1
MENU
2
VIDEO
SET
AUDIO
2160p 29.97
Input 3
1
3
2
4
17
Teranex Mini Smart Panel


