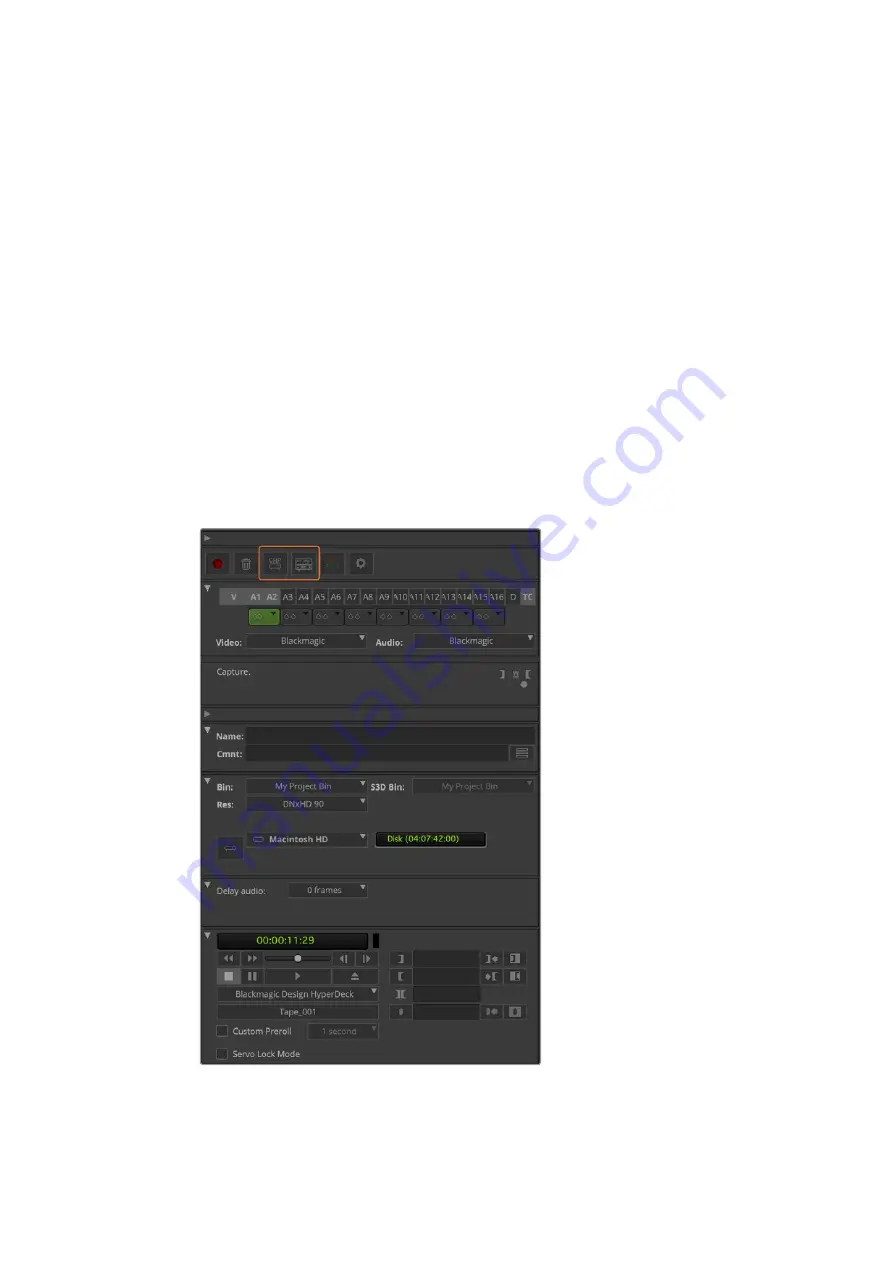
To capture with deck control on the fly:
1
Choose file > input > tape capture to open the ‘capture tool’. If a connected deck is
recognized and contains a tape or disk, you will be prompted to enter a tape name, or
you can choose it from the list.
2
The ‘toggle source’ button should show the icon of a deck. If the satellite icon is
present, click the button to enable deck control and make the deck icon appear.
3
The ‘capture/log mode’ button should show the ‘cap’ icon. If this button displays a ‘log’
icon, click the button to switch to capture mode and the cap icon should appear.
4
If ‘no deck’ is displayed in the timecode window, or a deck name appears in italics
underneath, click the dropdown menu and select ‘check decks’. When deck control is
re-established, the deck name will appear without italics. Now try the standard J, K, L
shortcut keys to control the deck.
5
Select Blackmagic for the video and audio input. Select your video and audio source
tracks, target bin, res, target drive and tape name the same way as in ‘capture from
non-controllable devices’.
6
Use the deck controller window in the ‘capture tool’ to cue the tape and start playing.
7
Click the ‘capture’ button. The capture button will flash red while recording. Click the
capture button again to end the capture.
Set the ‘cap’ and ‘toggle source’ buttons to use deck control.
Use the ‘deck controller window’ to cue the tape and start playing.
48
Using your Favorite 3rd Party Software


