724-746-5500 | blackbox.com
Page 14
Chapter 3: Installation
3. Installation
WARNING:
• Before installing the switch, power off all devices that will be connected to this system.
• Make sure that all devices you will connect are properly grounded.
• Place cables away from fluorescent lights, air conditioners and machines that are likely to generate electrical noise.
3.1 Device Connection
1. Use a video cable (HDMI) to connect the display to the video output port on the unit.
2. Use a video cable (HDMI) to connect the source device to the video input port on the unit.
3. Apply power to the unit.
4. Turn on the display (monitor, projector, or TV) and then power on the source device(s).
5. If necessary, apply EDID Copy process (see EDID Setting section).
NOTE: When each video source is powered on, make sure it has a display pointing to it for EDID communication. If a source does
not have a display pointing to it, a video image might not display.
If no screen displays, follow these steps:
1. Make sure the device cables are correctly and firmly attached.
2. Set your display device’s input source as HDMI.
3. Check the PC BIOS configuration for the video output settings.
4. Connect your video source to the display DIRECTLY to check if the video signal gets through.
5. Apply EDID Copy to your display (see EDID Setting section).
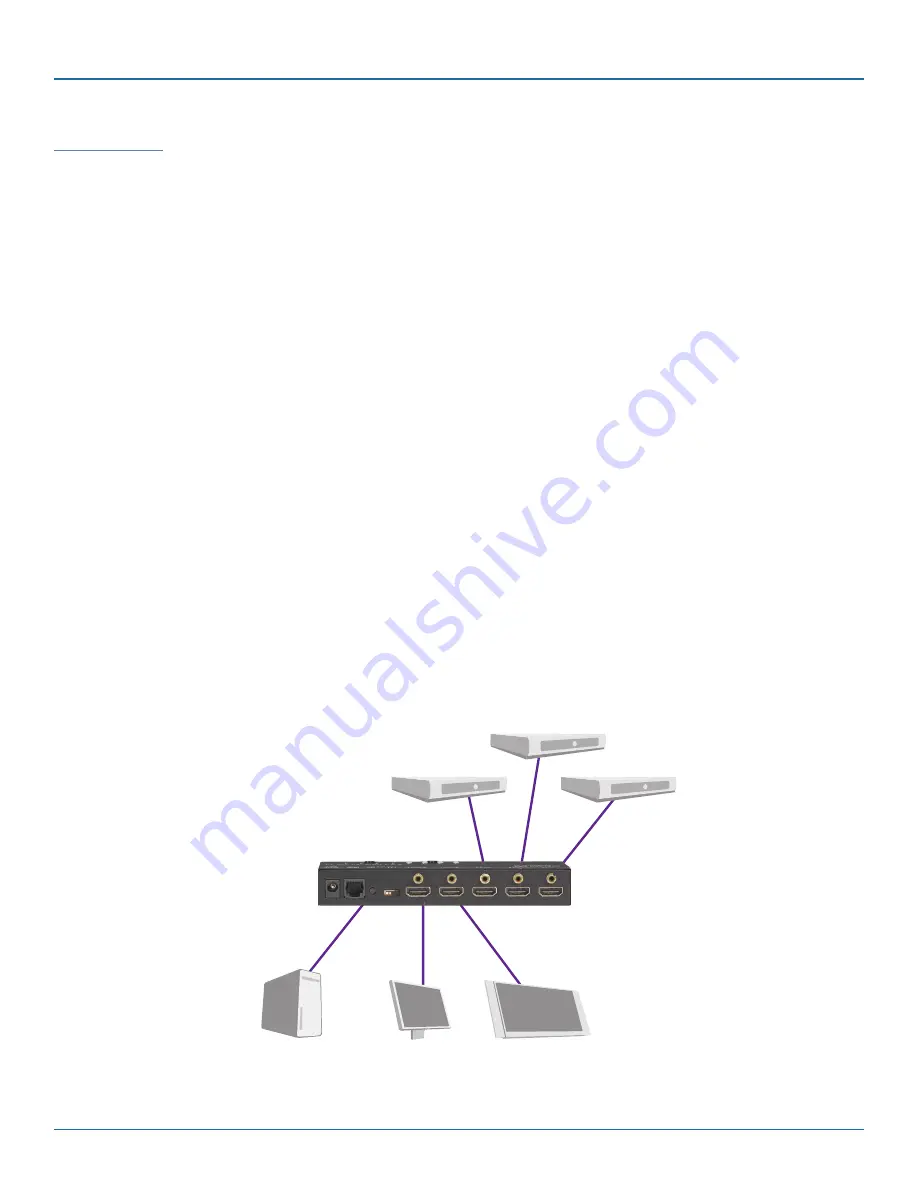
3.2 Connection Pattern
Diagram Format
Rule Size: 1 pt
DVI
Audio
USB
CATx
Fiber
HDMI
HDMI source 3
HDMI display
Serial control
HDMI display
Figure 3-1. Connection pattern.
HDMI source 1
HDMI source 2
Содержание VSW-HDMI2X2-4K
Страница 29: ...724 746 5500 blackbox com Page 29 NOTES...
Страница 30: ...724 746 5500 blackbox com Page 30 NOTES...
Страница 31: ...724 746 5500 blackbox com Page 31 NOTES...


