background image

ENGLISH   • 17

FEATURES (Fig. A)

1.  Main Body

2.  On/Off Trigger

3.  Flow Control Knob

4.  Battery Cap

5.  Battery Cap Release Tabs

6.  Paint Applicator*

7.  Paint Applicator Release Tabs

8.  Paint Tube*

9. Plunger*

10.  Plunger Drive

11.  Fill Sleeve

12.  Fill Sleeve Locking Tabs

13.  Fill Sleeve Paint Can Clips

*Applicator head, Paint tube, Plunger are made of Acetyl, ABS, 

Polypropylene and Poly Ethylene. Please ensure your local recycling 

agencies can recycle these materials together. Parts must be washed 
before being recycled.

SPECIFIC SAFETY RULES


f

Do not use this paint edger for purposes other than  


described in this manual. Failure to do so may result in  


injury to persons and or property damage.  


f

Keep hands out of the plunger drive area of the  


paint edger. Fingers can be pinched between the  


plunger drive and the plunger.


f

Use only with water soluble based paints. Not for use  


with oil based paints and stains (refer to label on original  


paint container). Do not use with paint removers, solvents, or  


the like. Liquids other than paint may damage product and  


result in injury to persons or property damage.


f

Always read and follow the label on the original paint  


container and follow all directions. Failure to do so may  


result in injury to persons or property damage.


f

Always use proper eye protection and other safety  


equipment for skin and respiratory protection when  


mixing the paint, and when filling, using, and cleaning  


the product. Paint and its fumes can cause personal injury.


f

To reduce the risk of injury, always work in a  


properly ventilated area and wear appropriate  


respiratory protection if necessary. Fumes from  


some paints can be noxious.


f

Thoroughly clean and rinse product after using with  


a particular paint. Mixing different paints in the product  


may cause personal injury and or result in property damage.


f

To reduce the risk of injury, use only recommended  

 accessories.


f

When servicing, use only identical replacement  

 parts. Failure to do so may result in personal injury. 

ASSEMBLY

BATTERY INSTALLATION

 Warning!  Batteries can explode, or leak, and can 

cause injury or fire. 

To reduce this risk:


f

Carefully follow all instructions and warnings on the  


battery label and package. 


f

Always insert batteries correctly with regard to polarity  


(+ and -), marked on the battery and the equipment. 


f

Do not short battery terminals. 


f

Do not charge batteries. 


f

Do not mix old and new batteries. Replace all of them  


at the same time with new batteries of the same brand  


and type. 


f

Remove dead batteries immediately and dispose of  


per local codes. 


f

Do not dispose of batteries in fire. 


f

Keep batteries out of reach of children. 


f

Remove batteries if the device will not be used for  


several months.


“Transporting batteries can possibly cause fires if  


the battery terminals inadvertently come in contact with  


conductive materials such as keys, coins, hand tools and  


the like. The US Department of Transportation  


Hazardous Material Regulations (HMR) actually prohibit  


transporting batteries in commerce or on airplanes (i.e.  


packed in suitcases and carryon luggage) UNLESS  


they are properly protected from short circuits. So when  


transporting individual batteries, make sure that the  


battery terminals are protected and well insulated from  


materials that could contact them and cause a short  

 circuit”.


f

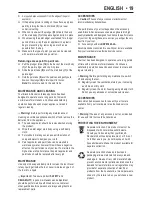
Remove the battery cap (4) by pressing in the battery  


release tabs (5) and then sliding the battery cap (4) off  


the handle.


f

Insert 3 fresh 1.5 volt AA batteries into the handle as  


shown in


Figure B.


f

Refit the battery cap (4) by sliding it back on to the  


handle until it is firmly seated.

 Note: Always place batteries correctly according to  


the polarity (+ and -) as marked on the battery and the  

 tool.

Installing the paint applicator (Fig. C)


f

Press in the paint applicator release tabs (7).


f

Slide the paint applicator (6) into the front of the main  

 body 

(1) of the paint edger until it is firmly seated.


f

Release the tabs.

 Note: The paint applicator (6) can not be fitted with  


the paint tube in place.

Removing the paint applicator


f

Press in the paint applicator release tabs (7).


f

Slide the paint applicator out of the main body (1) of  


the paint edger.

Содержание EasyEdge BDPE200-AR

Страница 1: ...S INSTRUCTION MANUAL Cat N BDPE200 LA BDPE200 AR ADVERTENCIA LEASE ESTE INSTRUCTIVO ANTES DE USAR EL PRODUCTO ADVERTÊNCIA LEIA ESTAS INSTRUÇÕES ANTES DE USAR O PRODUTO WARNING READ INSTRUCTION MANUAL BEFORE USING PRODUCT Español 4 Português 10 English 16 ...

Страница 2: ...D A 1 6 12 11 13 7 3 2 5 4 10 8 9 FIG A 4 9 8 11 FIG B FIG C FIG D FIG E 1 6 7 3 6 7 2 10 5 13 12 10 1 8 ...

Страница 3: ...90o 90o FIG F FIG J FIG G FIG K FIG H FIG L FIG I FIG M 3 2 11 11 9 11 ...

Страница 4: ... caso de manipulación de sustancias químicas como por ejemplo guantes adecuados y un respirador o máscara La utilización de un equipo de seguridad adecuado en cada caso reduce el riesgo de sufrir daños personales b No aplique pintura sobre sí mismo ni sobre ninguna persona o animal En caso de inyección cutánea busque atención médica inmediatamente c No trate un caso de inyección como si fuese un s...

Страница 5: ...ene utilice y limpie el producto La pintura y sus vapores pueden provocar lesiones personales f f Para reducir el riesgo de lesiones siempre trabaje en un área bien ventilada y use protección adecuada para las vías respiratorias si es necesario Los vapores de algunas pinturas pueden ser nocivos f f Limpie y enjuague minuciosamente el producto después de utilizar una determinada pintura La mezcla d...

Страница 6: ...re del tubo para pintura hacia atrás y levántelo para sacarlo del cuerpo principal de la bordeadora de pintura INSTRUCCIONES DE FUNCIONAMIENTO Llenado con pintura Fig F G y H Precaución No utilice la unidad si el cabezal del aplicador no está firmemente instalado Nota Utilice paños atrapagotas para proteger los pisos y cualquier otra cosa en la habitación que no desee salpicar accidentalmente con ...

Страница 7: ...pintura de los bordes del aplicador de pintura f f Si el aplicador de pintura está resbalando sobre la superficie aplique menos pintura girando la perilla de controldeflujo 3 aunaconfiguraciónnuméricamásbaja f f Cuando no esté en uso tire del accionamiento del émbolo 10 hacia la parte posterior del cuerpo principal 1 de la bordeadora de pintura y sujétela en su lugar f f Cuando deje la bordeadora ...

Страница 8: ...Decker o éste ha dejado de tener utilidad para usted no lo deseche con la basura doméstica normal Asegúrese de que este producto se deseche por separado La separación de desechos de productos usados y embalajes permite que los materiales puedan reciclarse y reutilizarse La reutilización de materiales reciclados ayuda a evitar la contaminación medioambiental y reduce la demanda de materias primas L...

Страница 9: ...ionamiento del émbolo El accionamiento del émbolo no se desplaza hacia adelante Asegúrese de que el accionamiento del émbolo se haya soltado del cuerpo principal PROBLEMA LA PINTURA SALE MUY RÁPIDAMENTE QUÉ SUCEDE QUÉ HACER Perilla de control de flujo configurada demasiado alto Reduzca la configuración de la perilla de control de flujo PROBLEMA LA PINTURA SALE MUY LENTAMENTE QUÉ SUCEDE QUÉ HACER P...

Страница 10: ...stituir quaisquer peças que não as especificadas neste manual Segurança pessoal a Ao manusear químicos deve ser utilizado equipamento adicional de segurança pessoal como luvas apropriadas e um respirador ou máscara A utilização de equipamento de segurança adequado ajuda a reduzir o risco de ferimentos b Não pinte na sua direcção de outra pessoa ou de animais Em caso de penetração na pele contacte ...

Страница 11: ...imentos pessoais f f Para reduzir o risco de ferimentos sempre trabalhe em uma área adequadamente ventilada e use proteção respiratória adequada se necessário Vapores de algumas tintas podem ser nocivos f f Limpe e enxágue completamente o produto após usar com uma tinta específica Misturar tintas diferentes no produto pode causar ferimentos pessoais ou resultar em danos materiais f f Para reduzir ...

Страница 12: ...a fora do corpo principal do acessório de pintura rápida de extremidades UTILIZAÇÃO Abastecimento com tinta Fig F G e H Cuidado Não use a unidade sem o aplicador de tinta fixado com firmeza Nota use panos para proteger o piso ou objetos no ambiente que você não deseja que sejam respingados acidentalmente com tinta Nota a película que se forma na parte superior da tinta pode obstruir o acessório de...

Страница 13: ...bilitar uma visão clara da borda que está sendo pintada f f Sempre use movimentos uniformes f f Conforme necessário limpe o excesso de tinta das bordas do aplicador de tinta f f Se o aplicador de tinta estiver deslizando na superfície aplique menos tinta girando o botão de controle de fluxo 3 para um ajuste numérico menor f f Quando não estiver em uso puxe o acionamento do êmbolo 10 para a parte t...

Страница 14: ...o normal Disponibilize este produto para coleta seletiva A coleta seletiva de produtos e embalagens usadas permite que os materiais sejam reciclados e utilizados novamente A reutilização de materiais reciclados ajuda a prevenir poluição ambiental e reduz a demanda de matéria prima Regulamentos locais podem prever a coleta seletiva de produtos elétricos em lixeiras municipais ou pelo vendedor ao co...

Страница 15: ...ponta do acionamento do êmbolo Acionamento do êmbolo não empurrado para frente Certifique se de que o acionamento do êmbolo seja destravado do corpo principal PROBLEMA A TINTA SAI MUITO RAPIDAMENTE O QUE ESTÁ ERRADO O QUE FAZER Botão de controle de fluxo com ajuste muito alto Reduza o ajuste do botão de controle de fluxo PROBLEMA A TINTA SAI MUITO LENTAMENTE O QUE ESTÁ ERRADO O QUE FAZER Botão de ...

Страница 16: ...used when handling chemicals Safety equipment used for appropriate conditions will reduce personal injuries b Do not paint yourself any person or animal In case of skin injection seek medical attention immediately c Do not treat injection as a simple cut Toxins from paint may enter the body and cause serious bodily injury In the event that injection occurs seek medical attention immediately d Bewa...

Страница 17: ...rsonal injury ASSEMBLY BATTERY INSTALLATION Warning Batteries can explode or leak and can cause injury or fire To reduce this risk f f Carefully follow all instructions and warnings on the battery label and package f f Always insert batteries correctly with regard to polarity and marked on the battery and the equipment f f Do not short battery terminals f f Do not charge batteries f f Do not mix o...

Страница 18: ...aint can with its built in clips 13 as shown in Figure H Painting with the Paint Edger Fig I J K and L f f Install the paint applicator 6 f f Set the flow control knob 3 to the minimum flow setting of 1 as shown in Figure I f f Fill the paint tube 8 with paint f f Install the paint tube 8 in the main body 1 f f Pull the trigger 2 Paint will start to flow slowly into the paint applicator as shown i...

Страница 19: ...ever immerse any part of the tool into a liquid Important To assure product SAFETY and RELIABILITY repairs maintenance and adjustment should be performed by authorized service centers or other qualified service personnel always using identical replacement parts ACCESSORIES Caution The use of any accessory or attachment not recommended may be hazardous The performance of your tool depends on the ac...

Страница 20: ...w Increase setting on flow control knob TROUBLE PAINT APPLICATOR LEAVES BEADS OF PAINT ON EACH END WHAT S WRONG WHAT TO DO Flow control knob set too high Decrease setting on flow control knob Moving the edger too slowly Use a paint brush to smooth out the paint beads Solamente para propósito de Argentina Importado por Black Decker Argentina S A Pacheco Trade Center Colectora Este de Ruta Panameric...

Отзывы: