28
The mounting opening of the control unit points to the front. The control box is
mounted movably at the top and can be swiveled forward if required. To do
this, loosen the (lower fastening screws of the motor control box) on the right
and left using a three-way Allen key (not included in the scope of delivery).
For the Ultra VA / 800, the electrical connection must be made in accordance
with installation instructions 47-21-0.
For the Ultra 500.i / Ultra 800i, the electrical connection must be made in ac-
cordance with installation instructions 47-21-i.
19.3.
Test run with motor control 47-21-0
Push the gate manually to the "center" position and lock the gate (using the
emergency release).
Press the pulse button on the motor control board and let the gate run by me-
ans of the drive. Check the end positions. You can adjust the end positions by
moving the permanent magnets.
In the first two test runs of the gate, the running time and the power require-
ment are automatically stored. The running time determines the smooth run-
ning of the gate, the force requirement determines the amp stop.
Mounting
29
19.4.
Test run with motor control 47-21-i
With the motor control 47-21-i, the teach-in travels are performed in the menu
and the end positions are corrected with the + and - keys. Please refer to the
installation instructions for motor control unit 47-21-i under "Teach-in travels".
2200..
N
Nootteess oonn eem
meerrggeennccyy uunnlloocckkiinngg
In order to be able to move the gate manually again in the event of a power
failure, the Ultra VA / 800 / 800i is equipped with a smooth-running emergency
release.
Proceed as follows:
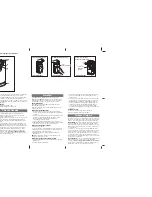
Lift off the hood. The red unlocking lever is located next to the control housing.
To unlock, push the lever to the left, press it down and lock it to the right. To
lock, proceed in reserve.
WARNING
The gate must have a mechanical end stop!
If the gate does
not have mechanical end stops, it can be pushed out of the
guide in the emergency unlocked state.
SAFETY INSTRUCTIONS FOR HAZARD AVOIDANCE
Make sure that the door has a mechanical end stop before moving the
emergency unlocked door.
Содержание Ultra 500i
Страница 4: ...4 24 Gewährleistungsbedingungen 33 ...
Страница 34: ...34 TYP Ultra VA 500i 800 800i Serien Nr Kaufdatum Händlerstempel und Unterschrift ...
Страница 38: ...4 23 Declaration for the installation of an incomplete machine 32 24 Warranty conditions 33 ...
Страница 68: ...34 TYPE Ultra VA 500i 800 800i Serial no Date of purchase Dealer stamp and signature ...
Страница 102: ...34 TYPE Ultra VA 500i 800 800i Numéro de série Date d achat Cachet et signature du concessionnaire ...
Страница 136: ...34 TIPO Ultra VA 500i 800 800i Número de serie Fecha de compra Sello y firma del distribuidor ...
Страница 137: ...E S P A Ñ O L ...
Страница 138: ......
Страница 139: ...E S P A Ñ O L ...
Страница 140: ......
Страница 141: ...E S P A Ñ O L ...
Страница 142: ......
Страница 143: ...E S P A Ñ O L ...
Страница 144: ......


