10 NARROW ROLLED EDGING
The narrow rolled edge setting is used to achieve the narrowest (1.5 mm) stitch possible on your Baby Lock
serger. It is used for seaming sheer and light weight fabrics, as well as edging and hemming all but heaviest
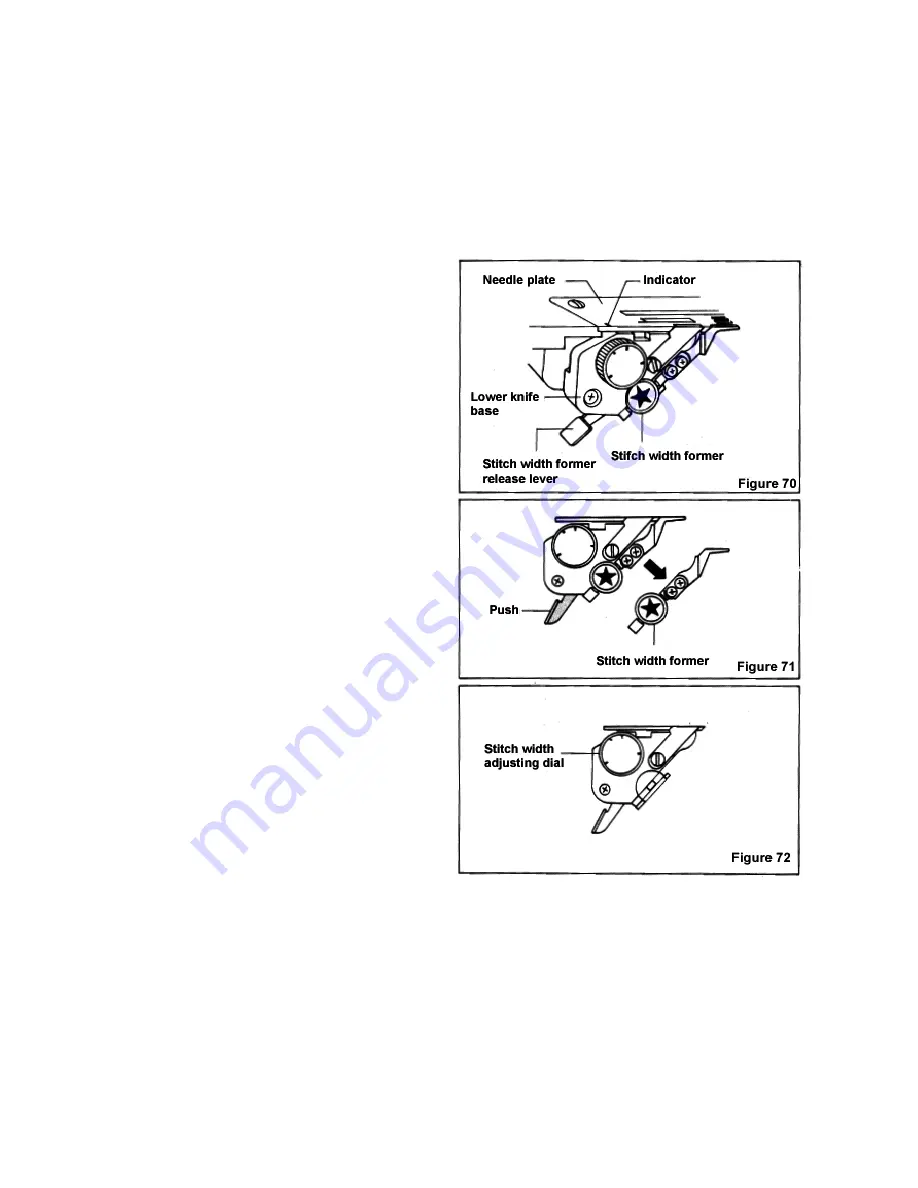
fabrics. This narrow edge is accomplished by removing the “Stitch Width Former” from the lower knife base.
Stitches are then formed on the one tiny remaining stitch finger.
10 – 1 To adjust the needle plate for narrow
rolled edging
1. Remove the left needle and corresponding
thread.
2. Open both the front and side covers.
3. Raise the presser foot and the upper knife to
the highest position.
4. Clear the stitch fingers.
5. Push the stitch width former release lever and
remove the stitch width former from the lower
knife base. (Figure 71). Place the stitch width
former in the side door accessories
compartment.
6. Turn the stitch width adjusting dial (red dial)
until the marked “M” on the dial matches the
red indicator on the needle plate. (Figure 72).
7. Set the stitch length to “M”.
8. Lower the presser foot and the upper knife.
Setting the machine in the above manner will provide a narrow edge, but not a rolled edge. It creates an
attractive edge or seam for many fabrics, and is especially, suitable for edging firm fabrics.
Narrow rolled edging can be accomplished with either the three – thread or two – thread mode of operation,
and its appearance can be varied by tension adjustment and the use of specialty threads. You will usually let
the weight and characteristics of the fabric determine whether you use three or two – threads and how the
tensions should be set. See page 26 for instructions on “Narrow Rolled Edging”.
Retyped by mastersewusa.com
25


