


APPENDIX 7 EAZY NETWORKING
63
A8.1.2 EagleEyes Setup
Two options can be chosen for EaZy Networking:
EaZy
and
QR Code
.
EaZy
is used for both recorders and IP
cameras while
QR Code
is used only for recorders.
When a device is configured to the internet via
EaZy
, the person who configures the device has the administrator
permission of this device and also has the power to assign who can access the device remotely, by the web
browser of Internet Explorer or the mobile app of EagleEyes.
When a device is configured to the internet via
QR Code
, everyone has the right to access the device as long as
he/she is able to scan the QR code of the device. However, he/she can only access the device via the mobile app
of EagleEyes. Internet Explorer is not supported.
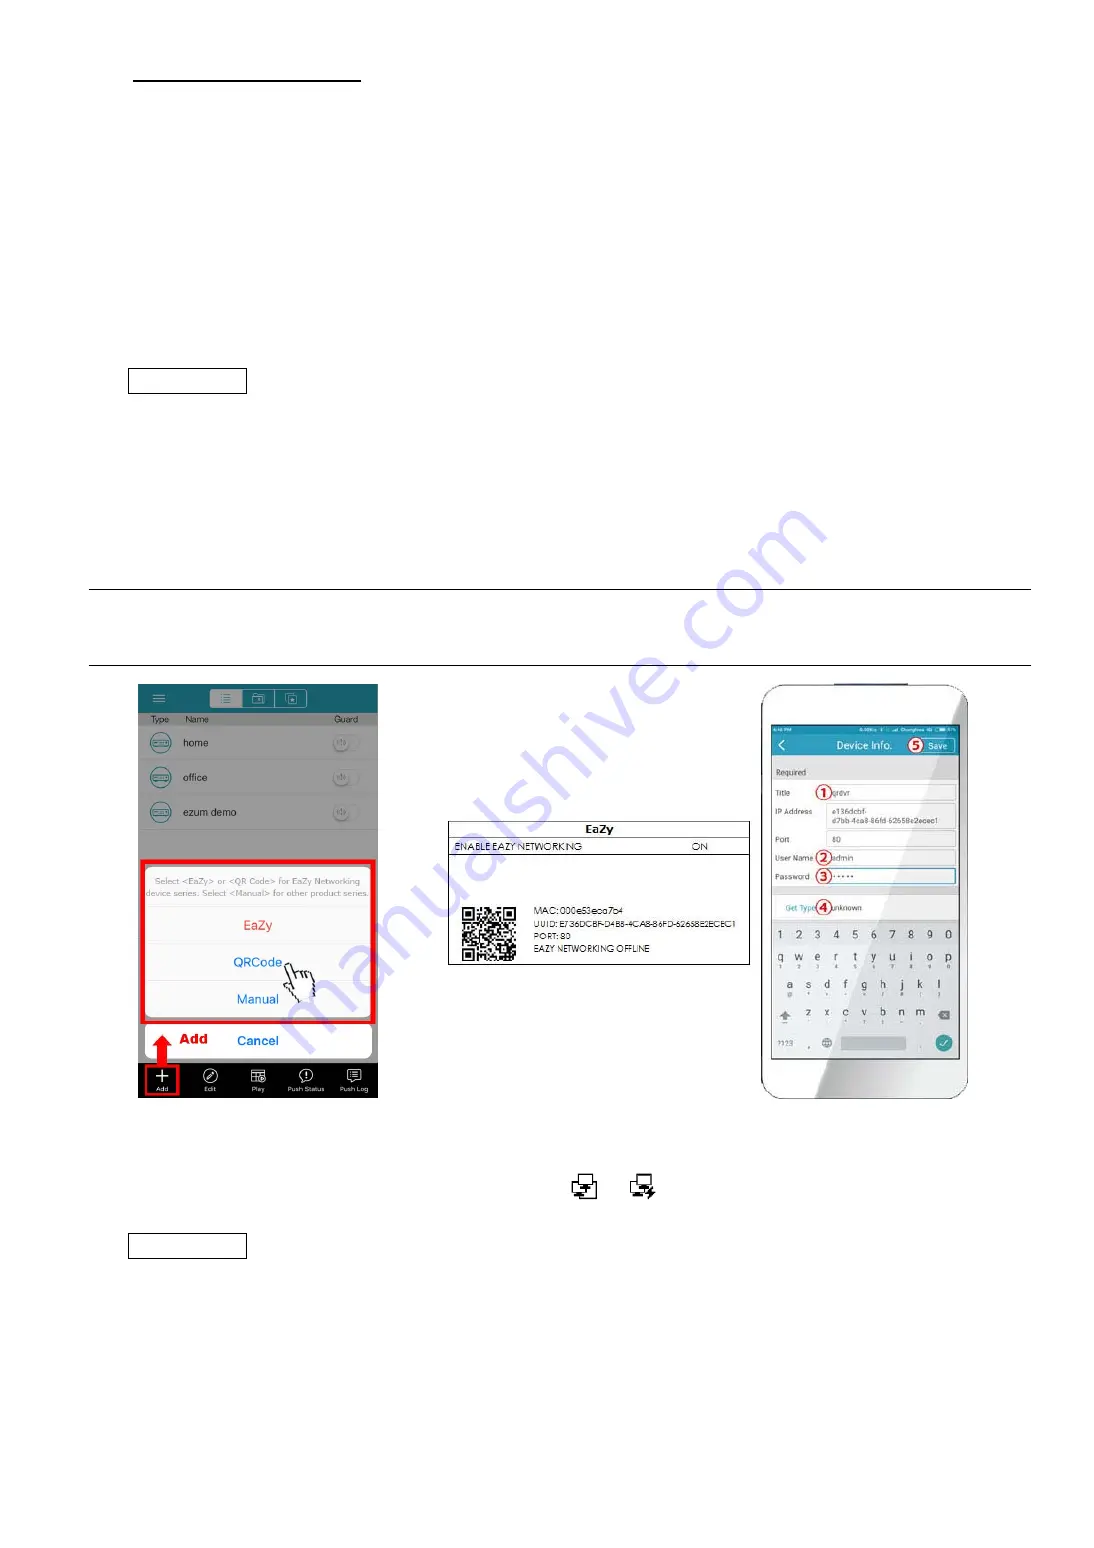
By QR Code
Step1: Open EagleEyes on your mobile device, and select
Add
on the bottom. Then, click
QR Code
.
Step2: Scan the QR code shown on your recorder, and enter the title of this device and its user name and
password.
Step3: Make sure you see the device type when you tap
Get Type
. If not, the device is not connected properly.
Then, Tap
Apply
to complete the process and you’re ready to see the live view.
Note:
For the first time to connect your device to the internet, the default user name and password are
both
admin
. If it’s been configured before, make sure you’ve known its current user name and
password since they may be changed for security purpose.
Step1: Go to
MENU
NETWORK
WAN
. Set
NETWORK TYPE
to
DHCP
, and make sure the network
icon on the bottom right corner is changed from
to
.
By QR Code
Step1: Open EagleEyes on your mobile device, and select “
…
” on the top left corner in the address book. Then,
click
EaZy
.
Step2: Click
Login
and register an account for “Cloud Service”. If you’ve got an account, please just log in.


